View Order
Table of Contents Show
Processing a New Order
When a new order is placed, you will receive an email notification. To find the order management page, click on the ORDERS link in the top menu of your merchant admin area. You can also use the left menu to navigate to the Manage > Orders page. Orders will appear here with the newest ones at the top.
There are three statuses to help you determine processing.
Order Status - the order statuses show the overall state of processing. You can use custom order statuses to modify your fulfillment process.
Payment Status - the payment status shows if the order is paid, authorized, or unpaid.
Shipment Status - the shipment status shows if the order is shipped, unshipped, or non-shippable.
To view an order, click on the View Order button in the Action column.
View an Order
To find an order, click on "Orders" link from the top header in the merchant admin area.
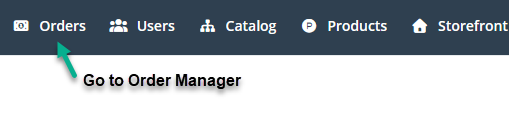
Find the order you would like to view. Click the linked order number or the View Order button from the Action column.

You will see the View Order / Summary page as shown in the example below:
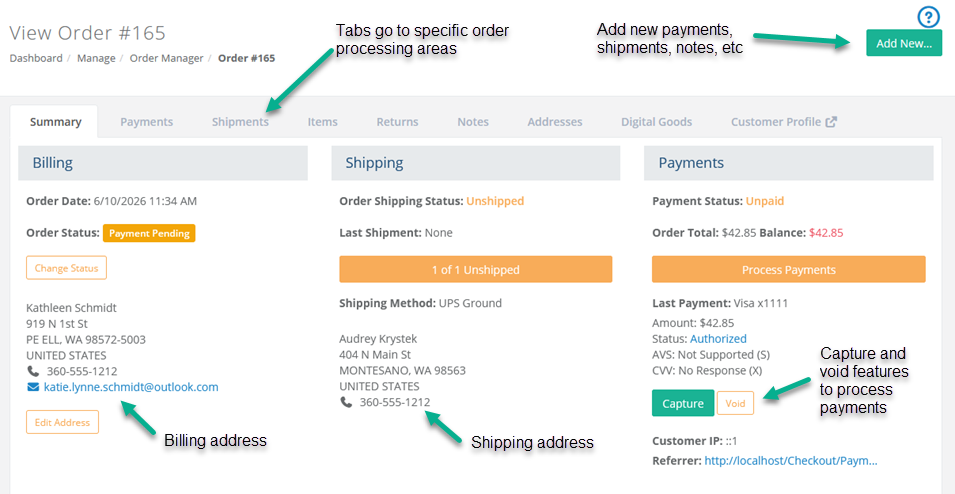
From the Summary tab, there are three sections summarized below:
Billing - displays the date and time the order was placed. The overall order status is shown which generally changes automatically depending on the processing steps for shipping and payments. You can change the status manually, but that is not recommended unless you need to cancel an order. The Billing Address is shown. This can be changed by clicking the Edit Address button. This will only change the order, not the user's profile.
Shipping - displays the shipping status, date of last shipment, shipping method and the shipping address. All information can be modified from the Shipments tab, but you can also process a shipment by clicking on the orange Unshipped button.
Payments - this section shows the payment status, order total and balance after payment(s). There is an orange button that will bring you to the payments page, or you can use the shortcut Capture button to directly process a credit card payment.
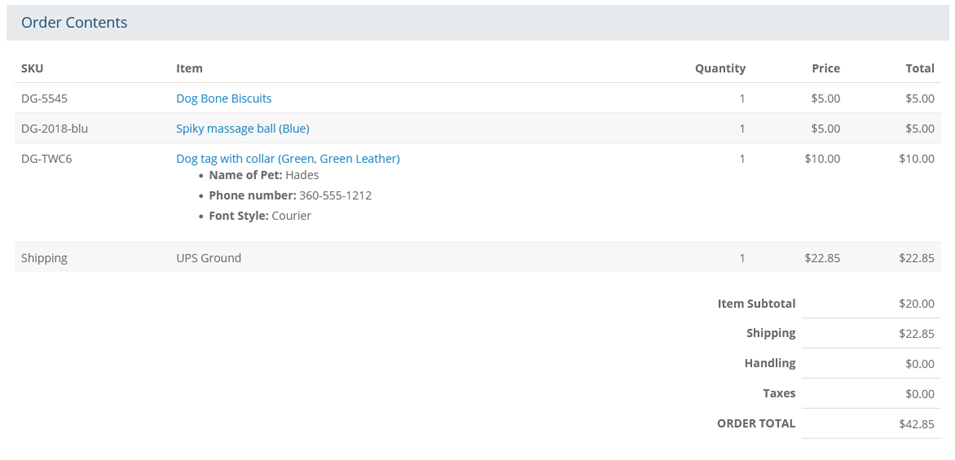
In the bottom section of the view order page, the Order Contents are shown along with shipping, tax, discounts, etc. This view will not show you multiple shipments, so be sure view the Shipments tab if you need to modify, merge, or split shipments.
In the admin footer, there are some additional functions.

Print Packing Slip - generates a printable packing slip for items for each shipment.
Print Pull Sheet - generates a printable pull sheet to find all the items that need to be included in the shipment.
Print Order Invoice - a printable invoice for your customer. They can also print their own invoice from the customer's Account pages.The Move Order feature can be used if you need to combine orders from two different user accounts. This is not common, but useful if your customer has accidently used two different accounts to order from.
Billing from Order Summary
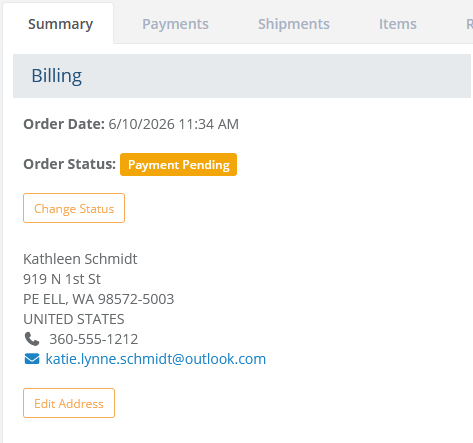
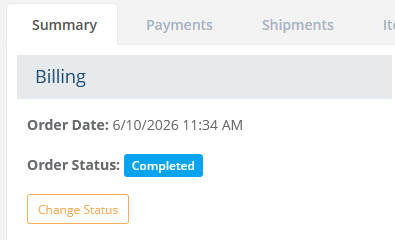
The billing section from the order summary view shows the order date and time and order status. The order date and time stamp cannot be changed. The order status changes automatically in most cases.
Edit Address
The customer's billing address is shown and can be edited by clicking the Edit Address button. A pop-up dialog appears where you can change the contact information for the order. You can modify the name, email, phone, and address. Any changes here will only affect the order you are editing. It will not change the user's profile.
Sending an Email
If you click on the linked email address, you will be able to send this user an email. This action will bring you to the Send Email page where you can select a template or simply enter a personal message and send. After previewing and sending the message, you will be returned to the order summary page.
Order Status
The order status will change during processing of the payment and fulfillment of the items. When you use the default order statuses, this will update automatically and there is no reason to manually change the status unless you are canceling the order. If you have a specific fulfillment process that requires multiple steps, then you can create custom order statuses and assign those to orders as needed.
Canceling an Order
To cancel an order, select the Change Status button and select "Cancelled". This will trigger a new pop-up dialog which gives you some additional options.
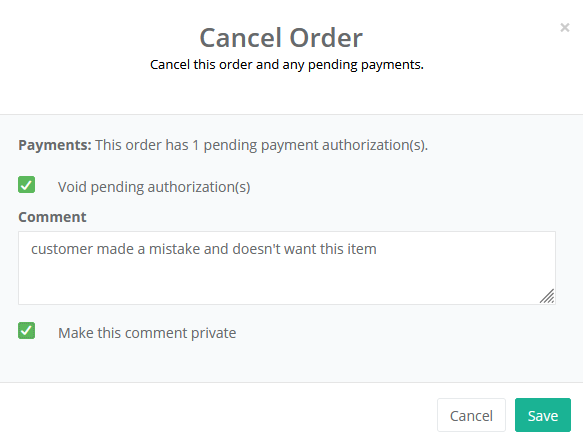
Any pending authorizations can be voided by checking the box.
You may enter a comment regarding the cancelation.
Make the comment private by checking the box.
When finished, click the Save button. The order will be cancelled and the status will be updated.
Payments from Order Summary
STEP 1) Typically, when an order is processed, the first step is to take the payment.
For authorized card payments, you will have the ability to capture directly from the Payments section. The Void option is also available, but if you need to view the payment details or perform different payment actions, click on the orange Process Payments button to go directly to the Payments tab.
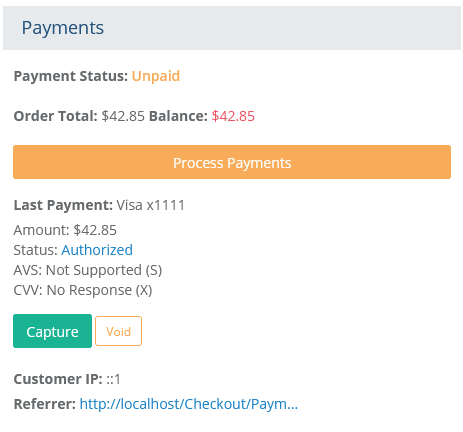
Other information show in this section includes the Customer IP address which can be blocked if fraudulent. The Referring URL is also shown.
Capturing a Payment
Click the green Capture button.
This will open a pop-up dialog which shows the capture amount field, capture options (if available), and a payment note.
Use the Capture Payment button.
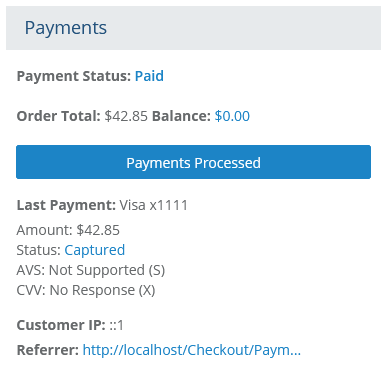
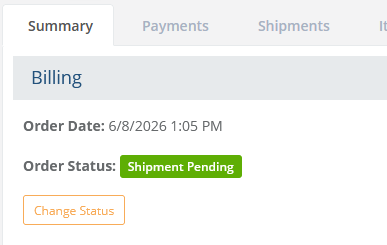
Return to the Order Summary page. Note the Order status is changed and the payment status now shows paid.
Order status updates automatically to Shipment Pending:
Shipments from Order Summary
STEP 2) After payment, the shipment is processed.
The shipping section from the order summary view shows the order's shipping status. As soon as the shipment is shipped, the status here updates automatically.
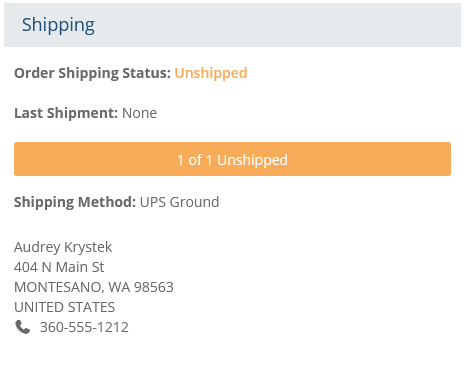
The customer's shipping information is shown in this section. It will also show the shipping method selected by the customers. This can be changed from the Shipments tab, but not from the summary page.
Shipping an Order
Orders can have multiple shipments or a single shipment. You can initiate the shipping process from the order summary page or from the Shipments tab.
Click the orange 1 of 1 Unshipped button.
This will take you to the Shipments tab.
Use the Ship Items button.
If needed enter the tracking number and click Ship.
Return to the Order Summary page. Note the Order status is changed and the shipment date and time are posted.
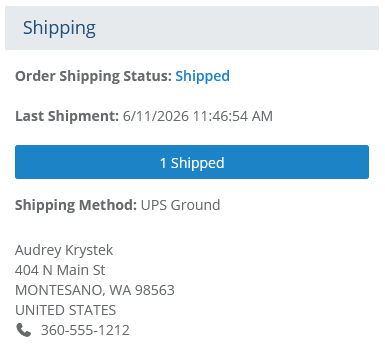
Order status updates automatically to Completed:
Additional Resources
NOTE: The steps above are common for most merchants, but you can create your own fulfillment process using Custom Order Statuses.
For complete details on all order fulfillment processes, please refer to any of the following pages:
Order Shipments - ship, edit, split, merge, and recalculate shipping charges
Order Payments - capture, void, refund, edit, delete, or manually add new payments
Edit Order Items - add or remove products, recalculate tax and shipping, or add other credits, discounts, etc.
Return Items - return items and adjust inventory
Order Notes - view system notes and private/public notes
Subscriptions - edit subscription details such as expiration and renewals, cancel and deactivate
Gift Certificates - view or edit gift certificate details, such as the balance, serial number, and expiration
Digital Goods - view, add, or delete digital goods; activate and deactivate downloads
New Orders - placing an order on behalf of the customer
Manage Order - search and management of orders including many batch options for payment, shipment, etc.
Configure Order Statuses - to add new statuses or change how statuses updated, send email, and customize colors.