Order Shipments
Table of Contents Show
Shippable Items
Any shippable product that is purchased will be part of a shipment for the order. A new order can have multiple shipments when either of the following conditions apply:
The customer has chosen to ship to multiple destinations. (A new shipment will be created for each destination)
The products purchased are from different warehouses. (A new shipment will be created for each warehouse)
The product's shipping settings determine how shipments will be created, what shipping methods will be available, and the costs of the shipping. Let's first look at the shipping settings available and how each will impact the order.
Product Shipping Options
Navigate to any product editing page and expand the section Shipping and Tax. The Shipping setting must be set to "Product is shippable" or it will be considered a digital good.
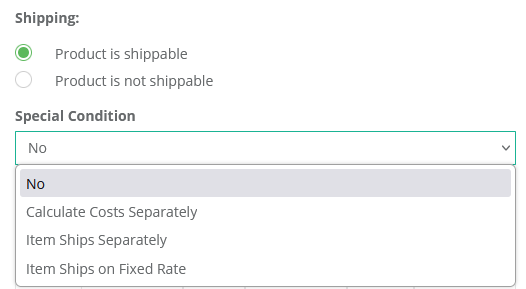
When a product is shippable, there are Special Conditions which may apply. The default setting is "No" which means the item ships in a standard way. In other words, the item does not require special handling when shipments are calculated or created.
Calculate Costs Separately - calculates rates separately, but does not create its own shipment.
Item Ships Separately - item will be in its own shipment with the cost calculated separately.
Item Ships on Fixed Rate - item will not be in it's own shipment, but the rate is determine by the amount entered by the merchant.
When an order has a shipment, you will be able to perform a number of changes like ship all or part of an order, add tracking numbers, print packing lists, or modify a shipment. This document covers the basic shipping feature.
You will also have the ability to generate a shipment through UPS, retrieve tracking numbers automatically, and print a shipping label.
Warehouses Create Shipments
The warehouse that a product is assigned to determines the address that the shipment will ship from. Typically, each warehouse address is unique and the information is sent to the shipping carrier to determine costs for shipping an item.
If an order contains products that are assigned to multiple warehouses, a separate shipment for each will be created. There are options to combine, edit, or split shipments which are documented below.
Processing a Shipment
An order may contain one or more shipments and be in a state where it is fully shipped, partially shipped, or unshipped. This information is available from the Shipments tab while viewing an order. All shipments will be itemized as Shipment #1 of X where X is the total number of shipments for the order. Each shipment will have its own destination and origin address, shipping status, items, method, shipping cost and tax, if applicable.
To view the details of all shipments, click on the Shipments tab from any order.
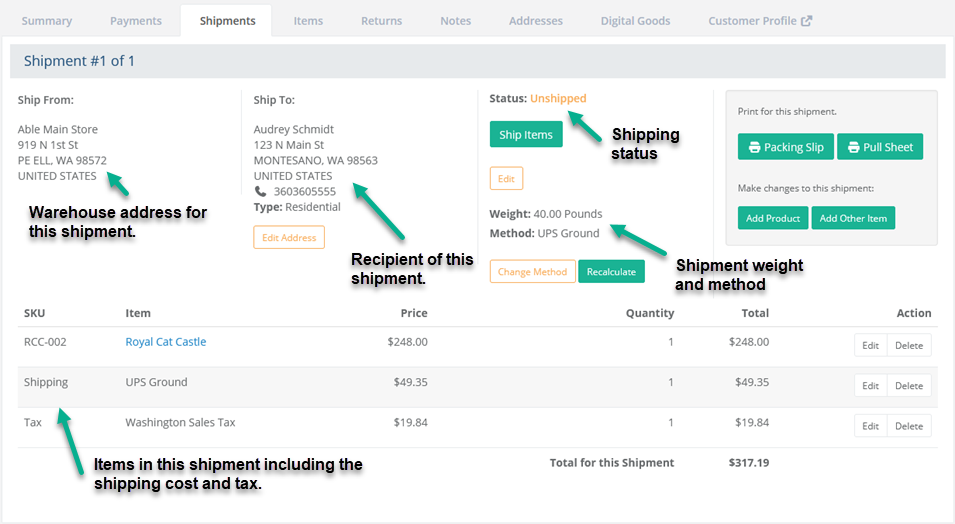
There are three possible shipping statuses:
Shipped - the shipment has shipped with a date and time automatically recorded. You can't unship, but there are actions available to void or delete a shipment which will put it back to an unshipped state.
Unshipped - the shipment is awaiting to be shipped. Using the carrier selected or changing to a different carrier, you can recalculate shipping or change the method.
Nonshippable - the order does not contain any shippable items. You can add a new shipment if needed, otherwise the Shippable tab will not be shown.
Shipping statuses should not be confused with order statuses which give an overall picture of the entire order. An order that has multiple shipments may be in a state of partially shipped until the entire order is fulfilled. Email notifications are automatically sent to the customer when any shipment in the order is shipped. If the order does contain multiple shipments, then an email notification for partial shipment is used.
Ship Items
A good place to start is to print the Pull Sheet and/or Packing Slip before beginning.
From the View Order page, click the Shipments tab in the top menu. There are two buttons available to print the Pull Sheet and Packing Slip.
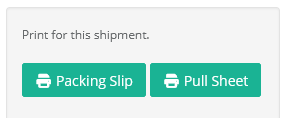
Packing Slip - print and include in the package to show only the items that are included in the shipment.
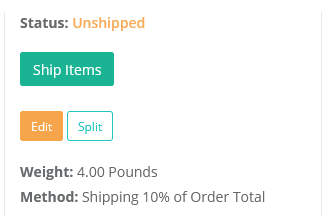
Pull Sheet - this is for internal use so an order admin can find the items that need to be pulled for the shipment.If there are no changes to the shipping carrier or costs, click the green Ship Items button.
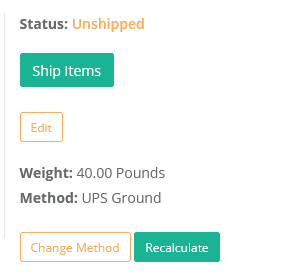
NOTE: The shipping provider will be shown as a default selection. You can change this if needed, but it should be done before shipping. The selection and tracking number will be used to generate a link to online tracking services in the shipment notification email.From the next page, you can enter the Tracking Number into the field provided. This is optional, but if used, it will be available to the customer so they can track the status of their order shipment(s).
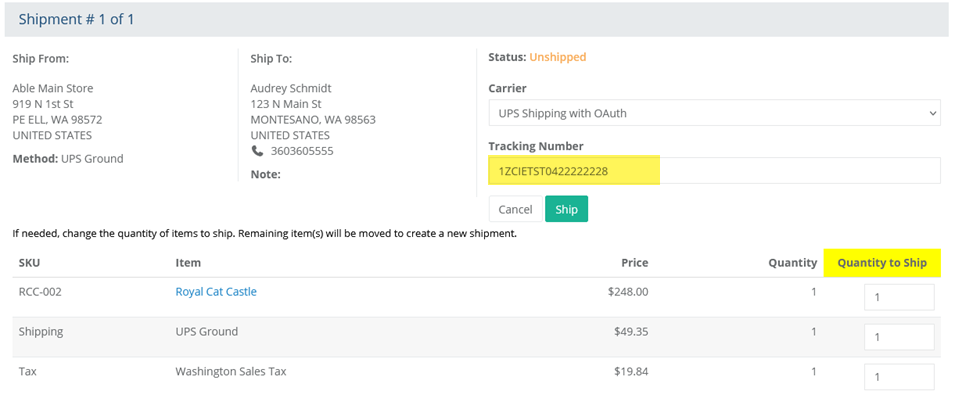
If you wish to only ship part of the shipment, then change the Quantity to the number being shipped. Remaining items will be placed into a new shipment.
Click the Ship button.
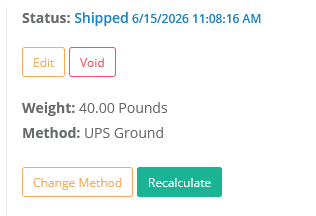
You will be returned to the Shipping page. The Status will change to Shipped with a date and time stamp.
UPS Print Label Feature
If you are using the Enable Labels feature activated through your UPS configuration, then you'll see additional options on the page. The UPS ship and label option will not be shown unless this feature is enabled. Click the Request Shipment button to automatically retrieve a tracking number from UPS.
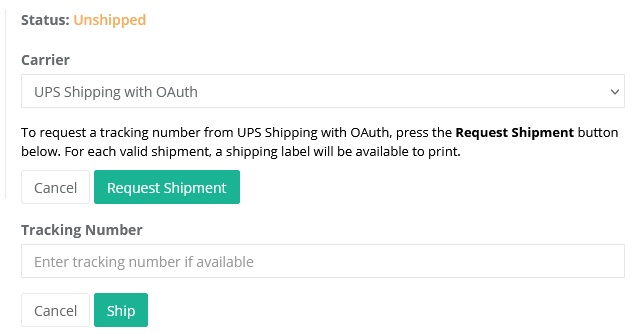
After the tracking number is retrieved, it will be automatically entered into AbleCommerce and you will be able to print the UPS shipping label.
Edit a Shipment
A shipment can be changed before or after it is marked shipped.
From the View Order page, click the Shipments tab in the top menu.
Click the orange Edit button for the shipment.
A pop-up dialog will be displayed with a form to edit.
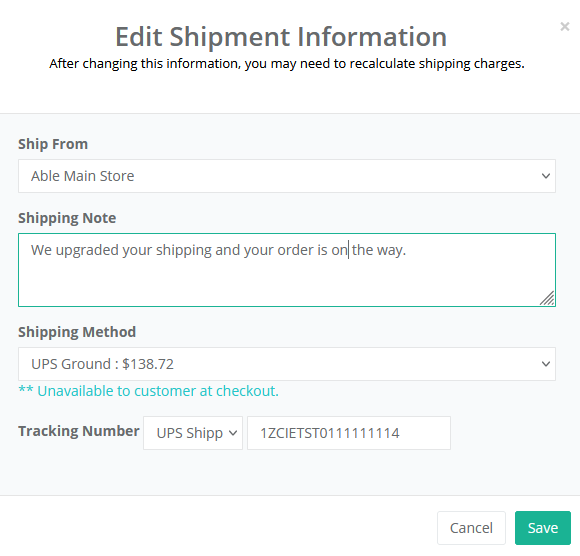
You may change the Ship From location, which is the assigned warehouse. A change here will generally require a recalculation on the shipping cost.
Add a Shipping Note which will be shown to the customer and displayed with the shipment details.
Change the Shipping Method if needed. Any shipping method that is not available to the customer will be shown.
You can select the carrier and enter a Tracking Number.
When finished, click the Save button to update.
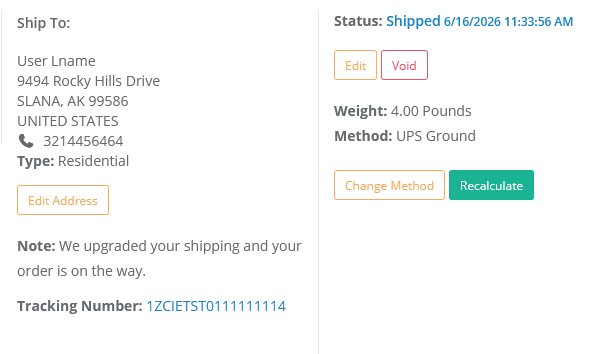
The new Shipment information will be reflected on the page.
Void a Shipment
For a shipment with a Shipped status, a void option is available.
From the View Order page, click the Shipments tab in the top menu.
Click the red Void button for the shipment.
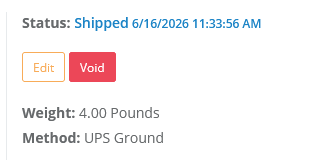
A confirmation page will be shown. Click OK to continue.
After the void, the shipment will be in an Unshipped status.
TIP: The only way to delete a shipment is by removing all items from the shipment.
NOTE: If you change the Quantity of items shipped from the Edit Shipment page, it will not create a new shipment. If you modify the items in a shipment, you may need to manually adjust any taxes, shipping charges, or payments already made.
Recalculate or Change Shipping
After any shipment adjustments, you can change the shipping method and recalculate the shipping costs.
Change Shipping Method
At any time you can change the shipping method for a shipment.
From the View Order page, click the Shipments tab in the top menu.
Click the orange Change Method button.
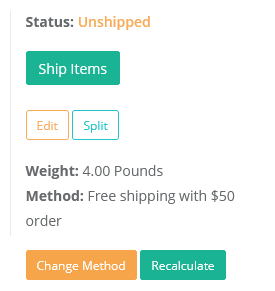
A pop-up dialog will appear with all available shipping methods. Note that any shipping method that would not be available to the customer at checkout will still be shown, but marked with a double asterisk. **
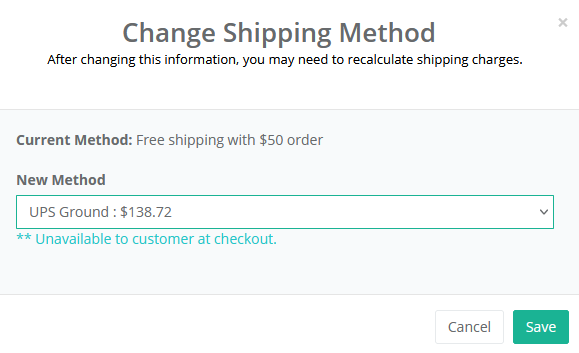
Select a New Method and click Save.
Recalculate Shipping and/or Tax
After making changes to the shipping method, address, warehouse, or any items, you can recalculate the shipping costs or taxes.
From the View Order page, click the Shipments tab in the top menu.
Click the green Recalculate button.
A pop-up dialog will appears.
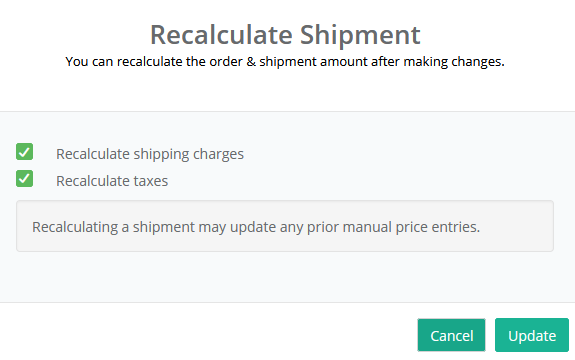
The defaults options are to recalculate both tax and shipping for the shipment. You can uncheck either box to remove it from the recalculation.
Click Update to recalculate.
Split or Merge Shipments
For some orders, you may need to modify how the shipments are create after the order is placed. AbleCommerce offers the features to do that.
In many cases, it's necessary to change how items are shipped and when. If you want to ship an item early, or some item is on back-order, you can split a shipment and move the item(s) to create another shipment. Merging of shipments allows you to combine or move an item(s) into other shipments.
Split a Shipment
The split button will only appear for shipments with a quantity 2 or more of any item and a status of unshipped.
From the View Order page, click the Shipments tab in the top menu.
Click the teal Split button for the shipment.
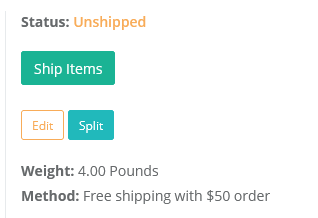
This will take you to the Split Shipment page where you will see the items included with shipment.
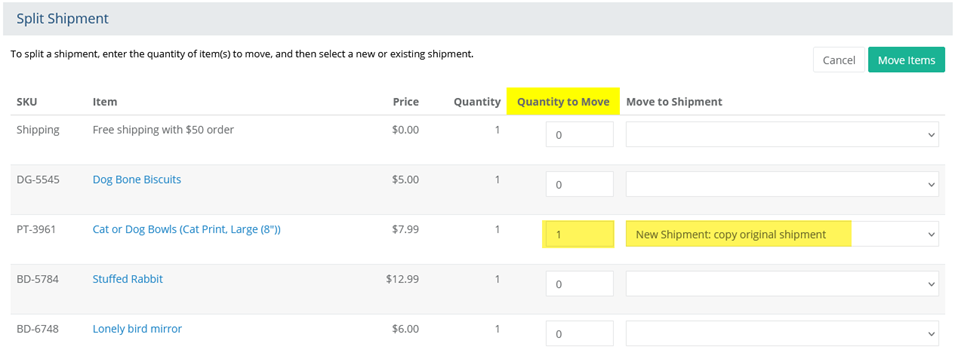
If you want to move a portion of the items in the shipment, then change the quantity of items in the Quantity to Move column.
The next column is Move to Shipment. This is where you select the shipment to move the item(s) to. You can choose to create a new shipment (copy of existing) or you can move them to an available existing shipment, when the order has more than one shipment available.
Click the Move Items button to continue.
A new shipment is created. Be sure to Recalculate the shipping and taxes, or modify the method if needed.
NOTE: You cannot move items to a shipment that is already marked as shipped.
Merge a Shipment
The merge button will only appear if there are two or more shipments that have not been marked as shipped.
From the View Order page, click the Shipments tab in the top menu.
Click the teal Merge button for the shipment.
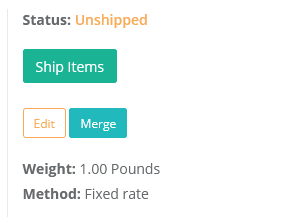
This will open up a pop-up dialgon where you can select the Merge Items to page another shipment.
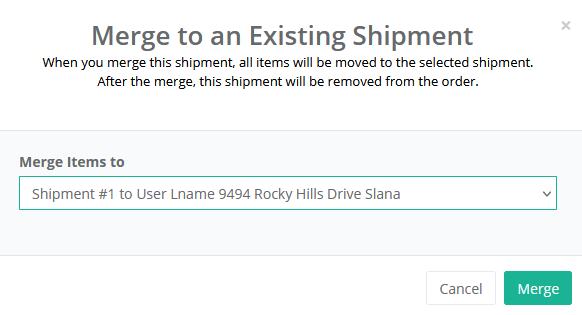
Select an existing shipment to Move these items to. All the items in this shipment will be moved to the shipment you select here.
Click the Merge button to continue.
The Shipments page will be updated. The empty shipment will be removed from the order.
Be sure to Recalculate the shipping and taxes, or modify the method if needed.
NOTE: You cannot merge items to a shipment that is already marked as shipped.
Add or Delete Shipments
In some cases, you may want to add or delete shipments from an order. A shipment cannot be removed until there are no items in it. To do that, you can delete items from a shipment, or merge them into a different shipment.
Add a Shipment
If you need to add a new shipping destination, then you should create a new shipment.
While viewing an order, click the Add New... button located at the top-right corner of the page.
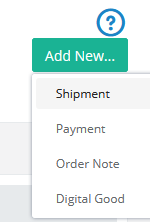
Choose the "Shipment" option. This will display the Add Shipment page.
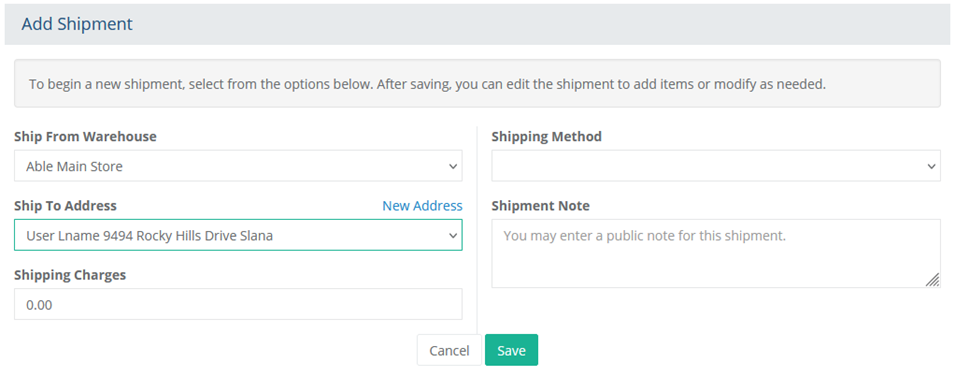
If the store has multiple warehouses, then select one from the Ship from Warehouse list.
Select an existing address if the user has multiple address book entries, or add a new one by clicking the "New Address" link. This is the Ship To Address.
Select a Shipping Method from the available options. You can select this later if needed.
Enter a Shipping Charge for the new shipment. You can add this later by editing the shipment.
You may enter a Shipment Note which will be shown to the customer as a public note.
When finished, click the Save button.
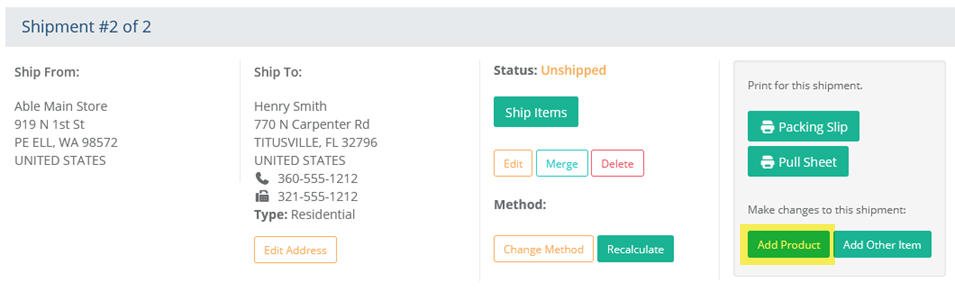
The Shipments page will be updated. The new shipment will be added to the order, but the shipment is empty.
Once this is done, you can use the Add Product button to add items to the new.
TIP: To add items to the new shipment, you can also use the MERGE feature or the SPLIT feature.
Delete a Shipment
The delete button will only appear for shipments without any items. You can remove items with the Delete button in the Action column.
From the View Order page, click the Shipments tab in the top menu.
Click the red Delete button for the shipment.
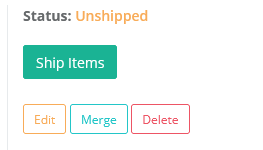
A warning prompt will appear for confirmation. If you want to delete the shipment, then click Delete.
Add a Product to a Shipment
From the View Order page, click the Shipments tab in the top menu.
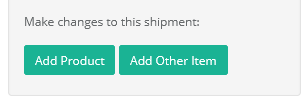
All shipments will be displayed, for the shipment you want to edit, click the Add Product button.
Click the Add Product button.
Using the search form, enter some criteria to find the product you want to add. You can search by Name, SKU, Category, Brand, or use the Advanced Search options.
Click the Search button to find your results.

Once you have found the product to add to the shipment, click the Add (+) icon.
From the next page, you can modify the price, quantity, and select which shipment to add the product to.
If the product has options, you can select those as well.
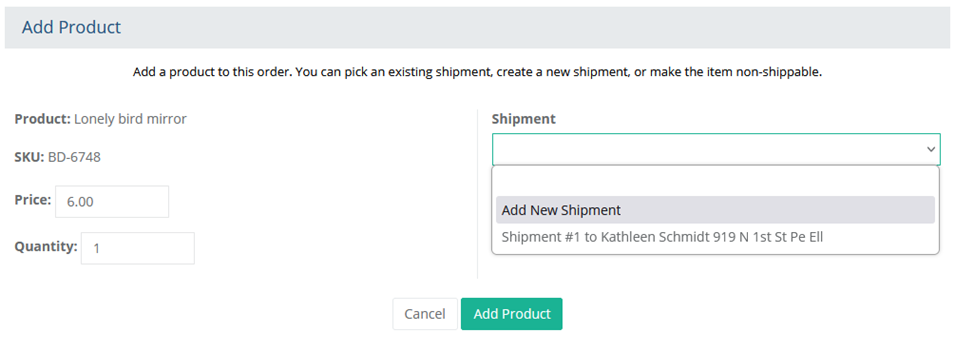
Make adjustments as needed, choose an existing shipment, or create a new shipment if needed.
(Optional) If creating a new Shipment, there will be options to select an existing shipping address (pulled from the user's address book), or you can create a new address by clicking the "New Address" link.
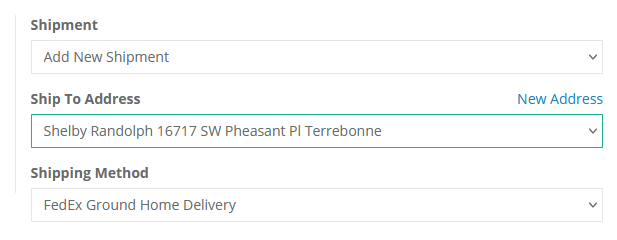
There will also be an option to select a Shipping Method.
When finished, click the Add Product button.
After the item is added, you can recalculate the shipping charges. Look for the green Recalculate button after modifying an order.
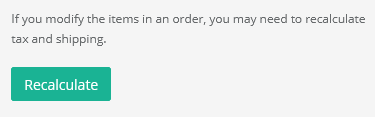
After recalculating shipping and/or taxes, the adjusted order balance will be reflected on the Order Summary page.
Add Other Item to a Shipment
From the View Order page, click the Shipments tab in the top menu.
All shipments will be displayed, for the shipment you want to edit, click the Add Other Item button.
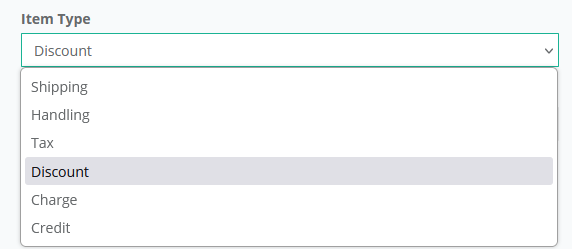
A popup dialog will appear as shown in the example:
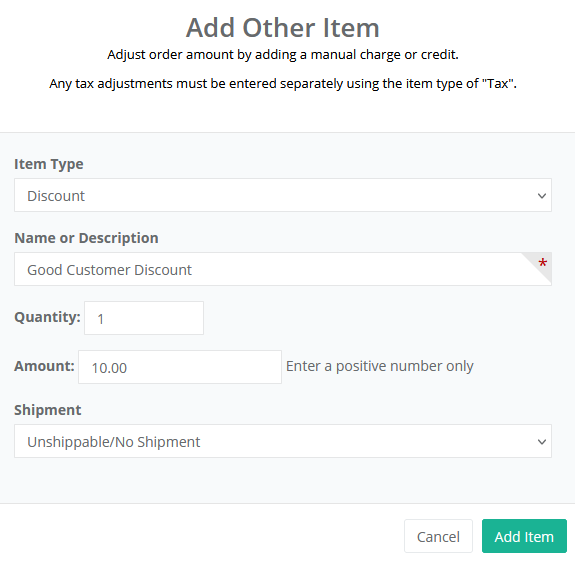
First, select the Item Type. This will determine if it's a credit or debit to the order.
Item Type - Select one of the item options available. (Shipping, Handling, Tax, Discount, Charge, or Credit)
This setting is used to determine how the order is modified and which reports are updated.
Then use the remaining fields to enter a Name or Description, Quantity, and Amount which will always be a positive value.
If the item is specific to shipment, you can select the shipment, otherwise, use the default "Unshippable/No shipment" option.
When finished click the Add Item button.
The adjusted order balance will be reflected on the Order Summary page.
Packing Slip
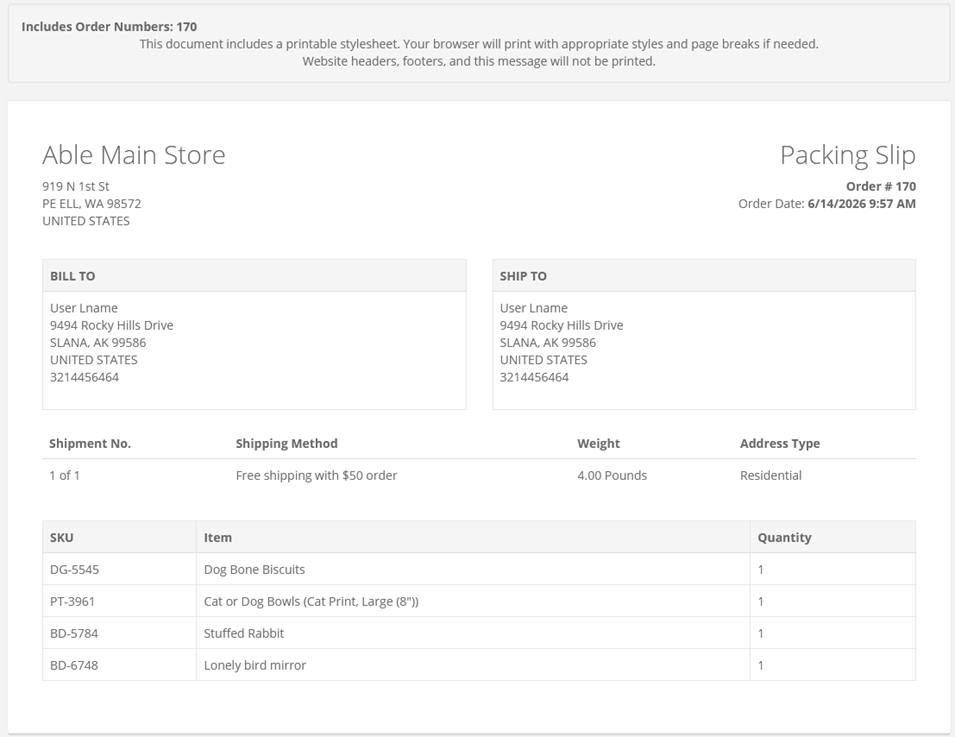
When you create shipments you can print a packing list to include in the package.
Print a Packing Slip
The packing list button will appear for all shipments.
From the Shipments page, click the PRINT PACKING SLIP button.
This will take you to a printable version of a Packing Slip for the shipment.
Click the PRINT button in the upper-right corner to initiate a print job.
Additional Resources
TIP: Create your own fulfillment process using Custom Order Statuses.
For other related chapters, please refer to any of the following pages:
Edit Order Items - add or remove products, recalculate tax and shipping, or add other credits, discounts, etc.
Return Items - return items and adjust inventory
Ship Groups - create special shipping requirements by assigning shipping methods to groups and products.
Methods - configuration and setup of custom shipping methods
Carriers - install free plugins for supported shipping carriers like UPS, USPS, FedEx, and more.
Warehouses - learn how warehouses are used for shipping and assign to products.