Order Notes
Table of Contents Show
Order History and Notes
When an order is placed, paid, and shipped, there will be a number of events that are automatically recorded as part of the order's history. The notes written to the order can vary, but typically occur when a payment is made, balance is due, money is refunded, a status changes, and shipments occur.
These entries will always remain hidden from the customer's view and they are not editable by the merchant.
You can also add private notes that can only be viewed by other admins working with the order. A public note can be added so you can correspond with your customer on the order. If you do not want to allow customers to contact you through their order, this feature can be disable if from the Configure Store > Order Settings section.
View the Order History
To view an order with several events recorded, you can pick one that has been paid and shipped as shown in the example below.
From the View Order page click the Notes tab in the top menu.
Within the Order History and Notes section you will all notes generated for the order. Reference screenshot below.
NOTE: All the notes shown below are recorded automatically by the system. The Author will be the customer or the admin user performing some action, like a payment, capture, or shipment. Any automated changes, such as an order status change, will show "System" as the author.
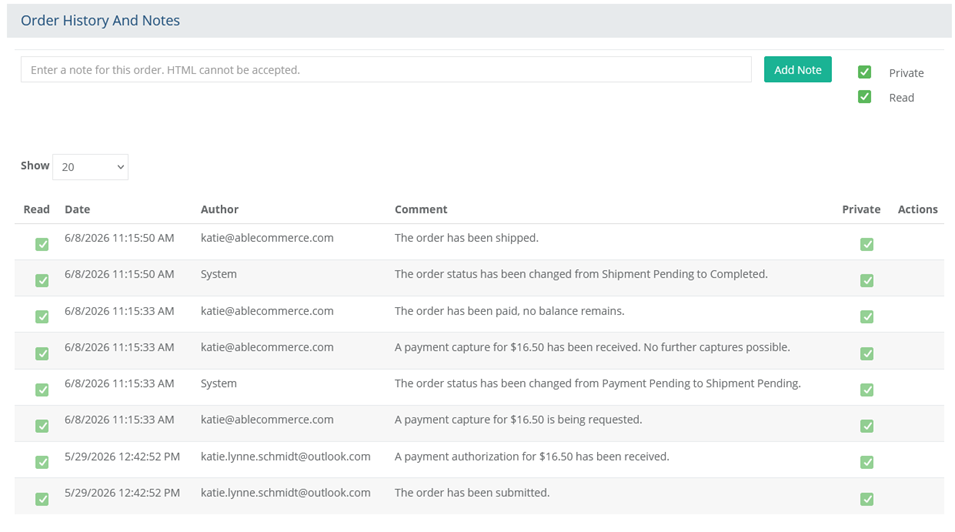
The type of information recorded depends on what action is being taken with the order. Typical actions recorded here are as follows:
New order placed - The order as been submitted. (All new orders will have this event.)
Order paid in full - The order has been paid, no balance remains. (Partial payments will trigger an event logged to the history page as well.)
Pending shipment - The order status has been changed from Payment Pending to Shipment Pending. (After an order is paid, and there is a shipment, this will automatically trigger an event logged to the history page as well as change the order status.)
Order shipped - The order has been shipped. (Once the order is marked as shipped, it will be logged. Any partial shipments will be shown as well.)
Order completed - The order status has been changed from Shipment Pending to Completed. (After an order is paid and shipped, it will automatically trigger an event and the order status will be changed to Completed.)
NOTE: The order history events will be never be shown to the customer. However, they will see changes to the order's overall status, shipment status, and payment status.
There are two types of information logged in the Order History and Notes. Automated entries, or historical logs, are shown when any action takes place with the order such as payment, shipping, etc. Then there are notes, or manual entries, which can be input by the customer or the merchant.
If a merchant enters a note, there is an option to keep it hidden (private) from the customer's view or shown on the customer's order. Additionally, a customer may view their order to send a message to the merchant.
If public comments are entered by the merchant or the customer, an email can be triggered to send notification to both.
Add an Order Note
You can add an order note by either clicking the ADD NEW... button from the upper-right corner page while viewing an order, or by going to the Notes tab.
From the Notes tab, you will see a page which records all the events that take place for an order.
At the top of this section, there is a field to enter a note. The default options is a Private note which will not appear for the customer.

Add a note that only your admin users can see, add some text in the field and click the Add Note button.
If you want to add a Public note that the customer can see, un-check the option for Private.

Add some text that your customer can see in the field provided. Click the Add Note button. Upon doing so, a note will be added to the order and an email will be sent to the customer letting them know that a note was added to the order. Please refer to Email Templates if you want to change the message or disable this feature.
Another way to add an order note is by clicking the Add New... Order Note button from the View Order page. This will open a pop-up dialog similar to the example below.
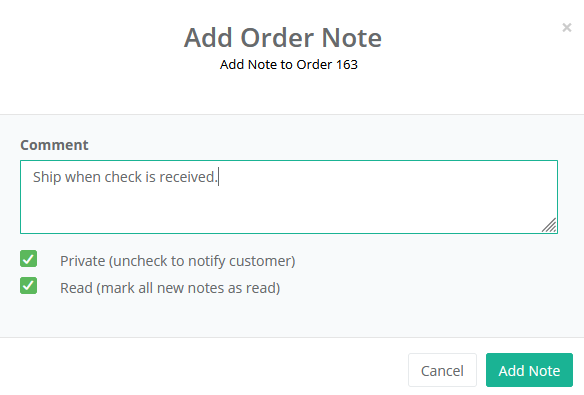
Type your message into the field. By default, all comments are private (hidden from customer).
If you want to add a note so the customer can view it on their order, then uncheck the box next to 'Private (uncheck to notify customer)'.
The option to 'Read (mark all new notes as read) will be checked by default. You can uncheck this box if you want the prior notes to remain unread.
When finished, click the Add Note button.
Edit or Delete Order Notes
The only notes that can be deleted are ones made by an admin user or those added by the customer. Notes added by the system cannot be changed or removed.
From the History and Notes page, find a note with an EDIT and DELETE button in the last column of the row.
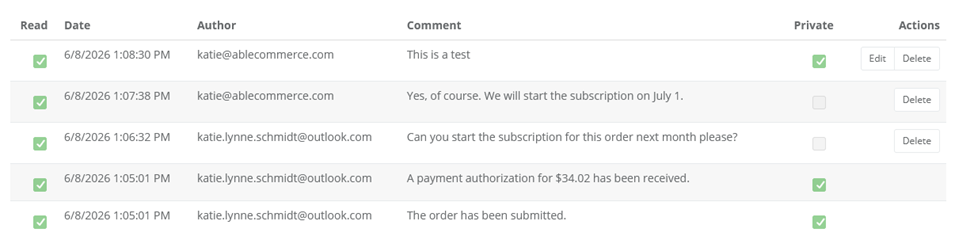
Click the EDIT icon to view the note in a pop-up form.
Change the comment text as needed and click SAVE.
If you wish to change whether or not the note is private or public. Check the box so the note is for internal viewing only, or un-check it so that a customer can view it on their order.
If you un-check the box to make this a public note, it will appear on the customer's order invoice.
You can delete any note if there is a DELETE button in the Actions column.
Click the SAVE icon when finished, or the CANCEL icon to quit without saving.
What does the customer see on their invoice?
After the customer places an order, they can add a note or reply to a merchant's note. The notes will display at the bottom of their order invoice.
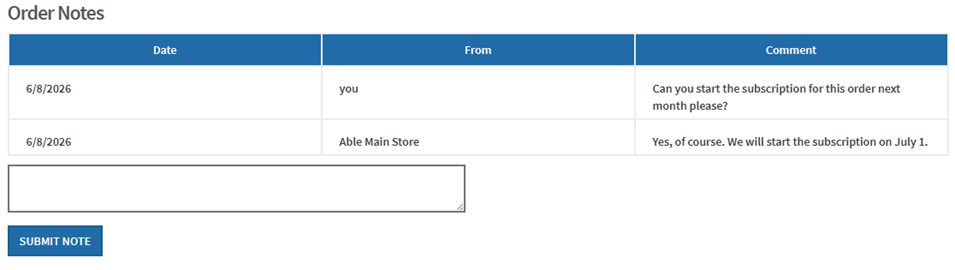
When the customer submits their note, an email notification can be sent to the merchant.
If you want to disable the ability for customers to submit notes, you can do so from the Configure Store > Order Settings page.
Managing Order Notes
Another place you can manage order notes is from the Manage > Notes page. This gives you a different way to view and manage multiple notes being added to orders without actually going to the individual order.
From the left menu, go to the Manage > Notes page.
At the top of the page, you can use the search form to find notes by date, keyword, email, or type. The default is to show all new unread notes.

Enter any filters as needed and click the Search button to view the results in the bottom section.
The notes in the search results include a View Order button to take you directly to the order.
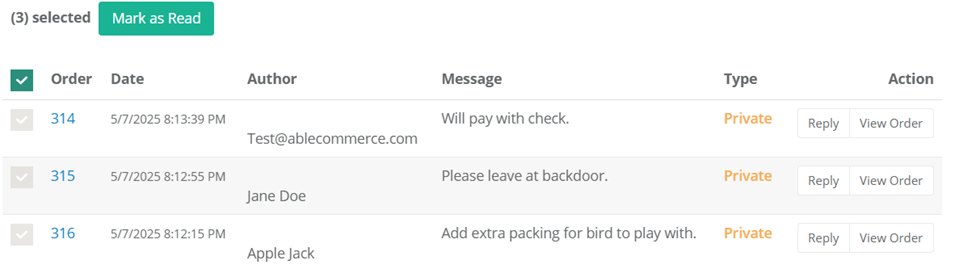
You can reply to a note using the Reply button in the Action column.

If needed, you can use the checkbox in the first column to select more than one note and mark them as read.