Order Payments
Table of Contents Show
Credit Card Transactions
Process a credit card payment online, capture funds, or issue a refund. When you setup your payment gateway in AbleCommerce, you may have different features or options available depending on the gateway integration you've selected. When you add a payment gateway in AbleCommerce, it will list the primary features available for each merchant service.
Every merchant service provider has a setting to 'Authorize' or 'Capture' funds. The recommended practice for an online store is to first 'Authorize' funds during initial order placement, and then 'Capture' payment on shipment.
This document describes how to capture full and partial payments, issue a refund, add a credit card payment manually, or delete a transaction.
Payment Transactions
All orders that use a payment gateway to process a credit card will have a log of events for the transactions. This is called the Transaction History. All credit card activity is recorded here.
From the View Order page, click the Payments tab in the top menu.
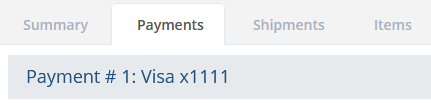
Within the Payment section, you will see all the payments in the order, starting with Payment #1.
- Multiple payments will appear labeled as Payment #2, Payment #3, ext. in the section header.
- Next to each payment, you will see the type of payment instrument used. (Visa, Mastercard, etc.)
- The last 4 digits of a card, or the email of a PayPal account will be shown if available.
Payment Details and Actions
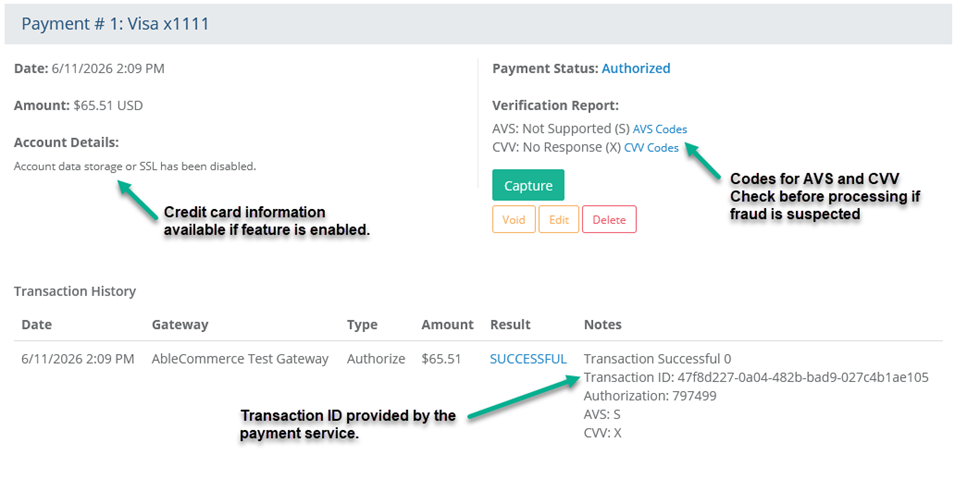
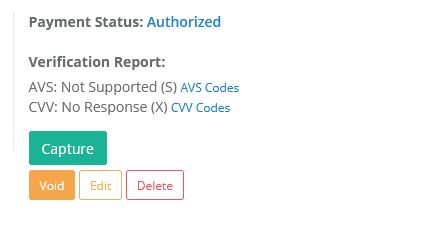
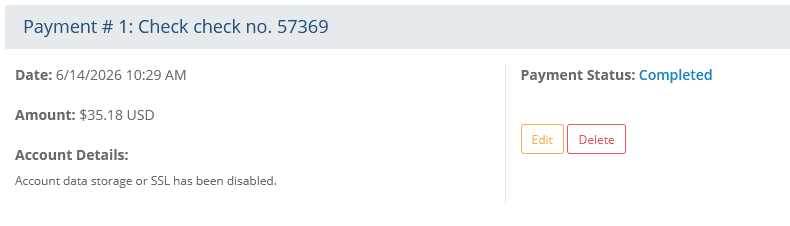
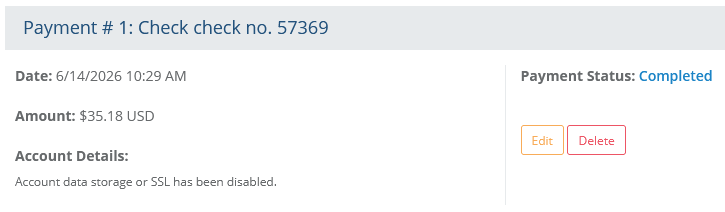
Within the individual Payment sections, find details and process payments. Refer to the sample screenshot below:
Date - The date and time of the transaction.
Amount - The total amount for this payment.
Payments Status - This shows the current payment status for this transaction.
Verification Report - Most payment gateways will send back the results from AVS and CVV. These can be used if fraud is suspected.
- Payment systems vary so please refer to your merchant service provider for description of codes.
- Click on the links to see the Codes and explanations.Account Details - You can view the details of the credit card number and expiration date. This feature is only available when SSL is enabled and when you have chosen the option to save credit card information. When any user views the credit card information, an entry is made in the Audit Log.
We do not recommend turning on credit card storage. It will put you at risk if your admin is compromised.
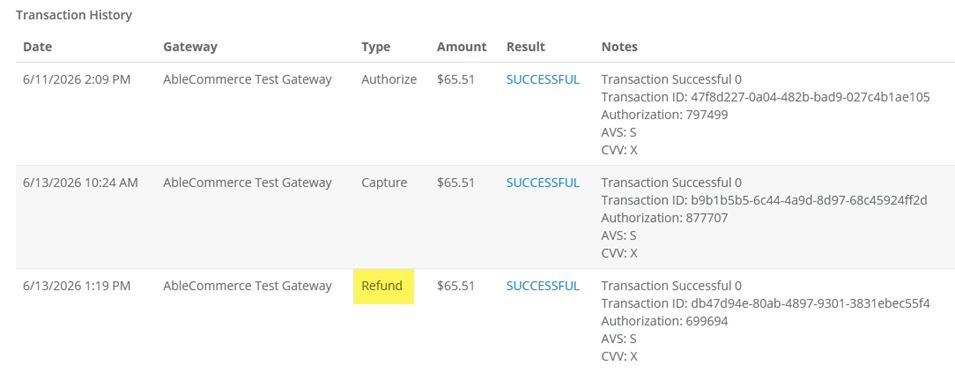
Transaction History
The transaction history section displays information about the credit card response. Looking left to right, the columns are described as follows:
Date - The date and time of the credit card transaction.
Gateway - The payment gateway. (Your merchant service provider)
Type - This designates if the payment is 'Authorized' or 'Captured'.
Amount - The amount of the transaction.
Result - SUCCESSFUL, FAILED, or PENDING (for PayPal IPN only)
Notes - The notes contain transaction data such as transaction ID, Authorization number, AVS and CVV responses. Not all payment processors have the same features, so the information shown here can vary.
Capture a Payment
In the example below, the payment gateway is setup to 'Authorize' funds. The payment status indicates the order is 'AUTHORIZED' so the next task is to capture the funds. The merchant service provider you are using determines the features you will have available here. Most authorizations are only good for 30 days.
REQUIREMENTS: You will need to select an order that has a payment status of 'Authorized' to complete this section.
From the Payment section, click the green Capture button for the payment you want to capture.

A pop-up dialog will appear. From the Capture Payment form, there are available options. Refer to screenshot below.
- The Authorization amount is shown first. Most payment gateways do not allow you to capture more than this amount. However, you will need to check with your merchant service provider to see if they allow capture amounts to be higher than the authorized amount.
- The Order Balance will reflect the current amount owed on the order. If post-order editing results in a new order balance, that will be reflected here.
- The default Capture Amount will be the Order Balance. If the order was changed, this amount may be less than the authorization. If the order balance increased and greater than the Authorization, you may need to collect a new payment. This again depends on your merchant service provider.
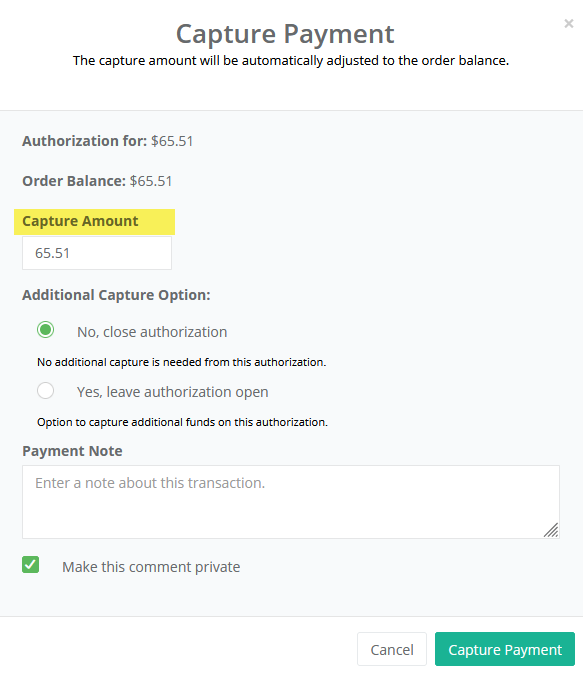
If you want to change the amount to capture, then enter a different Capture Amount.
Some payment gateways support the Additional Capture feature. By selecting the "Yes, leave authorization open" option, you can capture a portion of the total authorized amount. This will keep the authorization open so further captures on the same authorization can be placed.
If you want to add a Payment Note, enter it in the field provided. By default, the comment is private. Uncheck the box if you want the customer to see this note.
When finished, click the Capture Payment button. After a moment, you will be returned to the Payments page where you can view the Transaction History.
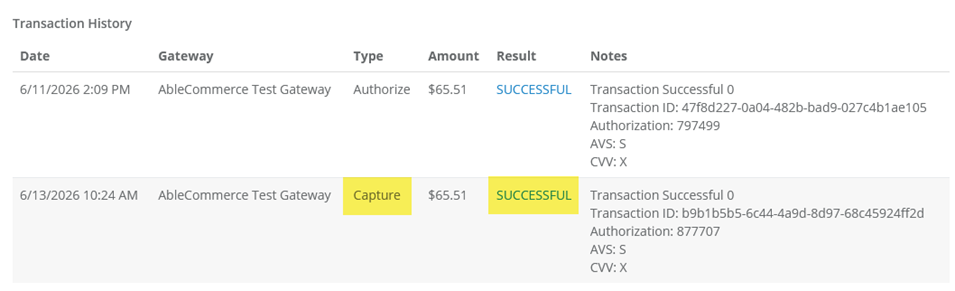
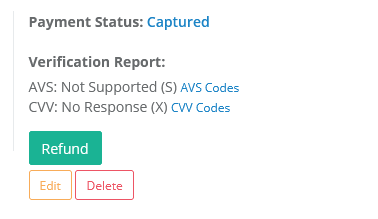
The transaction history has been updated to show the Captured payment and a SUCCESS result. Be sure to confirm the capture was successful before fulfilling the order.
Failed authorizations or payments may require additional debugging. Please refer to the section below for technical support troubleshooting tips.
Void a Payment
Most payment integrations use the 'Authorize' configuration setting. This setting can be changed from the configuration page available as part of the payment plugin. When a a payment is in the 'AUTHORIZED' state, you will have the option to VOID the transaction. By voiding an transaction, you can avoid fees imposed by your merchant service provider.
The merchant service provider you are using determines the features you will have available here. Most authorizations are only good for 30 days.
REQUIREMENTS: You will need to select an order that has a payment status of 'Authorized' to complete this section.
From the Payment section, click the orange Void button for the payment you want to void.
A pop-up dialog will appear confirming the action. You may enter a note here. Use the checkbox if you want to make the comment private.
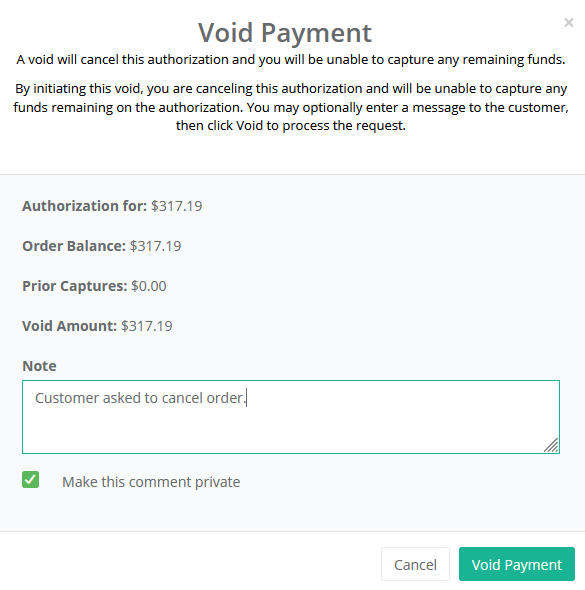
Click the Void Payment button to continue.
From the transaction history section, the Void is shown with a SUCCESSFUL result.

Refund a Payment
Refunds can be be processed through the Payments page. For some payment gateways, such as Authorize.net, you will need to wait until the end of day batch takes place before processing a refund. The exact time frame that a refund can be processed is determined by your payment processor. This is a configurable setting from the Configure > Store > General > Order_Settings page.
REQUIREMENTS: If you want to refund a payment by credit card, then you must select an order where the payment has been captured.
From the Payments page, click the green Refund button for the payment you want to refund.
A pop-up dialog will appear confirming the action.
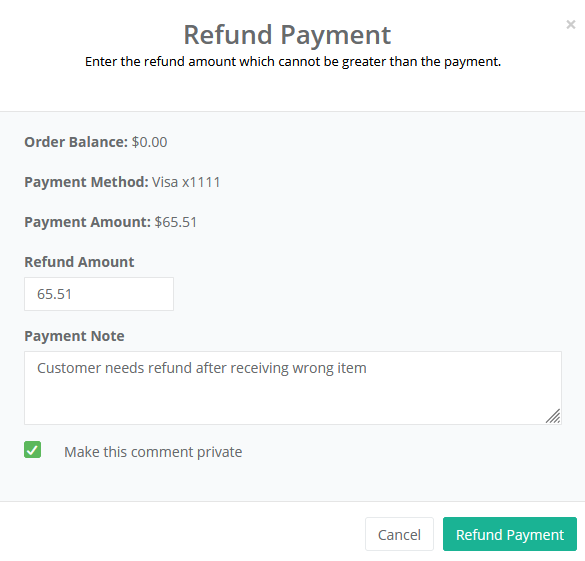
If you want to change the amount of the refund, then enter a different Refund Amount.
Depending on the payment gateway you are using, you may need to enter the full credit card number, the last 4 digits of the card, or the expiration date. (see Refund Notes in the next section)
If you want to add an order note for the customer to see, enter it in the field provided. Use the checkbox to make it public or private.
When finished, click the Refund Payment button. After a moment, you will be returned to the Payments page.
The transaction history will be updated to show the Refund with a SUCCESSFUL result.
Add Payment to an Order
You can add payments to an order. Either by processing a credit card over the phone with a customer, or by manually entering a payment that was taken in another system. Both processes are shown below.
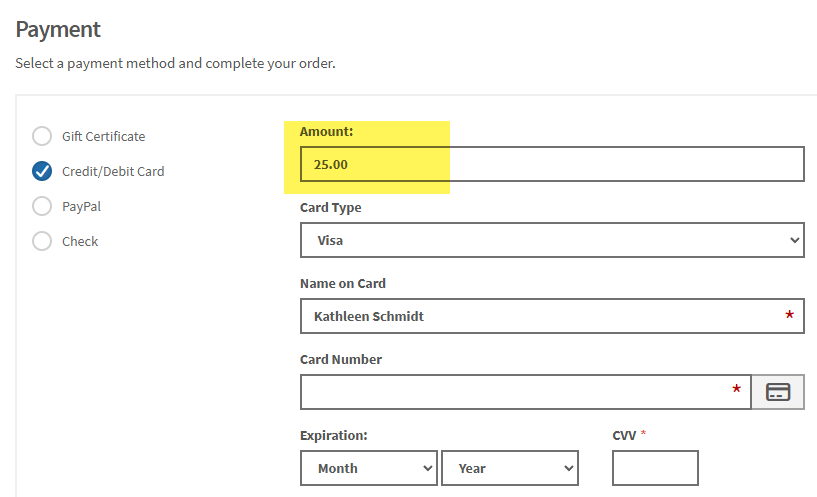
Process Credit Card Payment
Collect credit payment on an order that has a balance due, or apply a credit card payment for any amount.
While viewing an order, click the Add New... button located at the top-right corner of the page.
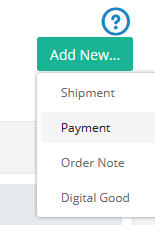
Choose the "Payment" option. This will display the Add Payment page from the Payments tab.
The default view is "Process Credit Card Payment". To enter a payment taken from another source, skip to the section below.
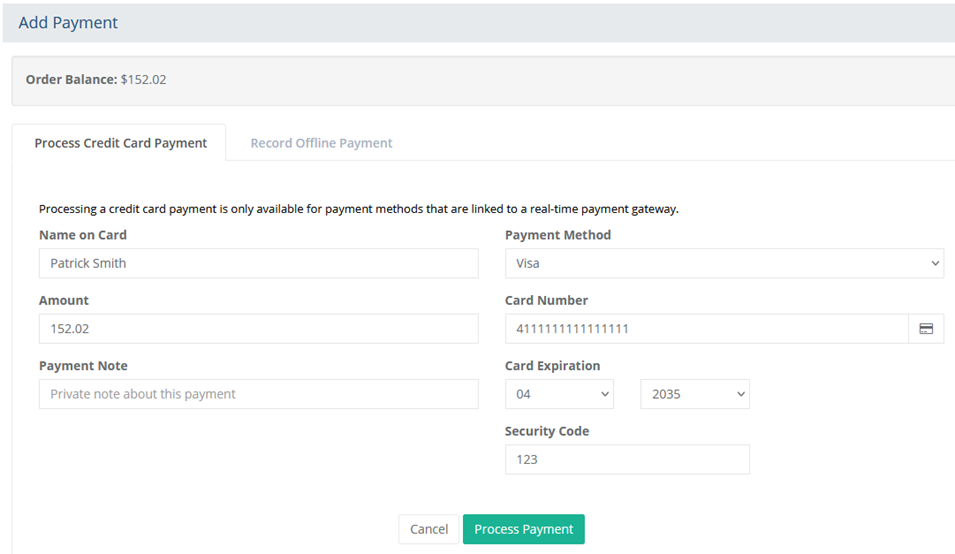
The Name on Card field will populate with the billing information.
The Amount field will populate with the order balance. You can adjust if needed.
Choose the type of card from the Payment Method selections.
Enter the Card Number, expiration date, and security code (CVV).
Click the Process Payment button to initiate the transaction. After a moment, you will be returned to the Payments page.
The transaction history will be updated. If necessary, make sure you capture the funds if transaction is an authorization.
Record an Offline Payment
If you take checks or some other form of payment outside of AbleCommerce, you can enter the payment manually.
While viewing an order, click the Add New... button located at the top-right corner of the page.
Choose the "Payment" option. This will display the Add Payment page from the Payments tab.
Click on the sub-tab "Record Offline Payment".
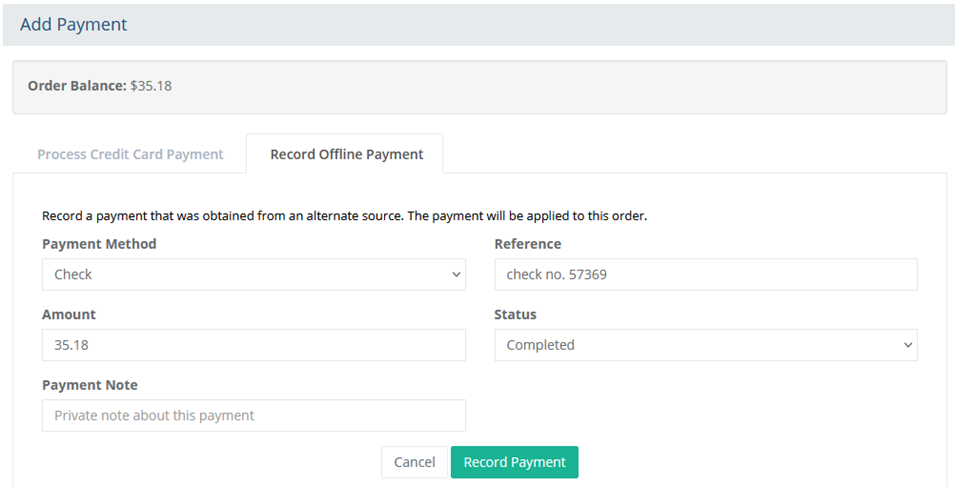
Select a Payment Method that corresponds to the type of payment.
The Amount field will populate with the order balance. You can adjust if needed.
Enter a Reference to the payment if needed. For example, this can be a check number or transaction number.
Change the Status to "Completed".
Click the Record Payment button to return to the Payments page.
Edit a Payment
Generally, editing a payment applies to any manual payment that's been entered. You may edit a card payment to change the payment status, but this is uncommon and would normally only be used if something happened to the payment outside of AbleCommerce.
For a more common example, we will edit an offline payment.
From the Payments page, click the orange Edit button for the payment you want to change.
A pop-up dialog will appear. You can change the payment status to Voided, Completed, or Unprocessed. If you are editing a card method, the payment statuses may be different. The payment status determines if the order is paid or unpaid.
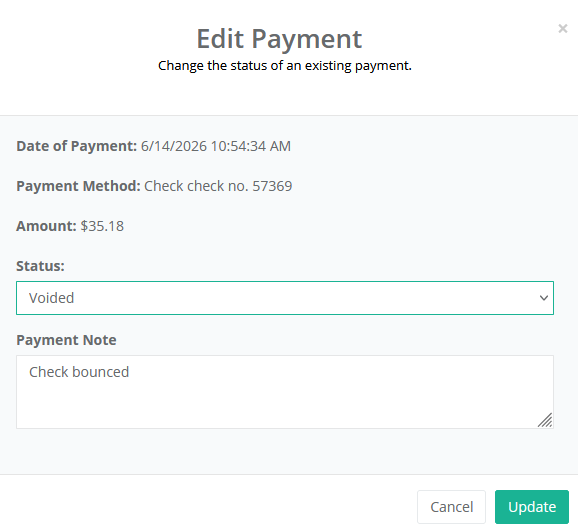
You may enter a Payment Note which is private and shown only to admin users.
Click the Update button to save the changes.
NOTE: Unless you have a specific reason to change the payment status, we recommend using the default settings.
Delete a Payment
If you delete an existing payment on an order, there will typically be a balance due. If the order has a balance due, the customer can login to his/her account and make a payment on the order. It is uncommon to delete a card payment, so this with caution as your merchant account might have that payment recorded.
From the Payments page, click the red Delete button for the payment you want to delete.
A browser warning prompt will appear for confirmation. If you want to delete the payment and all transaction information, then click OK.
Offline Payment Methods
There is no limit to the number or type of payments that can be applied to an order. There are many ways a merchant can apply a payment to an order. AbleCommerce provides the flexibility to do just that. The information collected and displayed is different between a credit card transaction and an offline payment method.
An offline payment is how you accept other types payments. Some examples of offline payment methods are:
Purchase Order
receiving a check in the Mail
Credit card terminal (when processing of credit cards is done outside of AbleCommerce)
AbleCommerce has built-in support for the offline payment methods shown above. You can add as many custom payment methods as you like through the Configure > Payment Methods page.
Payments on an Order with a Balance Due
Any order can be paid directly by the customer after that order has been placed. The customer will login to his/her account and go to the Orders page. From there, they can click on the link to view the order invoice. If there is a balance due, a PAY NOW button will appear.
Ask the customer to click on the PAY NOW button and a payment form will be presented. This will have the same payment options available to the customer as shown on the payment page during checkout.

From the Configure > Store > Settings page, there are several options you can enable or disable for payments and orders. One such setting allows the customer to enter multiple payments on an order.
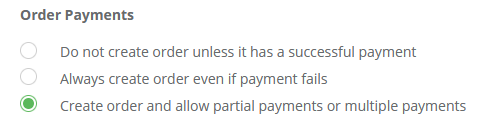
This is a setting which can be used in special circumstances where a customer can enter the amount to pay on an invoice.
Additional Resources
Configure> Store > Order_Settings - change the number of days allowed for a refund or other order settings.
Configure > Payment Gateways - Setup credit card processing, PayPal, or Google Checkout.
Configure > Payment Methods - Create or edit new types of payment methods.
Configure > Security > System Settings - enable or disable credit card number storage; purge card numbers.