New Orders
Table of Contents Show
Admin's Creating Orders
For many, the admin user may need to create orders on behalf of the customer. In AbleCommerce, this process is easy to do. There are two places where you can start an order:
From the Order Manager, by clicking the quick link navigation at the top of the header, or by going to the Manage > Orders page.
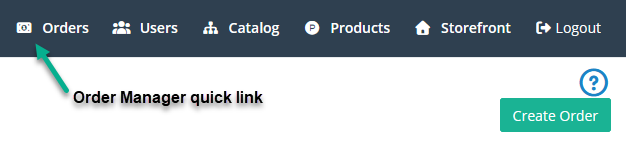
After arriving on the Manage Orders page, click the green Create Order button to begin at step 1 below.
Another location where you can start an order, is by viewing a customer's basket.
First, find the user's account from the People > Users > Manage Users page, or the quick link to Users in the top menu. After you find the user, go to the account editing page and navigate to the Basket tab.
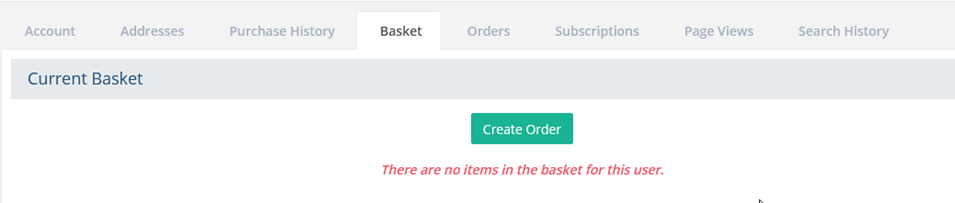
If the user already has items in his/her basket, they will be shown here. Click the green Create Order button to begin at step 1 below.
NOTE: When you place an order for your customer, they will still receive an email confirmation and be able to login to their account and view their order information.
Step 1: Find Customer
The Create Order feature is an easy step-by-step process.
To begin, click the Create Order button shown on the Order Manager page.
First, locate the customer that the order will be placed for by typing in the user's email, first name, last name, or phone and clicking Search. - OR -
Click the Next button in the admin footer if you will be creating a new customer account and proceed to section Step 2. Create Order below.
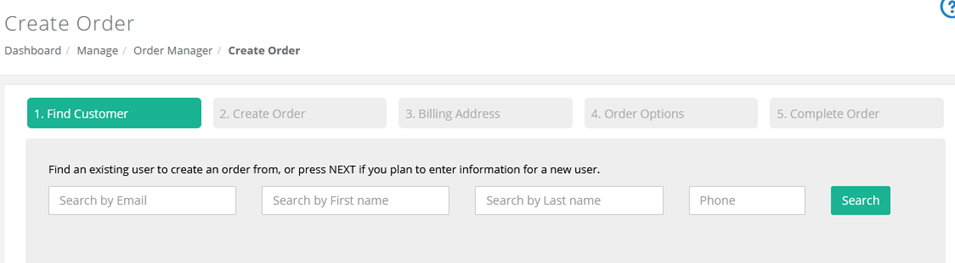
The results from your search will be displayed. Click the Create Order button from the Action column.
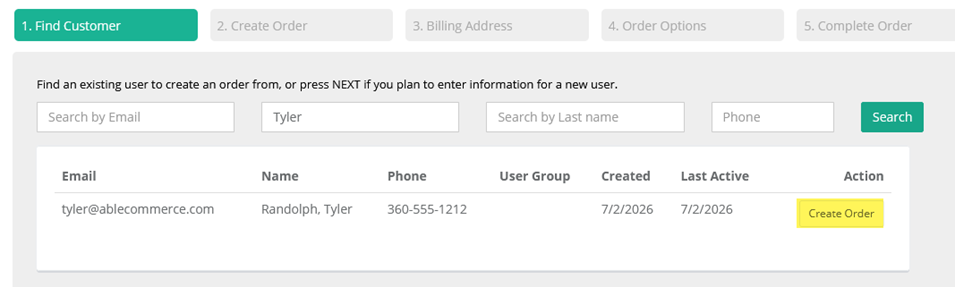
This will bring you to step 2. Create Order for the selected user.
Step 2. Create Order
You can arrive to this section of the wizard with a selected user, or no user account selected. If an existing user is selected from the previous step, you may see items in an existing basket. To add new items to the basket, continue with the steps here.
Enter a 'Name' or 'SKU' into one of the fields provided. You may include additional filters by category or brand.
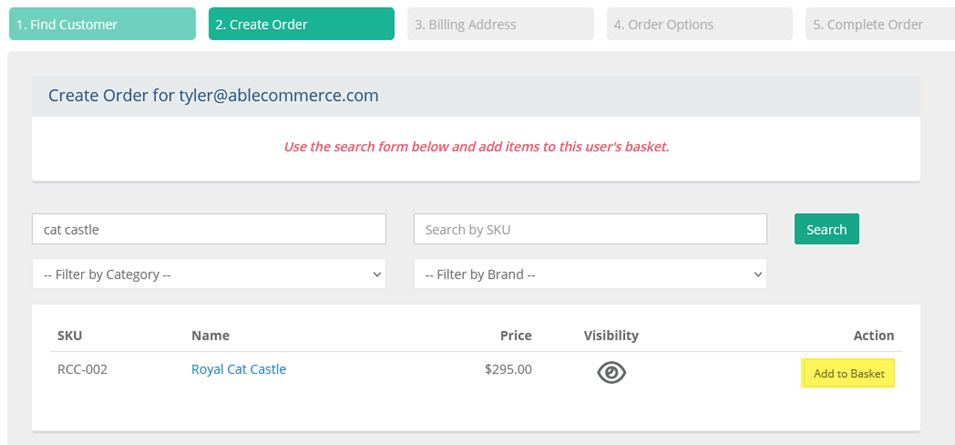
Click the Search button to display all the products that meet the search criteria.
Click the Add to Basket button from the Action column. A pop-up dialog will appear. Price and/or quantity can be changed.
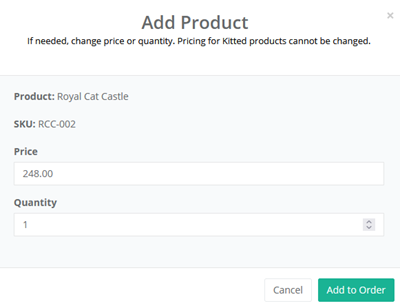
Products with Options - Select from the options available - same as shown to the customer.
Kit Products - Select any options if needed. Kit pricing cannot be adjusted.Click the Add to Order button.
If needed, search for additional products and add them to the user's basket.
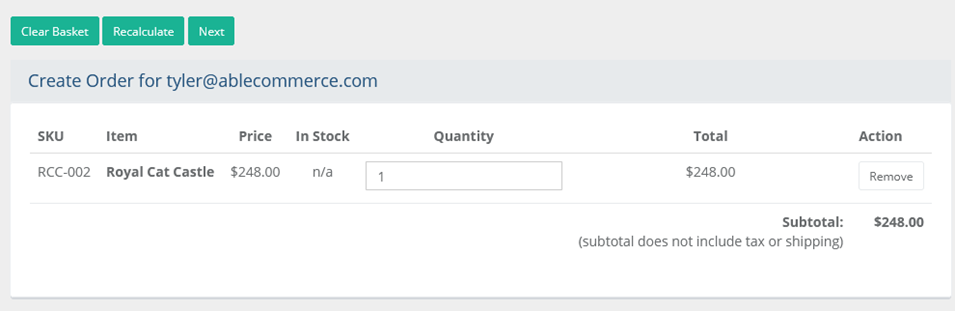
The basket with the item is shown. You can modify the quantity or delete any product. Use the Recalculate button if adjusting quantities.
To start over, use the Clear Basket button.
To continue, click the Next button.
Step 3. Billing Address
You can arrive to this section of the wizard with a selected user, or no user account selected. If an existing user is selected, you should see the address form completed. If not, go ahead and enter the billing address information here.
For Step 3 you will see the billing address form first. Make sure it is completed.
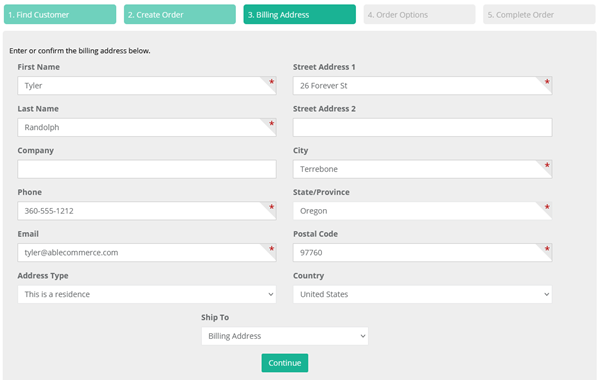
If the order is shipping to a different address, you can change the Ship To drop-down selection to one of the user's addresses, or create a new one.
If it billing address doesn't exist, you can enter the applicable information into the fields provided.
Click the Continue button or the Next button in the admin footer.
Step 4. Order Options
Upon arrival to this page, there will be additional options shown if the user account has been created.
For Step 4, you will need to select a shipping method if the order has shippable items.
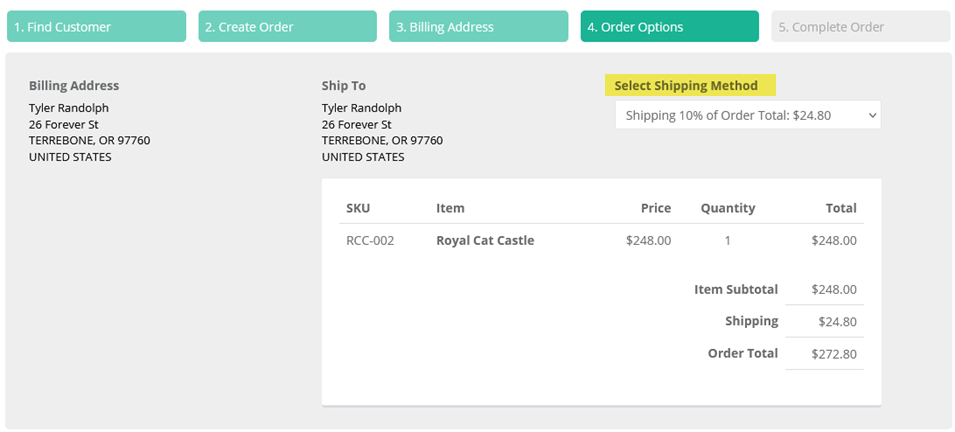
NOTE: All shipping methods will be shown. If the shipping method has an ** appended, it is not available to the customer - only to the admin.Click the Next button in the admin footer to continue.
Step 4. Order Options with a new user (alternate)
If you did not select an existing user in Step 1, then you will see some options. To create a registered user account using the email address entered, the box Create Account needs to be checked. This is the default option.
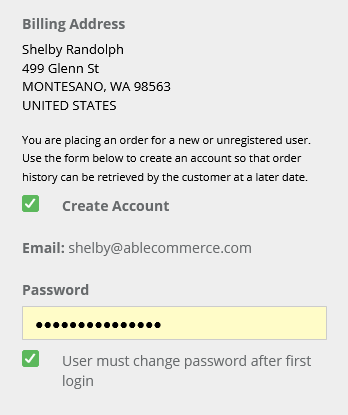
When the Create Account box is checked, a password field is shown and required to continue. An additional option is available to force the user to reset their password on first login.
Step 5. Complete Order
Upon arriving to the last step, you will see the Order Summary section. This includes all the items in the basket with totals for shipping, tax, etc.
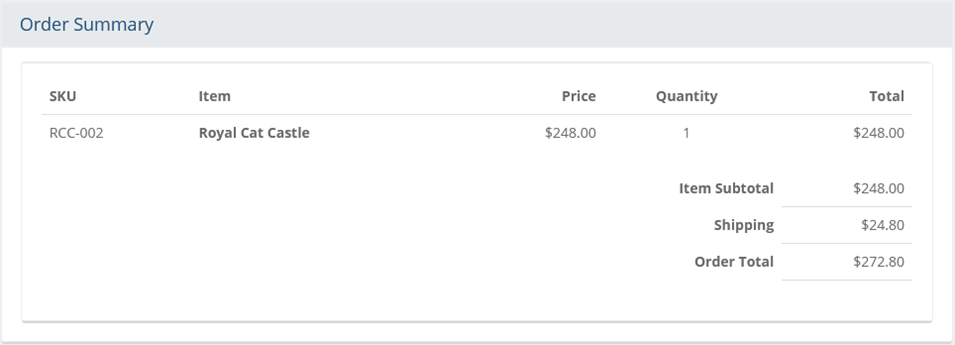
Below the Order Summary is the Select
Payment Method section:
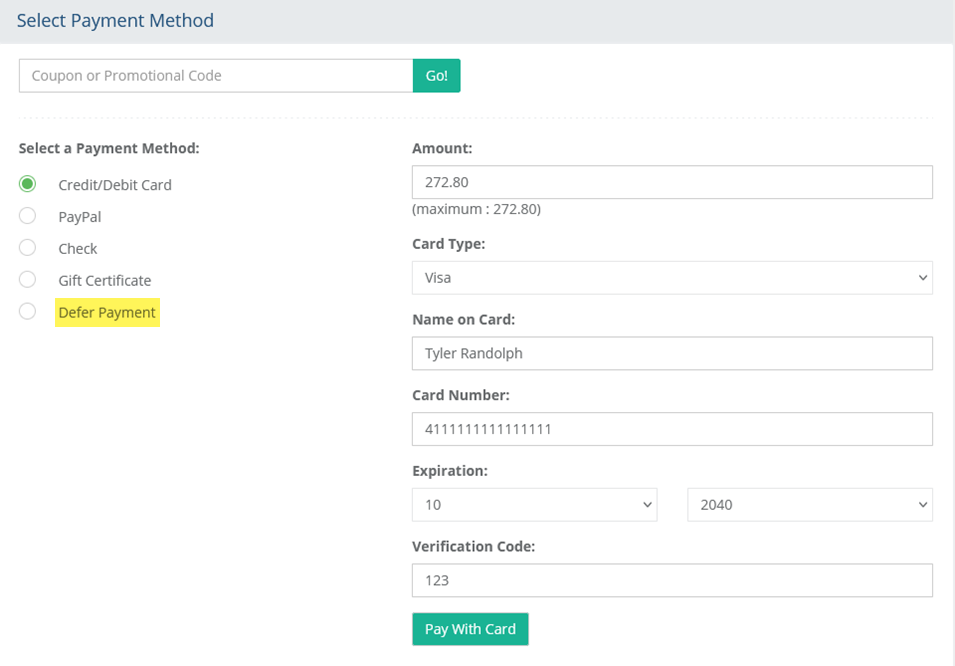
Before making payment, you should apply any coupons first. Click the GO button to adjust the order amount.
If you are going to place the order now and collect payment later, use the Defer Payment option to submit the order.
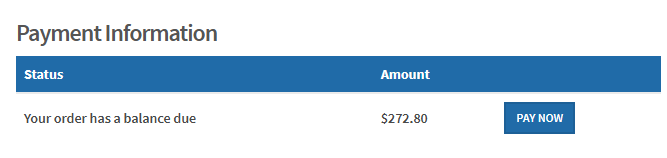
The customer will see a PAY NOW button from the order invoice:
Otherwise, choose one of the available payment methods and make the payment accordingly.
After placing the order, you will arrive on the view order page. Email notifications will be sent upon submitting the order.
TIP: You can apply a payment to the order manually, or ask the customer to login to his/her account and use the payment button.
Additional Resources
Manage > Orders > Payments - Record payments on an existing order.
Manage > Orders > Edit Orders - Add credits, debits, charges, or modify an existing order.
People > Users > Manage - create new accounts and access existing accounts to view basket and start new orders.