Widgets
Table of Contents ShowHide
Widgets
Widgets are comprised of dynamic code that is used for a particular
purpose. Some widgets have settings that allow the data to output in different
forms, while other widgets perform a specific purpose without additional
built-in settings. New widgets can be added, but the process requires
a developer and compilation of code.
Widgets are categorized into five groups, depending on their intended
use:
General - these widgets
work on most pages.
Header - widgets designed
for the store header area; also used with the widget boards for a
store header.
Footer - widgets designed
for the store footer area; also used with the widget boards for a
store footer.
Sidebar - these widgets
work in a sidebar, but they can also work in most pages with a setting
change.
Product - these widgets
need to reference a product, so they should only be used with template
that will be assigned to products.
Category - these widgets
need to reference a category, so they should only be used with template
that will be assigned to categories.
Checkout - widgets designed
to be used within the checkout system.
Account - these widgets
are used to create the customer's account system.
Many widgets have default properties and they can be changed from the
admin or retail side.
Managing Widgets
Using the menu, go to Website
> Store Design > Widgets to view a list of several widgets
that are pre-installed and ready to use.
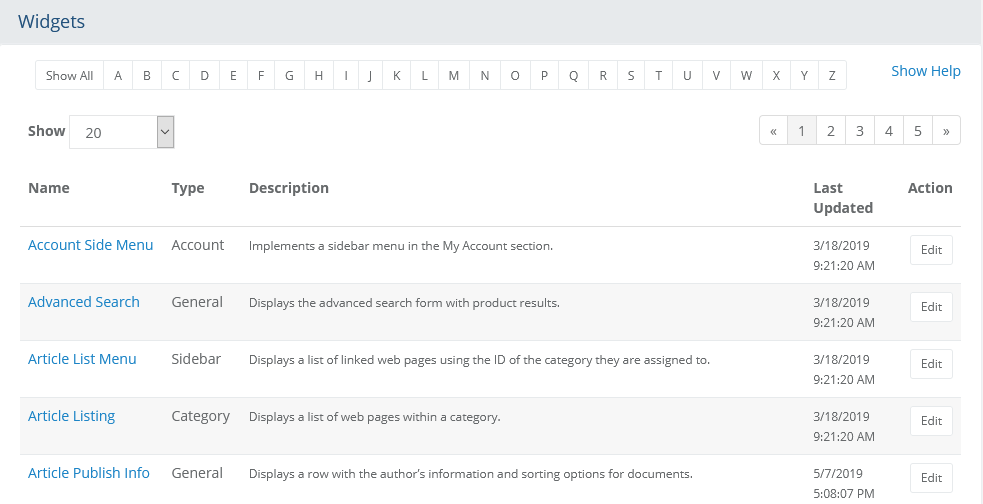
At the top of the Widget listing is a Quick
Search filter. You can use this tool to filter results
by name.
Paging and the number of items to show per page is available
when the total number of records exceeds 5.
The first column displays the Name
of each widget. You can click the link to edit. Click the column
heading to sort the list alphabetically.
In the second column, the Type
of each widget is shown. Click the column heading to sort the list
by type.
A Description
of each widget is provided. This explains what content will be output.
The Last Modified
date is shown in the fourth column. You can click the column heading
to sort the list by date changed.
In the last Action
column, there is a button to Edit, although not all widgets have properties
that can be changed.
Edit a Widget from Admin
If you edit the settings for a widget, then these will become the new
default properties for the widget. If the widget is in use, then the settings
changed here will be reflected for all places where the widget is being
used, except in the case where a widget has been used on a page and the
properties for the widget were modified, or overwritten, for that particular
page. Widget properties can be overwritten from the retail side, or when
they are placed within a template or board from the admin side.
Using the menu, go to Website
> Store Design > Widgets to view a list of several widgets.
For this example, find and edit the widget named "Edit Bill Address".
From the description, this widget is used to display a billing
address form. It is categorized under "Checkout" which means
that this widget can only be used within the checkout system.
This particular widget has two settings available:
Show Alternate Phone
- display values are Yes
or No, with No being the
default.
Show Company Name
- display values are Yes
or No, with No being the
default.
For some merchants, you may want to collect this additional
information on the billing form. To do that, change the values for
either or both options to Yes.
When finished, click the Save
button.
To view the change, go to the retail storefront, place an item
in the basket and initiate a checkout test.
Stop on the first page of checkout; the billing address form
(shown below) appears with the two additional fields now being displayed.
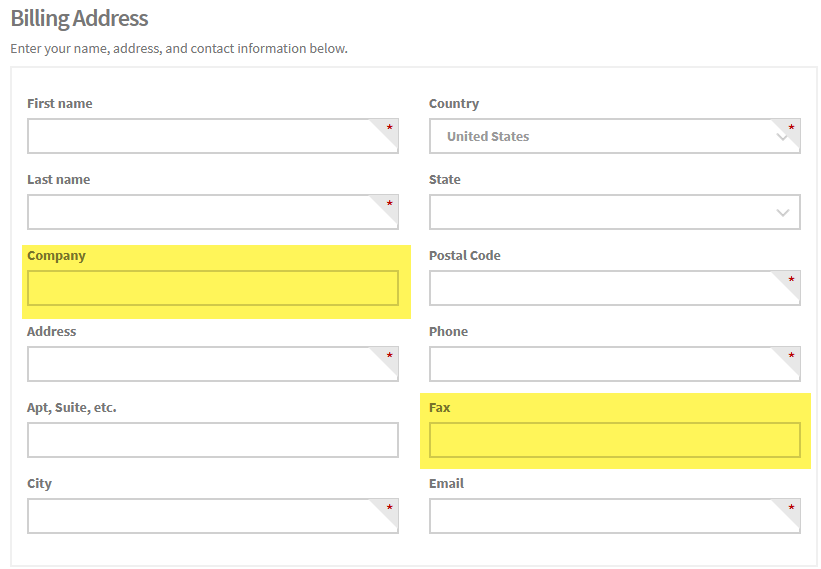
To make further adjustments, turn ON
design mode using the control found along the right
margin.
For this example, let's change field from Fax
to Mobile by clicking on
the label text surrounded by a light-blue border.
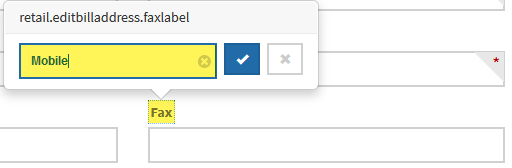
Save the change and
exit design mode to view the final result.
NOTE:
The thing to remember about widget editing is that any direct
change made to the widget will update all locations that widget
is used, except in the case where the widget has been inserted into a
page and its properties are changed from the retail side, or in the case
where the widget was inserted into a template or board and then modified
after it has been placed into
position.
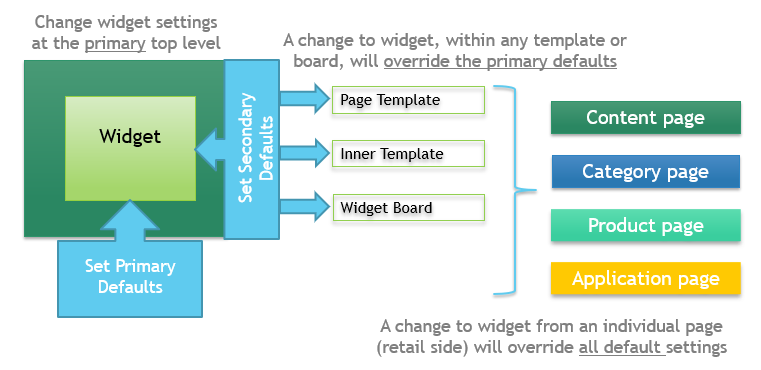
The diagram above shows the downward path
of a widget and how the settings will be applied at the three possible
levels.
Primary
Default settings take place from the Website
> Store Design > Widgets page.
Secondary
Default settings take place from the widgets that are placed in
any of Page Templates, Inner
Templates, or Widget Boards.
Retail Widget
settings take place from an individual retail-side page while in
design mode. These settings override any changes at a higher level.
Edit a Widget from Retail
For this next example, we will demonstrate how to modify a widget from
the retail storefront. You will need to be logged in as an administrator.
Add any item to the shopping cart.
View the basket page. (../checkout/basket)
Turn ON design mode
using the control found along the right
margin.
Find the widget named "Basket". It will have a light-pink
background that looks similar to the following image.
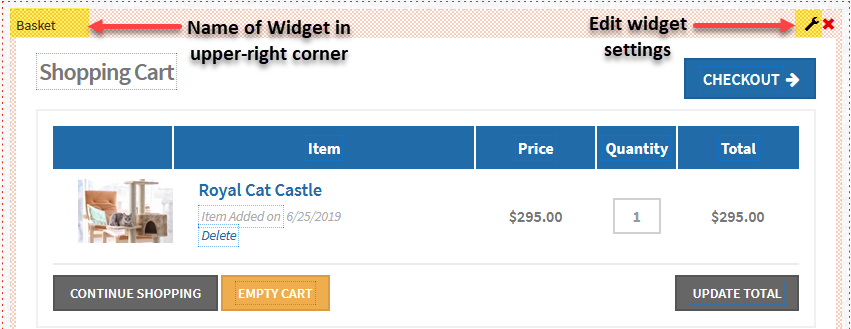
Widgets (in design mode) will always be shown on a pink background,
and the name of the widget will be shown in the upper-left corner.
Click the wrench icon
to edit the properties of the widget. A popup appears.
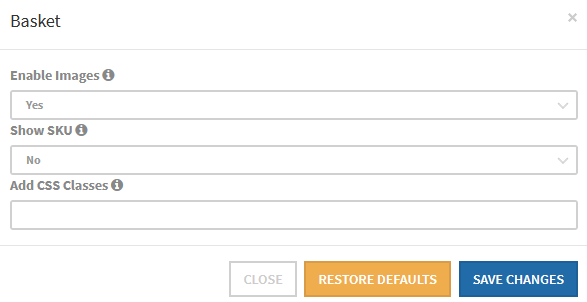
For this particular widget, there are settings to show or hide
images and product SKU's shown in the shopping cart.
Change the setting to Yes or No as needed. For the example,
we will disable images and
enable SKU.
Click the Save Changes
button from the popup.
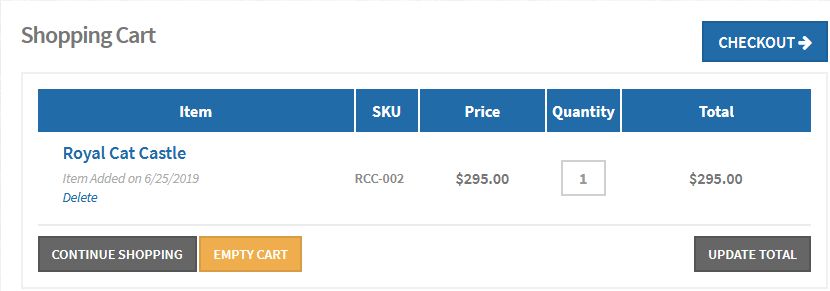
After making this change, the page is now considered customized.
You must click the SAVE button in the footer to complete the change.
If you do not want to complete the change, then click the CANCEL button.
After saving, exit design mode to see the results of the basket
widget. Notice the thumbnail is hidden and the product SKU appears.
Reversing Widget Setting Changes
To undo the changes above, turn ON
design mode again.
Click the wrench icon
for the Basket widget. This will make the popup appear.
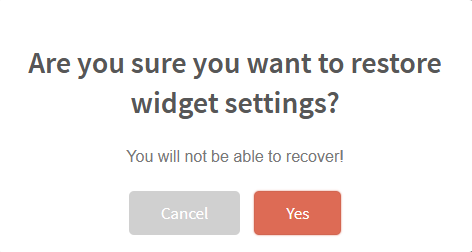
Click the Restore Defaults
button.
A confirmation popup appears asking that you confirm
the restoration of the widget's settings.
The change will take effect immediately. This will only remove
the setting overrides that were made for this page.
Note:
The RESET button in the footer
will remove all customizations
made to the page.
Edit a Widget used in Design
Widgets can be used in Page Templates, Inner
Templates, and Widget Boards. For each location a widget is placed, the
ability to adjust, or override, the primary default setting is available.
When you adjust the widget settings from within one of these three design
elements, then the widget will be updated in all locations that it is
used.
For this last example, we are going to edit
the basket's page template which shows the shipping estimate widget within
the right column.
Using the menu, go to Website
> Store Design > Page Templates listing.
Filter by the letter "B"
and find the template named "Basket
page". Click the Edit
button or linked name.
Click the Design
tab.
Click the Edit
Content button.
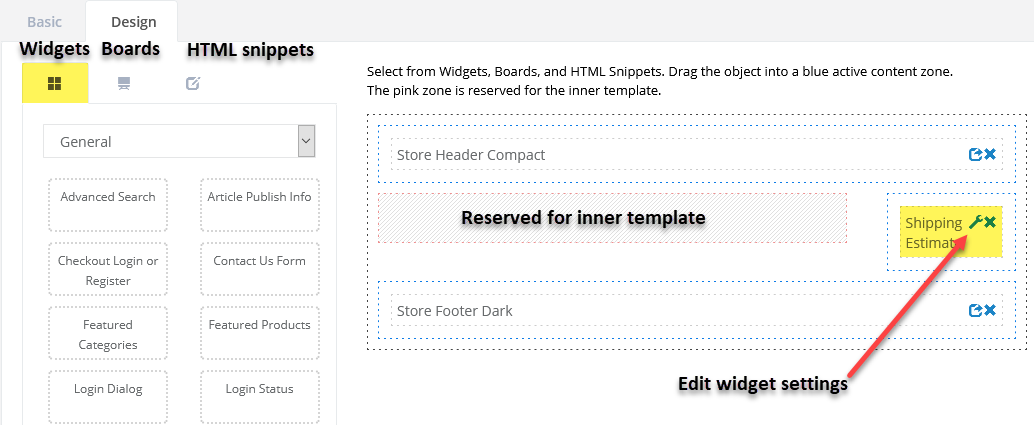
The image above represents editing
of a Page Template in design
view. Click the wrench icon
for the "Shipping Estimate" widget.
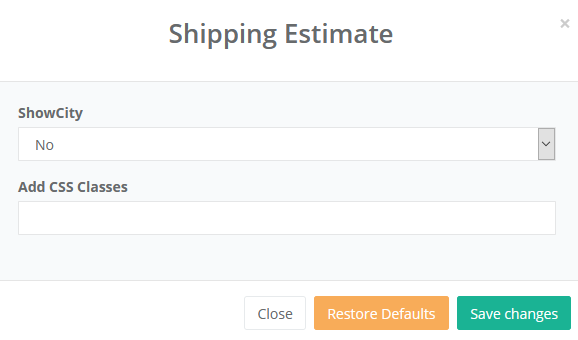
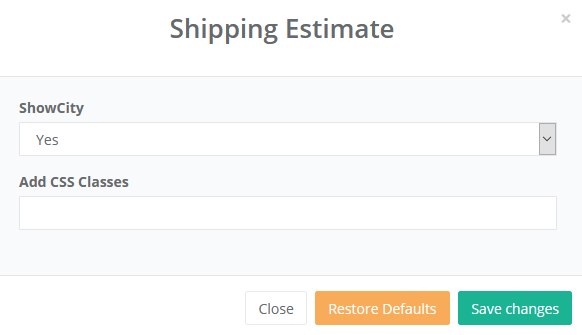
A popup appears as shown in the screenshot
above. For this widget, a setting to "Show City" is available.
Notice the widget's original default setting shows this as No, or
off. Change the value for "Show City" to Yes.
Click the Save
Changes button on the popup.
Finally, click the Save
or Save and Close button from the admin footer.
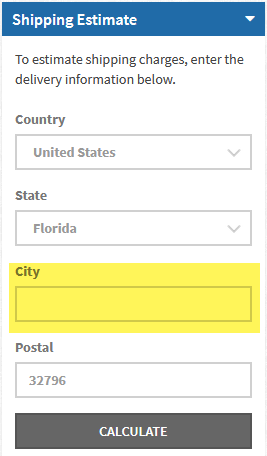
To view the change, switch over to
the retail side of the store. Add a shippable item to the cart, and
access the basket page.
Notice the Shipping
Estimate control in the right column now has the City field
shown.
Reversing Widget Setting Changes
To undo the changes above, return to the page template design
screen.
Click the wrench icon
for the "Shipping Estimate" widget. This will make the popup
appear.
Click the Restore Defaults
button.
A confirmation popup will appear.

Confirm the change.
The panel will be closed with the
settings reverted back to the original, or primary, default values
of the widget.
Note:
When editing widgets within the Inner Templates and Widget Boards, the
processes shown here are still applicable.