Add User
AbleCommerce allows you to create new users from the Merchant Menu. A user can also be created by registration at checkout, through a mailing list sign-up, or from a new wishlist. For each user registration, you'll be able to view information like their current and past orders, page views, and more.
Users can be assigned to your custom Groups. When new users are created automatically by the system, they will not be assigned to any Group. A Group can be given special privileges or memberships, like the ability to receive tax exemption is one example. The AbleCommerce system includes several security groups with permissions to manage different areas of the store.
The anonymous user record can be stored if the user visiting your store has allowed a 'cookie' to be stored in their browser. This is very common, so most anonymous users browsing your store can be tracked to some degree. For information on tracking settings, see Anonymous User Maintenance. In order to make use of the Abandoned Basket report, you'll need to track these anonymous users.
Adding a New User
All user records must have a unique email address.
-
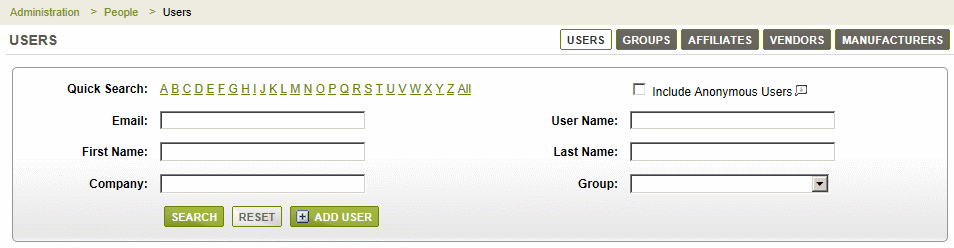
From the Manage Users page, or from the top-menu, go to People > Users.
-
Click the ADD USER button.
-
A pop-up menu appears with the minimum requirements needed to add a new user.

-
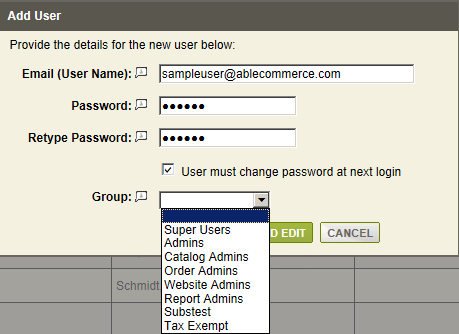
Enter an email address which will be also be the User Name for future logins.
-
Enter the same password into the next two fields shown. Your password needs to meet the minimum password policy requirements.
-
By default, the checkbox to require this user to change his/her password at first login is active. You may uncheck the box to use the existing password.
-
A Group selection is optional. By assigning a user to a Group, you will be establishing special rights.
-
Click the SAVE AND EDIT button to view and/or complete the user record. You may also skip this step and click the SAVE button to finish.
|
NOTICE: |
The Group feature is extremely versatile, so please read more before making a Group assignment. |
User Account
Each User will have an account with several features. These pages are accessible from the tabs, where you can view detailed information about the user, order history, and activities including page views, basket contents, and more.
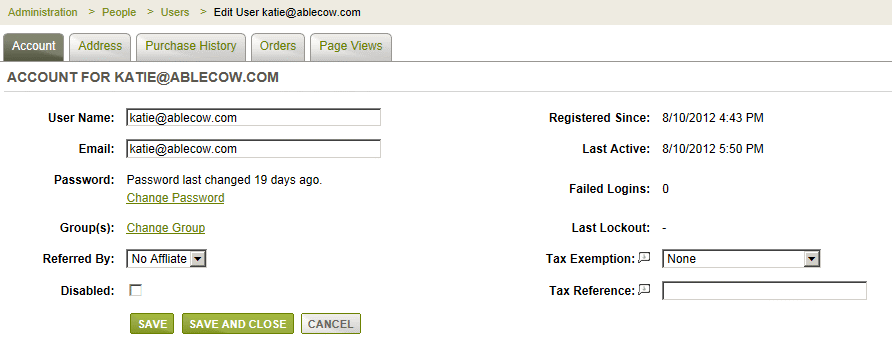
The first page you will see after editing a user record is the Account summary page showing the most common user information.
-
The User Name, by default, is the user's email address. However, this may be changed to be any combination of letters, numbers, or characters.
-
The Email address that will be used for notifications. This must be a unique value.
-
Password shows the length of time since the user's password was last changed.
-
The Group(s) name(s) will be shown here if the user has been assigned to one or more groups.
-
If necessary, you can Disable a user account. This prevents the user from logging into the store.
-
The Referred By selection would only be used if you are using the Affiliates feature.
-
Registered Since and Last Active show the exact dates and times of new user registration and the last time they were recognized as being at the store.
-
The Failed Logins is a counter that increments each time the user attempts to login unsuccessfully.
-
The Last Lockout will show the date and time the user failed to login the maximum number of times which triggers a lockout period.
-
Tax Exemption can be used to exempt the user from taxes. Select the type of exemption for tax purposes.
-
Tax Reference - For tax exemptions, you should use this field to record a document proving exemption status.
To Change a Group
A User's group assignment can be changed by clicking the Change link, within the Group row, from the User's Account page.
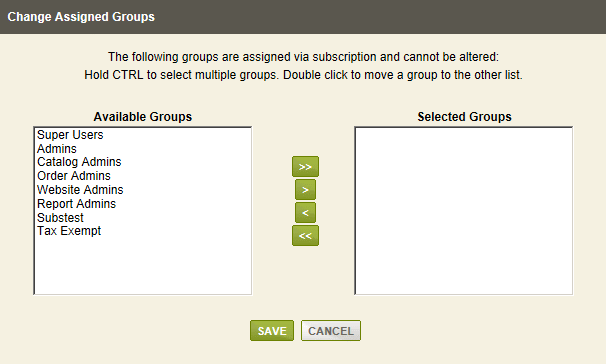
To add a group assignment, select from the list of Available Groups on the left, and click one of the Move Right action icons.
To remove a group assignment, select from the list of Selected Groups on the right, and click one of the Move Left action icons.
To Change a Password
A User's password can be changed by clicking the Change link, within the Password row, from the User's Account page.
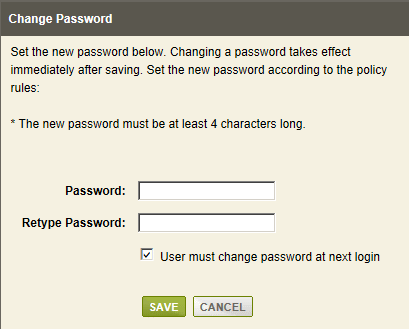
To set a new password, enter the new one into the fields provided. Your selected password must meet the minimum requirements of the Password Policy.
Uncheck the box if you want to keep the password. If not, leave the box checked so the user must change the password at his/her next login.
User Addresses
From the Addresses tab, you can view, change, or enter the user's billing address.
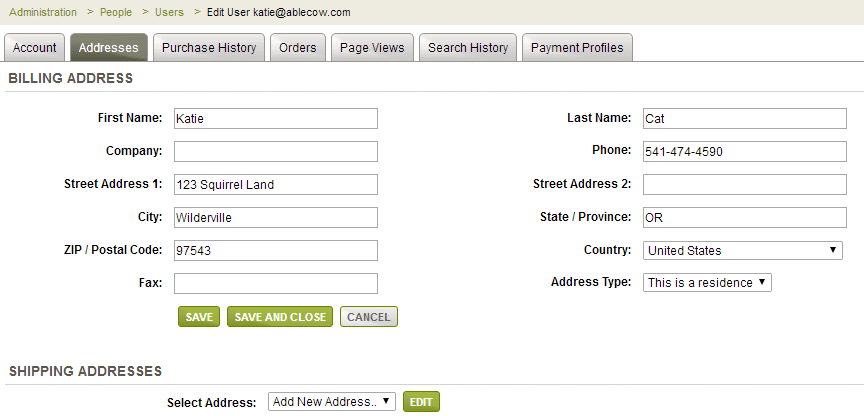
Only users that have been manually registered, or completed a checkout, will have address information displayed here.
User Shipping Addresses
At the bottom of the Addresses page, there is a feature that allows you to edit or add new shipping addresses for the customer. [New in Gold R12]
Simply click the EDIT button while selecting "Add New Address.." to add a new address. To edit an existing address, select it from the list and click the EDIT button.
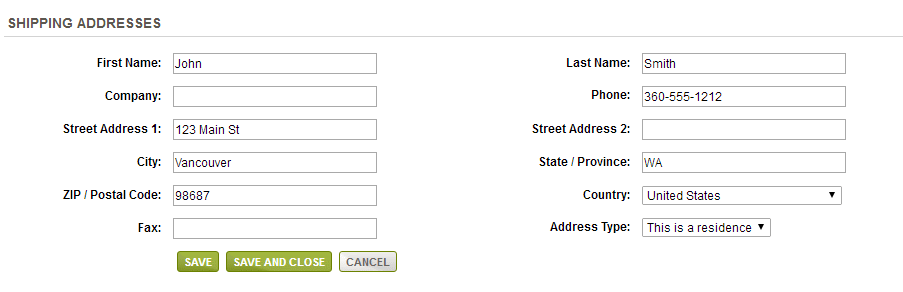
When finished, click the SAVE or SAVE AND CLOSE button.
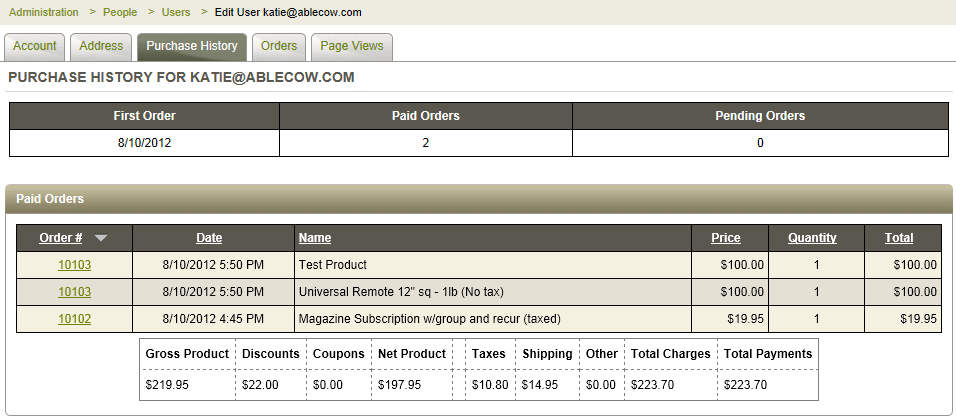
User Purchase History
The Purchase History page will show a summary of all orders placed, including the date of first order, and the number of orders placed.
-
Totals for Gross Product, Discounts, Net Product, Taxes, and Shipping are indicated at the bottom of the page.
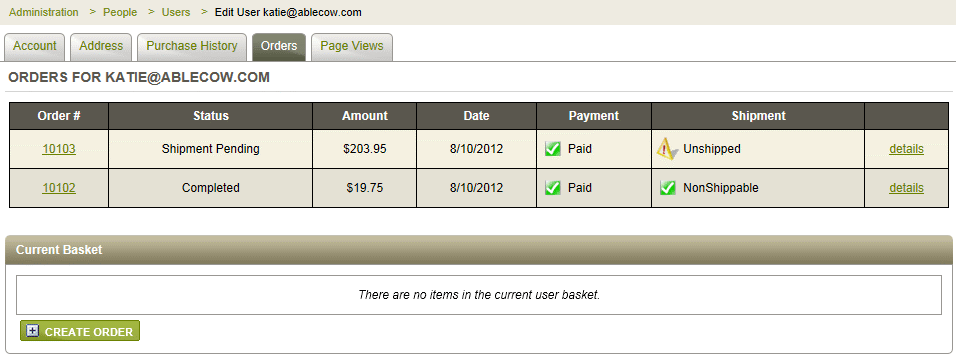
User Orders
The Orders tab will display any items that are currently in the user's shopping Basket. The second section of this page, Order History, will display all orders that have been placed using this user account. You can access their order(s) by clicking the details link in the far right column.
-
You can create a new order for a user by clicking the CREATE ORDER button as shown below.
-
This launches a product search page where you can build an order for the user. For instructions, please see New Orders.
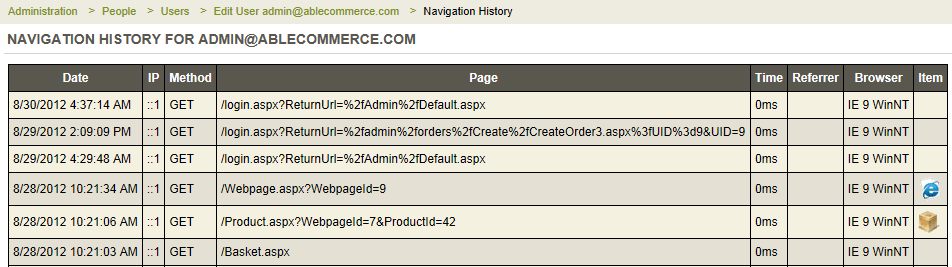
User Page Views
A history of each user's access to pages within the store will be available from the Page Views tab.
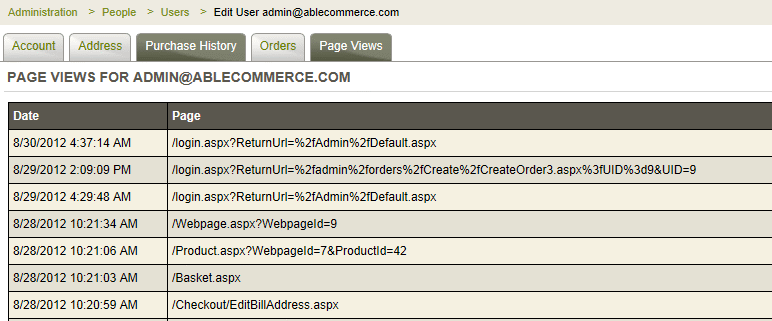
From the lower left corner, you can click the See All link to view all page view history for the user.
![]()
Go to Site Map