Application Pages
Table of Contents Show
Application Pages
Application pages are a special type of content page that is used for more complex store functions, like the checkout system or customer account pages. The application pages have attributes to change SEO data, along with template assignments. The design functionality is limited because their purpose is to determine what content will be used for the page layout, inner template, and theme.
Content and application pages have different purposes. The content pages are used to create new custom retail storefront pages that can be included in storefront searching and the catalog. They are used for supplementary information, blogs, and the home page. A new installation includes two content pages, one for the home page and another for the contact form.
An application page is not accessible to the storefront search engine. There are 40 pre-built pages, and each has a special purpose. Together, both page types create the entirety of the storefront. The ability to add new content pages, or application pages for advanced users, is unlimited.
WARNING - Modifying the template assignments for an application page could break the retail storefront. Editing the SEO attributes for an application page is available and will not compromise the storefront in any way.
Managing Application Pages
Using the menu, go to Website > System > Application Pages. This will bring you to the application page listing, as shown in the example below.

In a new installation, you should have 40 application pages installed. These pages cannot be removed because it would cause parts of the retail side storefront to break.
At the top of the Application Page listing is a Quick Search filter. Use this tool to filter results by name.
The first column displays the Name of each application page. You can click the link to edit. Click the column heading to sort the list alphabetically.
The Last Modified date is shown in the second column. You can click the column heading to sort the list by date changed.
The Preview column displays an icon with a link to the actual URL.
Note: There are many application pages that cannot be previewed directly because they must contain some reference data. For example, you cannot preview a Subscription page without being able to reference a valid subscription order.The Visibility column shows you if the application page is public, private, or hidden.
Note: You should not change the visibility for application pages unless there is a specific reason to do so. If you lock an application page from viewing, this could create serious problems in the retail storefront.Public: available for any user to view when it is part of the normal storefront operation.

Private: available by direct link only

Hidden: locked and unavailable; page is effectively disabled.

In the last Action column, there are buttons to Copy, Edit, or Delete.
Add an Application Page
This feature is intended for advanced users who are customizing the storefront and wish to create special pages that have specific functions. Remember that a key difference between a content page and an application page is that the application page will never be included in the storefront search results. In may, however, be indexed by a search engine if the page is linked and visible in the store.
Using the menu, go to Website > System > Application Pages. This will bring you to the application page listing.
Click the button in the upper-right corner to Add Application Page. A pop-up screen will appear.
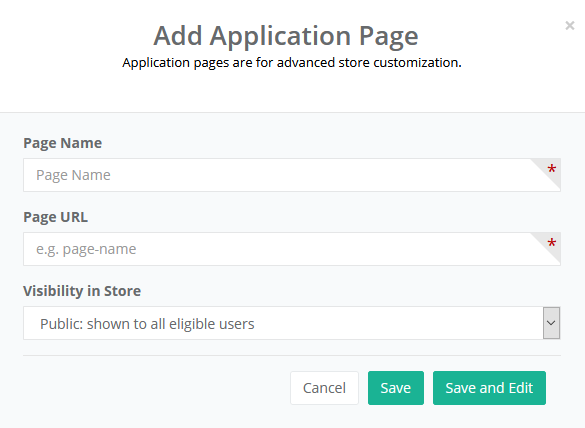
Enter a Page Name in the first field. (e.g. Membership Registration)
Note: The page name is used for the admin and retail side. Using the SEO option while editing, you may enter a page title for search engines. If you do not want the page crawled by a search engine, then make sure you don't have direct links to it from other websites or content. You can also change the visibility of the page so that it can be hidden or locked.To automatically generate the Page URL using the name of your page, click into the second field. The URL will automatically populate the field, but you may adjust the URL as needed. (e.g. Membership-Registration)
Note: Keep in mind that search engines index the page URL, so it is best practice to not change it in the future. However, if you do need to change the URL later, the application can create a 301 permanent redirect to ensure that old links will continue to work.For Visibility in Store, the three display options available are:
Public: available through direct link and any user to view; application pages are not included in the store's search results.
Private: available by direct link only.
Hidden: locked and unavailable for viewing; page is effectively disabled.
If you want to assign or add SEO content later, click the Save button. To continue editing the new application page, click the Save and Edit button.
Edit an Application Page
To edit an application page, go to Website > System > Application Pages using the menu.
Find the page you would like to change and click the Edit button from the Action column.
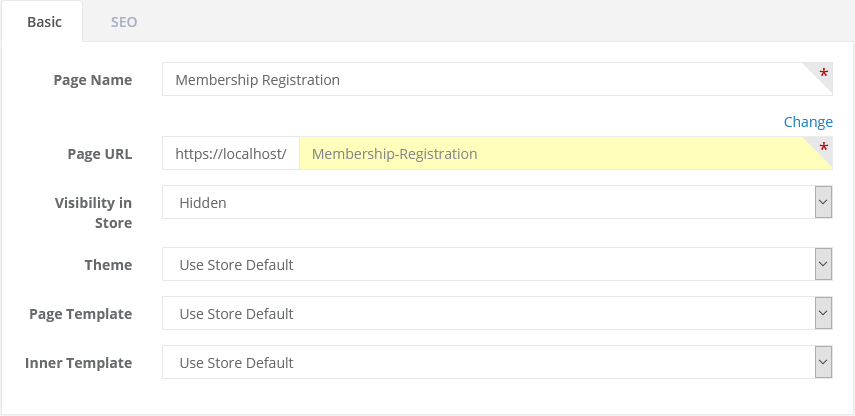
The edit content page is composed of two sections denoted by the tabs for Basic and SEO. Each section is explained below.
Basic Information
Refer to the sample screenshot above. A Page Name and Page URL are the only two required attributes of the application page. Prior to accessing this editing area, the information has already been entered while creating or copying a new application page.
If needed, change the Page Name in the first field provided. This will not affect the URL.
To change the Page URL, first understand that any existing links to this page can be automatically corrected when the system creates a 301 permanent redirect to the new URL. Click the Change link located above the field.
Change the Page URL as needed. An option will be shown that allows the system to create a URL redirect from the old URL to the new.
Note: If this is a new page that has never been indexed by the search engines, then it is not necessary to have this option selected.Save these changes to continue.
The last three selections for basic application page editing include a theme, page template, and inner template.
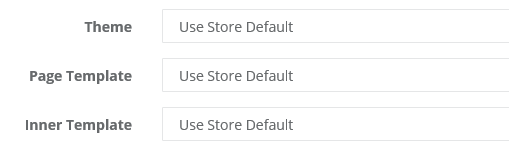
The store has default values which can be set for both application and content pages. Using the store default setting for a Theme and Page Template is common, but the Inner Template selection should use the content from a custom template that has already been created for use with the application page. The point of using a unique application page is so you can create custom content that used
For additional documentation on each of the store design features, see:
- Website > Store Design > Page Templates (page layout and outer content)
- Website > Store Design > Inner Templates (inner content and inside layout)
- Website > Store Design > Themes (colors and styles)When finished making changes, click the Save button.
Search Engine Optimization (SEO)
To optimize your page for search engines, click the SEO tab.
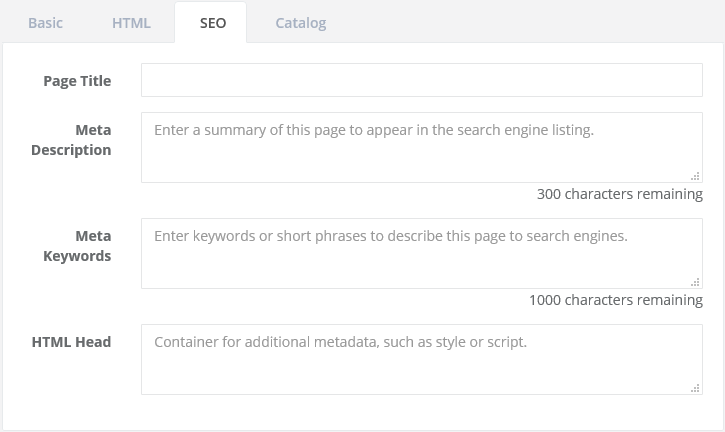
Enter a Page Title if you would like it to be different from the page name. The page title may be displayed and linked by the search engines, but only in the case where a search engine can reach the page. For many application pages, they are inaccessible to search engines because they can only be reached by some action such as the checkout process.
The Meta Description is important to search engines. After indexing, the text you enter here appears below the link to this page.
Meta Keywords are still a valid SEO feature, but most search engines no longer use this information. If desired, you may enter keywords or key phrases into this field.
The HTML Head is used to enter any custom scripts, styles, meta information, etc.
When finished, click the Save and Close button.