HTML Snippets
Table of Contents Show
HTML Snippets
An HTML Snippet is any custom content that does not constitute a page. Unlike content pages that are used with the inner body templates, an HTML snippet can be placed in any page, in any location. HTML snippets can be created through the admin interface or while in design mode when editing from the retail storefront.
An HTML Snippet can be reusable content that might be displayed in multiple locations, or it could be a more advanced feature like a rotating banner. There is no limit to the number of HTML snippets you can create, and AbleCommerce provides the necessary interfaces to manage, use, and edit your snippets.
Managing HTML Snippets
Using the menu, go to Website > HTML Snippets. This will bring you to the HTML Snippets listing, as shown in the example below.
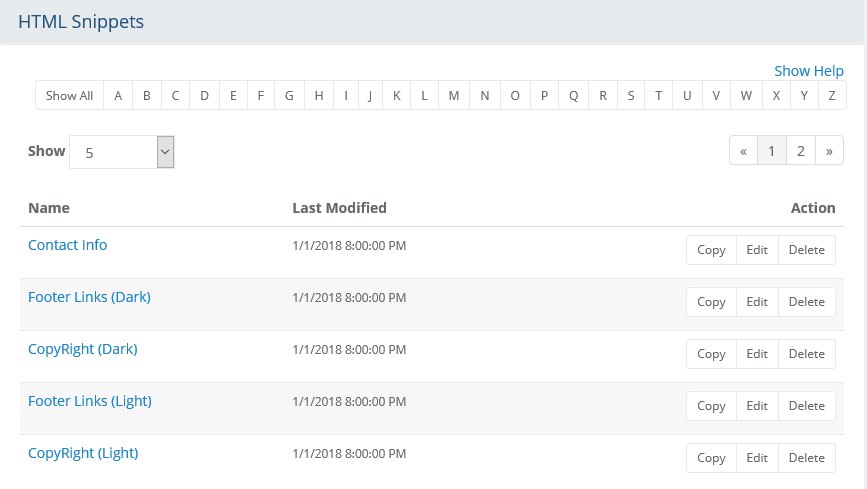
In a new installation with sample data, you should see the five HTML snippets created above. These snippets happen to be used within widget boards for the store header and footer. You can update the content in each one, or create your own snippets to replace these.
At the top of the HTML Snippets listing page is a Quick Search filter. You can use this tool to filter results by name.
The first column displays the Name of each snippet. You can click the link to edit the snippet. Click the column heading to sort the list alphabetically.
The Last Modified date is shown in the second column. You can click the column heading to sort the list by date changed.
In the last Action column, there are buttons to Copy, Edit, or Delete.
Add or Edit an HTML Snippet
Using the menu, go to Website > HTML Snippets. This will bring you to the content page listing.
To add a new snippet, click the button in the upper-right corner to Add HTML Snippet.
To edit an existing snippet, click the Edit button or the linked snippet name. An existing snippet is shown in the following example.
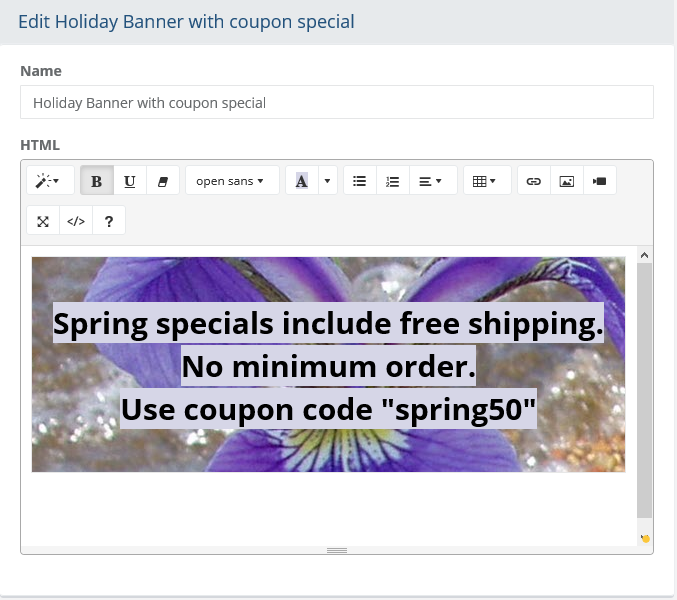
You will need to enter a Name for a new HTML Snippet. The name is for internal purposes only. This should be kept as short as possible.
Using the HTML editor to create your custom content. If you need more features than the in-line editor offers, then click the </> button from the toolbar. Return to design mode by clicking the </> button again.
When finished adding new content, click the Save button or Save and Close button.
Add HTML Snippet in Design Mode
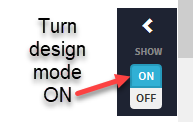
From the retail side, make sure you are logged in with an account that has administrator access.
Turn ON design mode using the control found along the right margin of any page.
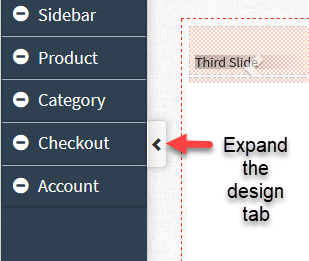
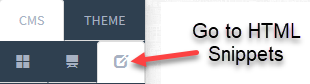
This will display a design tab along the left side of the page. Expand the menu.
At the top of the menu, click the edit icon to display the HTML Snippets panel.
To add a new snippet, click the + Add HTML button to view a pop-up screen like the one shown below.
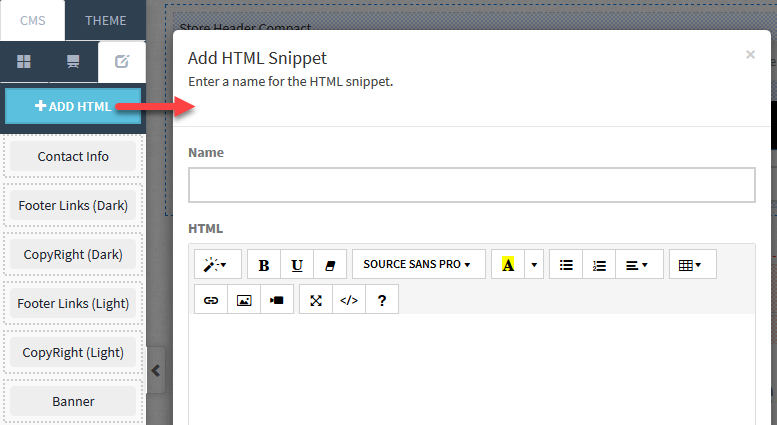
Enter a name and some content for the HTML Snippet.
Click the SAVE button when finished.
Note: To remove an HTML snippet, you will need to delete it from the admin side.
Placing HTML Snippets into Pages
When new HTML Snippets are created, they can be placed into any page of the store. Whether or not you want to place one into an individual page, or apply to a template so it can appear in multiple pages, depends on where you are editing when you drag the HTML snippet into position.
This section describes the process of adding an HTML to an individual page. If you would like to display the HTML snippet on multiple pages, then you should do that by editing a template or widget board. Skip to the next section "Placing HTML Snippets into a template".
From the retail side, make sure you are logged in with an account that has administrator access.
Find the page you want to edit and turn ON design mode.
Expand the menu tab from the left margin and click the edit icon to display the HTML snippets available.
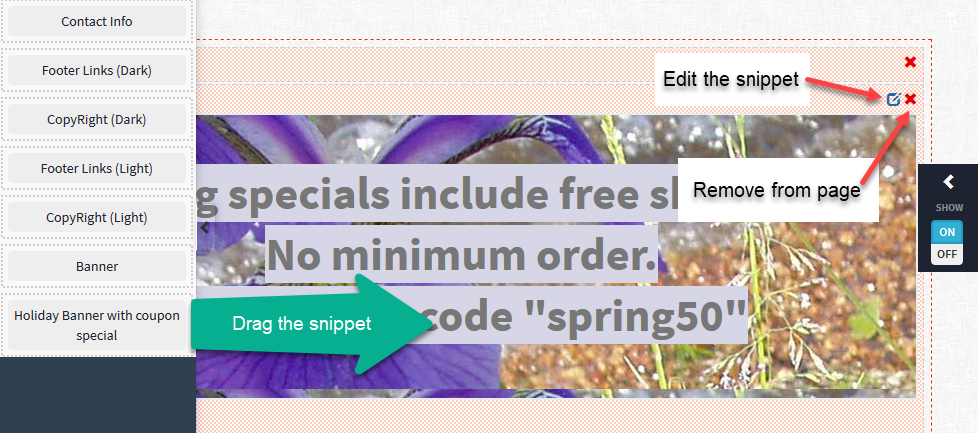
Drag the snippet into one of the sections on the page.
The page will refresh with a preview showing the new content.
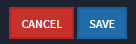
Confirm the change and click the SAVE button in the page footer before leaving design mode. If you are not happy with the change, click CANCEL to revert.
To edit the snippet, click the edit icon in the top-right corner of the HTML snippet.
To remove the snippet from the page only, click the red X in the top-right corner as shown in the example above.
Placing HTML Snippets into Templates
To add an HTML snippet so that it will appear on multiple pages, you'll need to place it in a template or widget board instead. If you only wish to add the snippet to a single page, then follow the instructions in the section above "Placing HTML Snippets into Pages".
HTML Snippets can be added to:
- Website > Store Design
> Page Templates (page layout and outer content)
- Website > Store Design
> Inner Templates (inner content and inside layout)
- Website > Store Design
> Widget Boards (combination of HTML and/or widgets)
For the purpose of editing or adding HTML Snippets through the admin, let's cover placing a snippet into a widget board. The process is identical no matter where you are adding the snippet. For more information, you can visit any one of the links above.
A new installation should already have a store header and store footer in place.
Using the menu, go to Website > Store Design > Widget Boards to view a list of boards.
Click the Edit button for "Store Footer Dark" to view the Widget Board designer.
Click the Content tab.
Then click the Edit Content button.
In the design area, there will be two HTML Snippets and one Widget. You will know the difference by looking at the edit functions in the upper-right corner of the object.
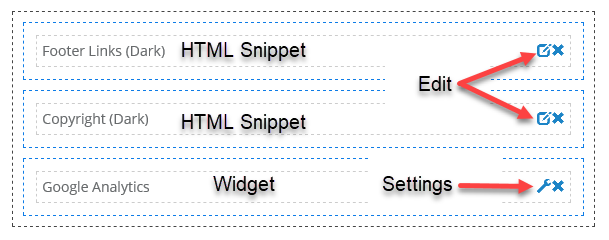
To edit an HTML snippet that is already placed in the board, click the edit icon in the upper-right corner. This will open the in-line HTML editor. Make changes and save if needed.
Note: Widgets are comprised of HTML and application code. They are different from snippets. Widgets use settings that can determine how things will be output when used on a particular page. You can modify the text shown in a widget by editing it from the retail side in design mode.To remove an HTML snippet that is already placed in the board, click the X icon in the upper-right corner.
To place a new HTML snippet into the Widget Board, click the tab with the edit icon as shown in the example below.
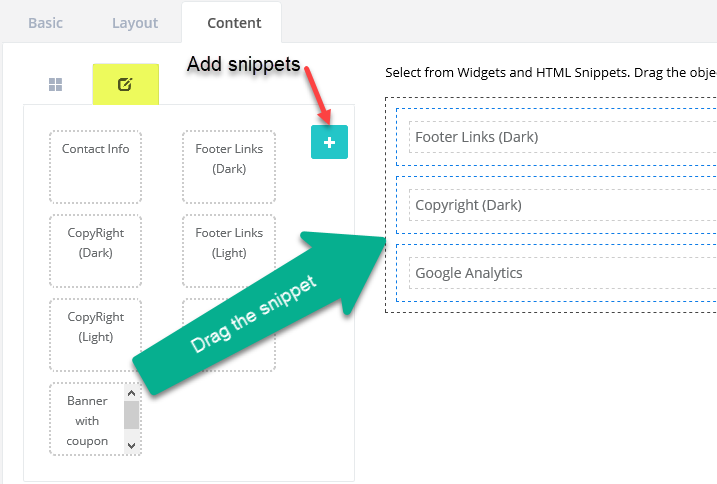
Drag one HTML Snippet into a design area, which is denoted by the light-blue dashed border. Repeat with additional snippets if needed.
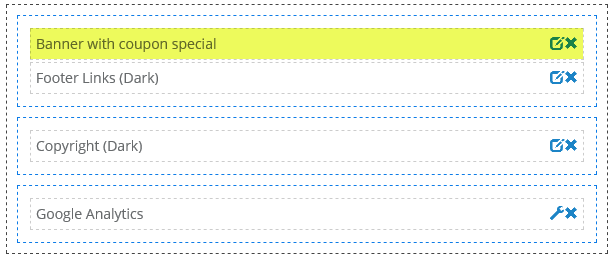
Note: You can create new HTML Snippets from this page. Click the teal colored + button as shown in the screen capture above. You can also adjust the design areas or create new ones, but that is covered with documentation for each of page templates, inner templates, and widget boards.The HTML Snippet falls into place. The screen will refresh showing its placement with the edit and remove icons.
Note: Unlike the retail side, a preview is not available from the admin design pages. If you would like to view the changes, then launch a new browser window for the store's retail page where editing or placement of the snippet is taking place.When finished, click the Save or Save and Close button.
Cancel will return you to the previous Widget Board listing page.