Digital Goods
Table of Contents Show
Manage Digital Goods
Learn how to create digital goods, setup emails for download notifications, and automate license keys. A digital good is associated to a downloadable file. It must also be associated to a product so that it can be purchased. When the digital good is setup, there are several configurations that will allow you to determine when it's available and how it can be downloaded. Accompanying options to view a readme or license agreements will be also available.
Search Digital Goods
From the menu, go to the Catalog > Digital Goods > Digital Goods page.
In the top section of the page, a simple search form is shown.

At the top of the search form is a Quick Search filter. You can click on the individual letters to show only the digital goods with matching names to the letters.
The Digital Good Name search field can be used to find any word part within the digital good.
The File Name search field will search for any files that are assigned to digital goods. If a file has been uploaded, but not yet assigned to a digital good, it will not be found.
When finished entering a partial word or full name, click the Search button to shown the results. An example is shown below.

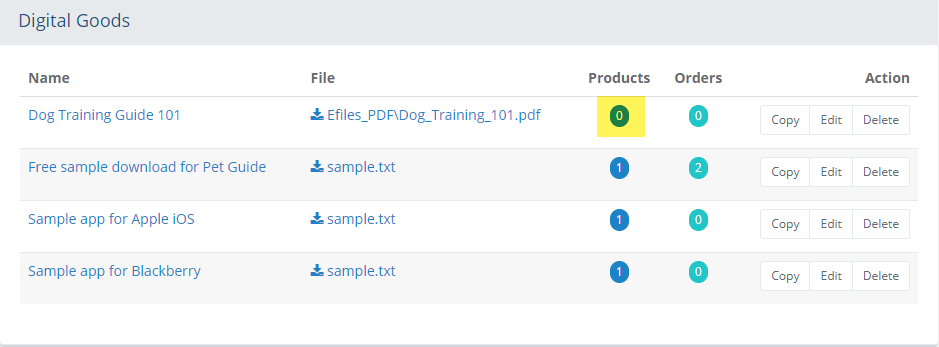
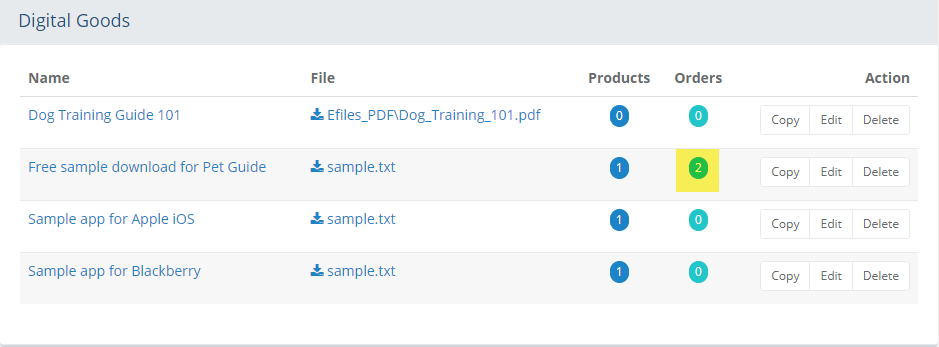
In the first Name column, the digital good is linked with the name that will be shown to customers. Click the linked name to edit the digital good.
The next File column shows the name of the file that will be downloaded when the digital good is purchased. You can click the linked name to download the file.
In the Products column, there is a counter which displays the number of products that are associated to the digital good in that row. If you click on the linked counter, you can assign or remove digital goods from one or more products.
In the Orders column, there is a counter which displays the total number of orders where the product associated to that digital good was purchased. If you click on the linked counter, you can view all the orders where the product that is associated to this digital good was purchased.
From the Action column, you can use the buttons to Copy a digital good. This will not copy the product associations, but only the digital good configuration settings.
The Edit button will bring you to the digital good configuration page.
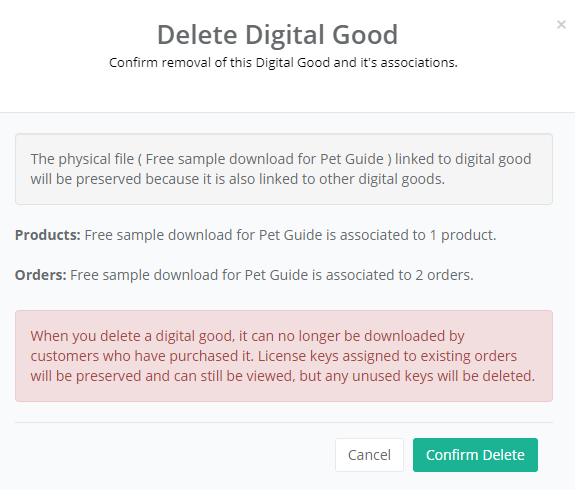
The Delete button will remove the digital good. It will not remove any existing associations to products or orders, but it will no longer be available for download and any associated license keys will be removed.
Add Digital Good
Before you can offer digital downloads to your customers, you need to create a digital good and assign it to a product.
From the menu, go to the Catalog > Digital Goods > Digital Goods page.
Click the Add Digital Good button from the upper right corner of the page. A pop-up will be displayed like the one shown below.
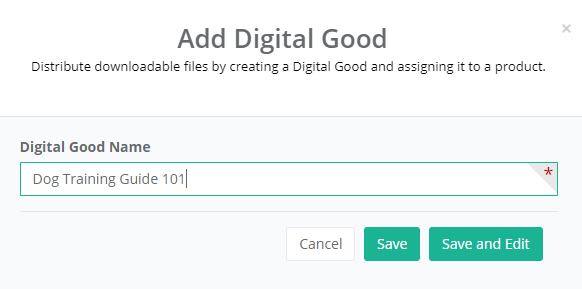
In the field, enter the Digital Good Name. This will be displayed to customers when they purchase the product it is assigned to.
Click the Save and Edit button to continue with configuration. There are four sections. Each are documented below.
Basic Info
In the top-left section, you'll find the Basic Info section. This is where you can add or edit the files that are attached to this good, or edit Digital Good names previously entered.
The first field has the Digital Good Name. This can be changed, but it is a required field.
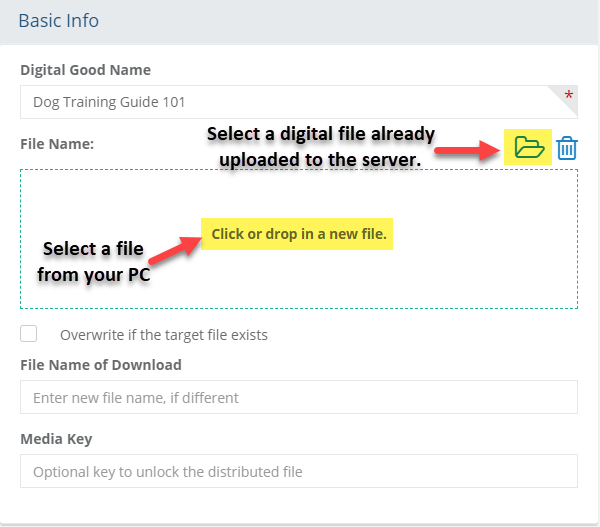
To assign a downloadable file, either drag and drop a file into the box shown, or click on the folder icon to select one from the server. For this example, the digital file has already been uploaded to the server, so we will proceed to select it by clicking the blue folder icon. This will redirect you to the Image and File Manager page.
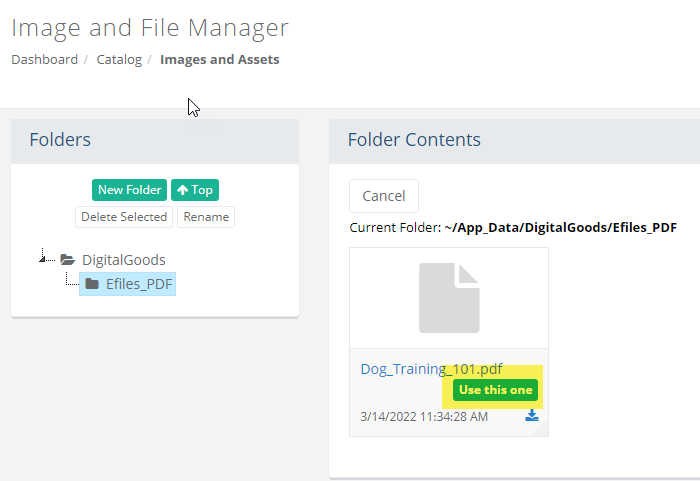
Select the folder which contains the file needed. Find the file by sorting by name, date, or size. Then click the Use this one button to select it.
You will be redirected back to the Edit Digital Good page and the selected file will be shown.
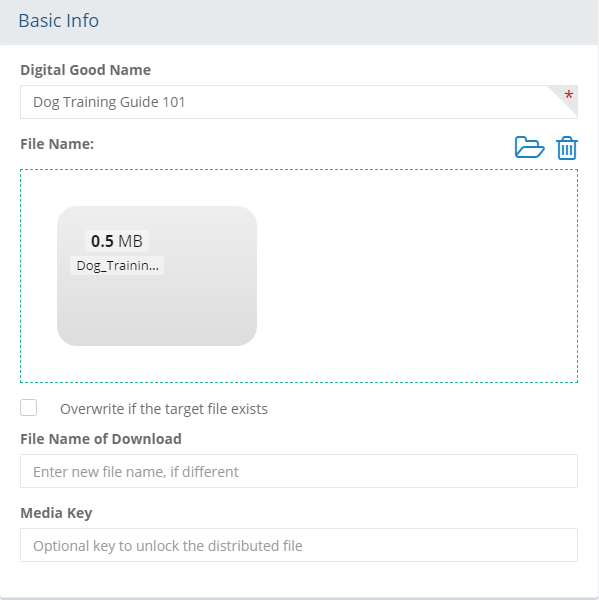
If the file selected already exists, and you are planning update the one on the server, check Overwrite if the target file exists. This option is applicable if you are uploading a file from your local PC to the server and the file already exists.
If needed, you can enter a different name for the downloadable file by using the File Name of Download field. This will change the name of the download when your customers purchase the product. If the field is left empty, it will be the same name as the digital file associated to the digital good.
The Media Key is optional and can be used to provide your customers a password or passcode necessary to open the file being downloaded. This information is provided in the Key Fulfillment email template. For more information, see Email Templates.
After you have completed the first section, click the Save button.
Download Policies
In the top-right section, you'll find the Download Policies section. This section is where you will configure the rules for activating the digital download.
After adding and saving a digital file for this digital good, you can configure the download policies.
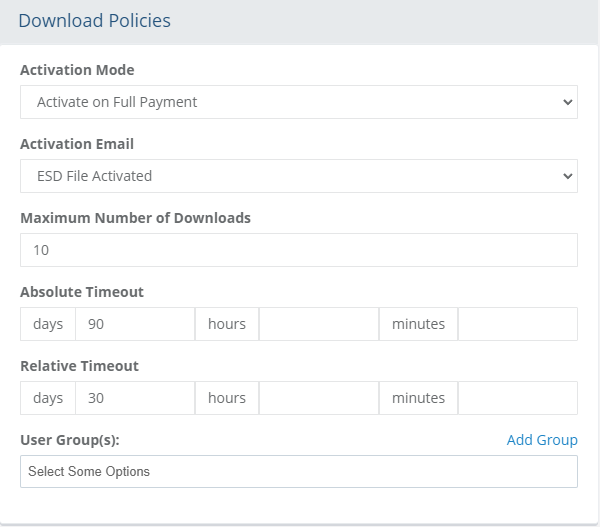
When a product with a digital good is purchased, you must select the time when the file will be available for download, or activated. The Activation Mode has three options available:
Activate Manually - You will need to activate the download through each order if you choose this option.
Activate on Full Payment - This option will make the download available after the order is paid.
Activate Immediately on Order Placement - This option will make your download available through any paid or unpaid order. Be careful not to use this option unless you have secured your digital good download with a license key or you intend for the download to be free.
Activation Email - This is the email that is sent for each Digital Good in the order. It is sent when the Activation Mode setting from above is triggered. The default email from AbleCommerce sample data is named 'ESD File Activated'.
Maximum Number of Downloads - The maximum number of downloads allowed per customer. Leave blank to allow unlimited downloads.
Absolute Timeout - The amount of time, after the order is placed, in which the customer shall have to download the file.
Relative Timeout - If you going to allow more than a single download, then you can set the amount of time between the first download and the expiration of the download.
User Groups - When you assign a digital good to a group, any customer who is a member of that group, will be able to view and download the digital good file. This overrides the activation policies for the order, and no email will be sent.
After you have completed the download policy configuration settings, click the Save button.
TIP: Use subscriptions with groups and digital goods to give your customers easy and automatic access to files for download. Once the subscription expires, the user will be removed from the group, and access to the downloads is no longer available.
License Agreement and Readme
In the bottom-left section, you'll find the section License Agreement and Readme. These features are optional. You will need to create a License Agreement and/or Readme before you can assign it to a Digital Good. If you need to do this now, then click the manage... link(s) before continuing.
After adding and saving a digital file for this digital good, you can update the agreement and readme settings.
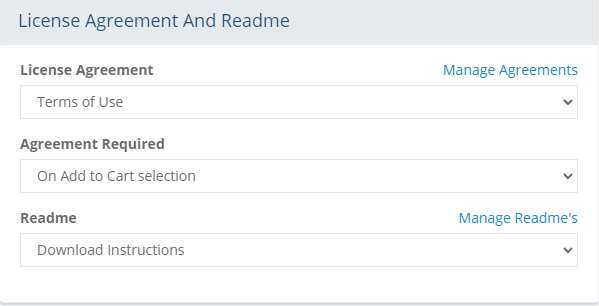
To assign a License Agreement, select a license agreement from the list. For more information, see Agreements.
The Agreement Required option determines when the customer must read and accept the license agreement before downloading.
Not Required - A license agreement is not required in order to download.
On Add to Cart selection - The selected agreement will be presented, and must be accepted, before the user can add the product to the shopping cart.
On Download selection - The selected agreement will be presented, and must be accepted, before the user can download after purchase.
Both Add to Cart and Download - The selected agreement will be presented twice. The user will be required to read and accept the agreement before adding to basket or downloading.
To assign a Readme, select one from the list. This will display a link to the selected Readme file. When clicked a pop-up will display showing the readme text for informational purposes.
After you have completed the agreement and readme configuration settings, click the Save button.
License Key Policy
In the bottom-right section, you'll find the section License Key Policy. Using license keys with your digital goods is an optional feature. You can manage your own license key lists which are available through manual or automated fulfillment.
After adding and saving a digital file for this digital good, you can enable license key management and configure key fulfillment.
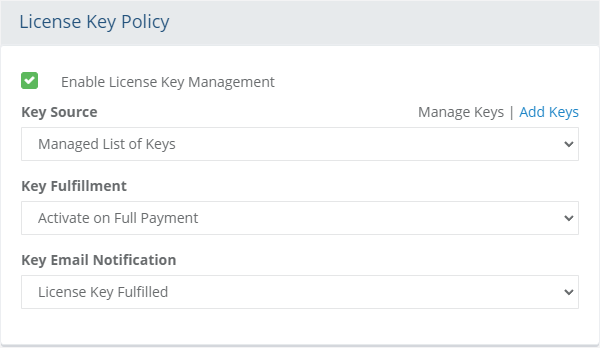
If you want to record, store, or generate a license key for the digital good, check the box Enable License Key Management.
The Key Source setting determines whether the license key will be 1) manually entered by the order admin, or 2) come from an available managed list of keys.
Note: You will need to provide a source list of keys, if using a managed list of keys is selected.The Key Fulfillment setting determines when a license key is distributed by email and/or displayed to the customer with their download.
Manual - No license keys are used. The merchant may need to enter a license key to the order manually.
Auto, When Order is Placed - When using a Managed List of Keys, you can use the automatic fulfillment feature. This setting will use the next available key from your list to display it to the customer when the order is placed. You should make sure to use a payment capture, at time of order, if you are going to use this setting.
Auto, When Full Payment is Received - This option is also available with a Managed List of Keys. When selected, the next available key is displayed when the order is fully paid.
Key Email Notification - If you want to send an email when a license key is automatically used or manually entered, then select a default email from the AbleCommerce sample data named 'License Key Fulfilled' or create your own.
After you have completed the license key policy configuration settings, click the Save button.
Add Keys for Licensing
To use the option for managed list of keys, you will need to add license keys that are specific for this digital good.
Make sure to check the box Enable License Key Management from the License Key Policy section of a Digital Good.
For the Key Source option, select "Managed List of Keys" and save.
Click the link Add Keys to bring up a screen as shown in the example below.
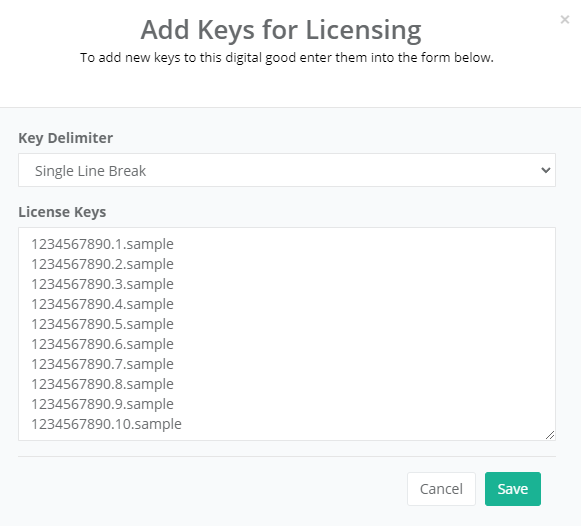
First, select the correct Key Delimiter option which indicates the format of the data being entered.
- Single Line Break: each key is on its own line with a single hard return after each entry.
- Double Line Break: an empty line break is between each key which is also on its own line.
- Comma: all keys are run together with no line breaks. They are separated by a comma.Then, in the License Keys field, enter a list of unique license keys in the format selected above.
Click the Save button to finish.
Manage Keys for Licensing
From the License Key Policy section of a Digital Good, click the manage keys link.
The next page will show all license keys that have been previously entered and unused. An example is shown below.

From the Action column, you can Edit an existing license key or use the Delete button to remove it.
Assigning Products to a Digital Good
After creating a new digital good, you can assign products to it. There are two methods available:
Search and Assign - to assign several products to a digital good, click on the linked number counter in the Products column for the digital good you want to assign.
Edit a Single Product - go to the product editing page, which is available from the Catalog > Products page. Select a product to edit. From the tab named 'Digital Goods', use the Add Digital Good button to search and select one or more digital goods to assign to the product and/or its options.
Search and Assign Products to a Digital Good
From the menu, go to the Catalog > Digital Goods > Digital Goods page to view a list of digital goods previously created.
To assign a digital good to one or more products, click on the linked number counter in the 'Products' column for the applicable digital good.
This will bring you to the Search Products form, which is similar to the one shown below.
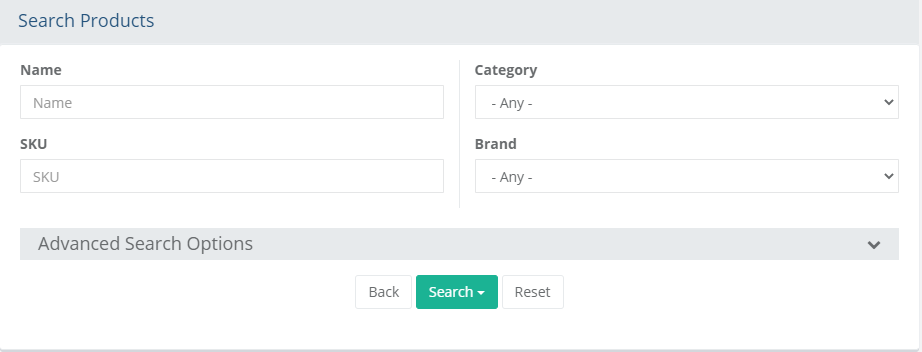
The top section provides common search fields and options that can be used to find a one or more products. If you want additional search options, then click on the Advanced Search Options header to expand a section with additional search criteria. Reference the sample screenshot below:
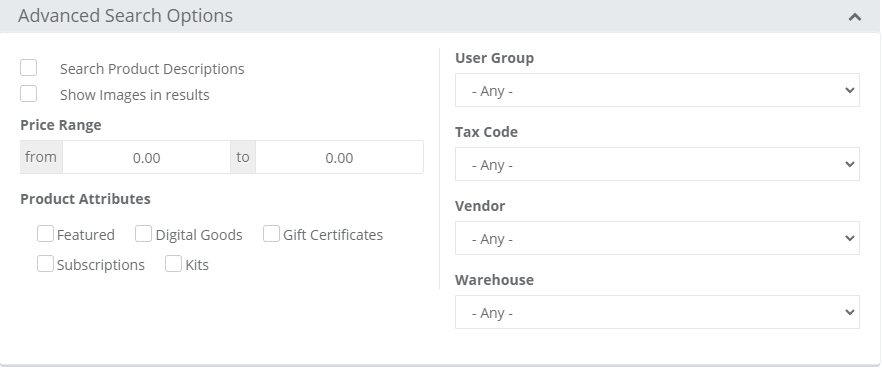
Using the search form(s) provided, find the products that will be assigned to the digital good selected from the prior page.
After entering the search criteria, press the Search button which will drop-down to provide 3 additional filters:
- All Products: results include all products regardless of their assignment to digital good.
- Assigned Products: results include only the products that are assigned to the selected digital good.
- Unassigned Products: results include only products that are not assigned to the selected digital good.
By default, the search results show any products that are currently assigned to the selected digital good. Reference sample below:

You can either use the buttons from the Action column to individually Assign or Remove product associations, or..
Check the box next to one or more products, or check the box at the top of the first column to quickly select all products in the search results.
This will activate the Update button, which will drop-down to provide 2 options: either Assign or Remove the selected products.
The update will take place immediately after selection.

When finished assigning products, click the BACK button to return to the Digital Goods page.
Orders Associated to Digital Goods
From the menu, go to the Catalog > Digital Goods > Digital Goods page to view a list of digital goods previously created.
To view all orders where the digital good was purchased, click on the linked number counter in the 'Orders' column for the applicable digital good.
The next page will show a list of all the orders that were placed with a product that is associated to the selected digital good.

A list of orders is displayed. You can view each and obtain information about the status, date, and order amount.
When finished, use the Back button to return to the Digital Goods management page.
Adding or Changing a Product's Digital Good
From the Catalog menu, go to the Edit Product page for any product. Typically these will be non-shippable products.
Click on the Digital Goods tab to view a page similar to the one below.

Click the Add Digital Good button to view a search form.
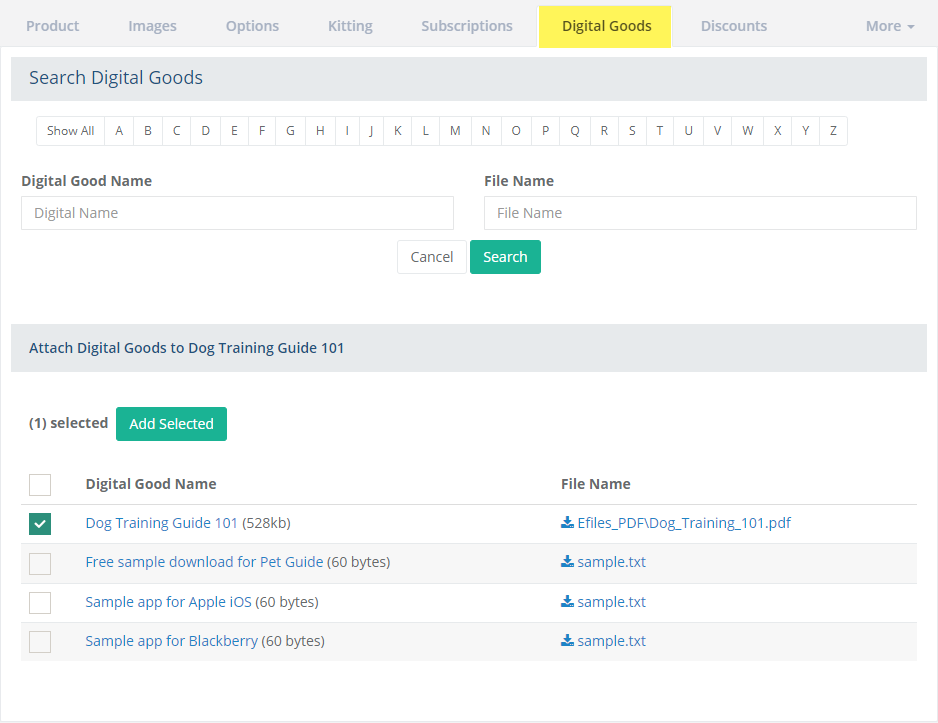
After finding the digital good(s) associated with the selected product, check the box in the first column.
Click the Add Selected button. The digital good(s) will be associated to the product.
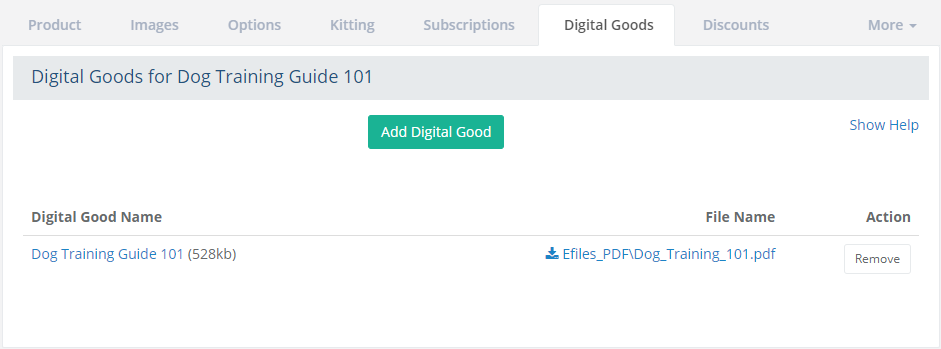
If needed, you can add other Digital Goods or use the remove button in the Action column to remove the association.
Note: Existing orders will not be changed when you add or remove digital goods from a product.
Digital Good products at Checkout
The configuration settings for the Digital Good will decide how the product will appear before and during checkout.
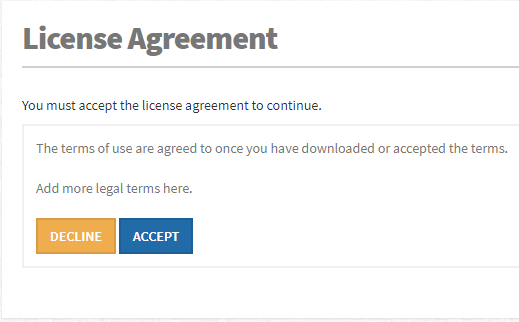
If the license agreement is required on Add to Cart, the customer will need to agree to the terms before purchase. This happens when the Add to Cart button is clicked. The customer will be presented a page with the terms of the agreement and they must select Accept to continue the purchase. If Decline is selected, the product will not be added to the shopping cart.
Here is an example of the License Agreement that is presented to the customer.
In this next example, the digital good has been ordered and fulfilled. The invoice shows the product as a non-shippable item with the price, quantity, and name.
There will be a Digital Goods section which has the name of
the digital file, any associated readme and/or license agreement,
plus a Download button. The download will be activated according
to the configuration settings for the digital good. The number
of downloads remaining is also shown. If the digital good has
automatic or manual license key fulfillment, the information will
appear in the last column.
