Manage Products
Table of Contents Show
Managing Products from the Catalog
The products in your store can be located by two different methods. The first method is by using the Catalog and its category structure. This is useful if you need to reorganize product locations, or if you want to find an item based on his position in the catalog.
To access the store catalog, go to Catalog
> Categories using the menu, or use the short-cut in
the top menu.

The Contents of Catalog
is shown. At the top-level, only categories can be shown. To find
your products, click down through the category structure until
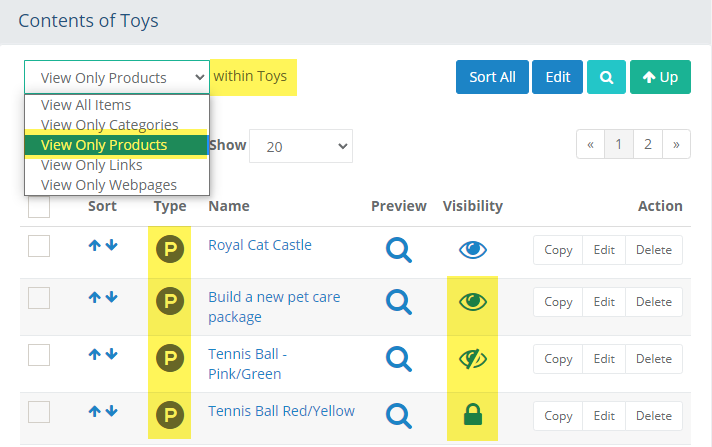
you find the product(s) within a selected category. To filter
items in the catalog, use the selection View
Only Products as shown in this example below.
Products are noted by the circle P in the Type column.
From the Category page,
you can click on the linked product name or the Edit button from
the Action column to make changes.
The magnifying glass icon in the Preview column will open a new window with the product shown as it would be seen by the customer.
Use the up/down arrows in the Sort column to change the ordering of the products as they can appear for the customer as a default sort.
The Visibility column has three settings:
- The eye icon indicates the item is viewable on the storefront pages.
- The eye icon with a slash indicates that the item is only available through a direct link and won't appear in the catalog listing.
- The lock icon indicates that the item is hidden from any storefront listing and cannot be viewed by anyone but an admin.
Managing Products with the Search Form
The most efficient way to find your products is to access the product manager. Go to Catalog > Products using the menu, or use the Products short-cut in the top menu as shown.

This will bring you to the Manage Products page. From here, you can use the search form to find products that meet the search criteria.
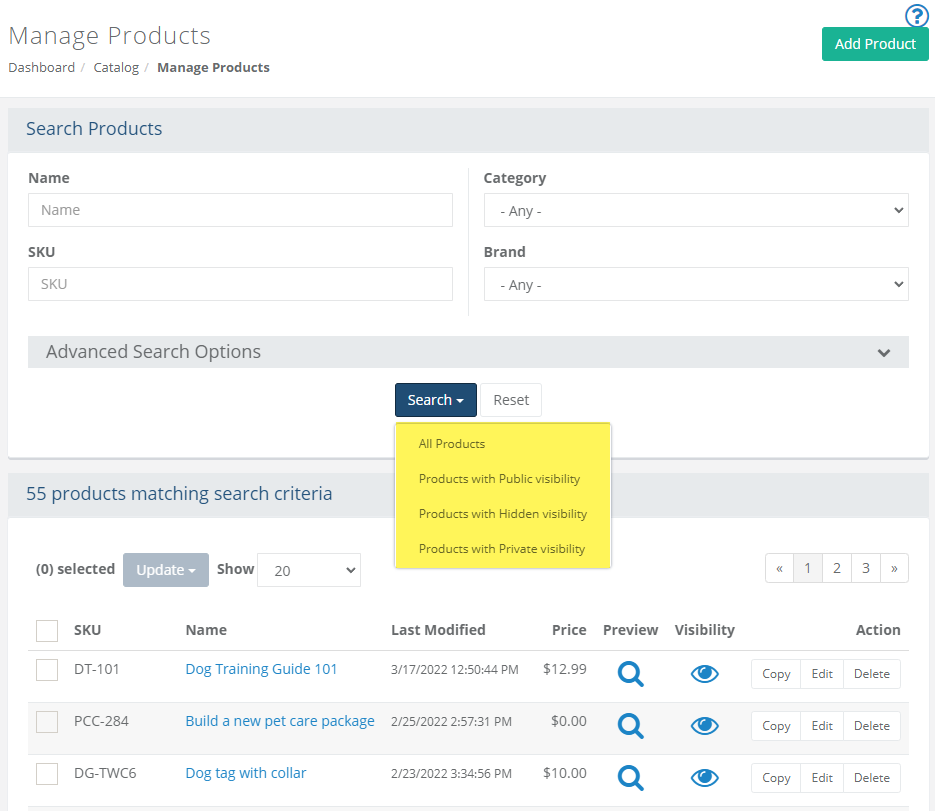
In the top section, the Search Products form is shown in the example image above.
Use the fields to search by Name or SKU. Partial matches are acceptable.
To narrow the search further, select a Category or Brand from the list.
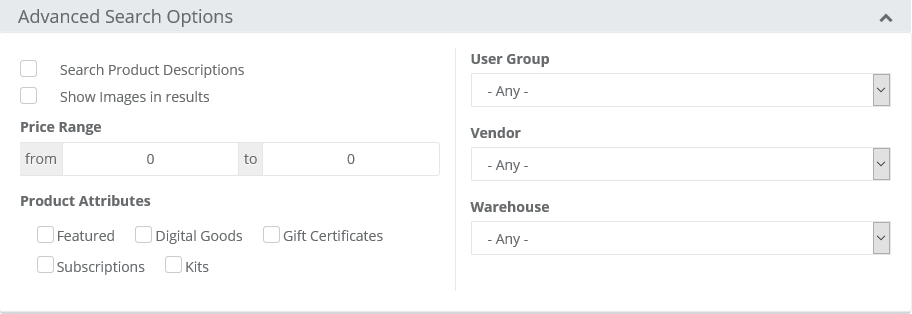
If you want additional search options, then click on the Advanced Search Options header to expand a section with additional search criteria. Reference the sample screenshot below:
After entering the search criteria, press the Search button which will drop-down to provide 4 additional filters:
- All Products: results include all products regardless of their visibility.
- Products with Public visibility: only products that are available to users.
- Products with Hidden visibility: only the products that have a hidden visibility setting.
- Products with Private visibility: only the products that have a locked visibility setting.
The search results show product meeting the criteria. Reference sample below:
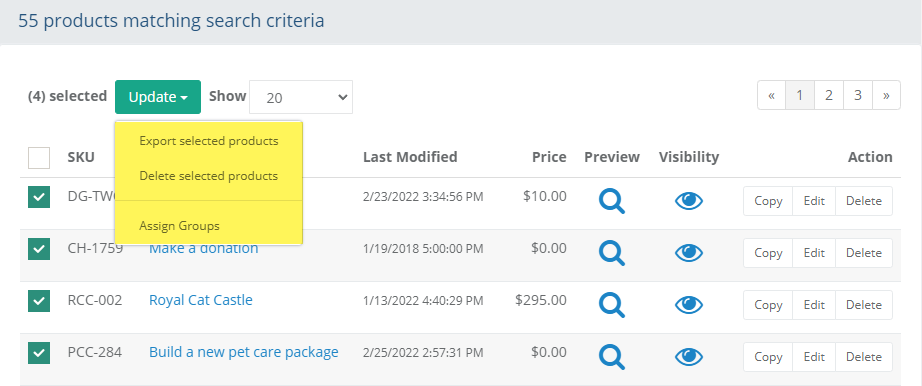
Within the Search Results will be a list of product(s). The SKU and Name column are shown. The product name is linked and will bring you to the Edit Product page. You can also use the Edit button from the Action column.
The Last Modified column shows the date and time that the product was changed last.
The Price column shows the base price of the product. Special prices are not reflected here.
The Preview icon launches a new browser window so you can see how the product will look to the user.
Check the box next to one or more products, or check the box at the top of the first column to quickly select all products in the search results.
This will activate the Update button, which will drop-down to provide some options:
- Export selected products: Use this option to create an export file in CSV format.
- Delete selected products: Use this option to permanently remove the selected product(s) from the catalog. Any products part of existing orders will be retained.
- Assign Groups: Use this option with user groups when you wish to easily assign more than one product to a group.
The update will take place immediately after selection.Use the Reset button to clear the results and start with a new search form.
Copy Product
From the search results, find the product you wish to copy.
Click the Copy button from the Action column. A pop-up window will be shown.
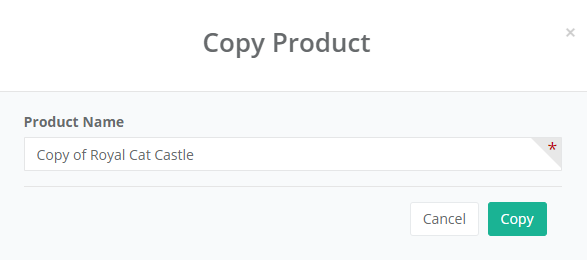
Enter a new Product Name and click the Copy button.
You will be brought to the Edit Product page for the newly copied product.