Getting Started
Welcome to the Quick Start Guide for AbleCommerce.
This guide will explain the first steps taken immediately after installing a new store. There are many features within AbleCommerce that cannot be explained here. Feel free to explore each menu selection to become familiar with your new store. All pages within your Merchant Administration will have quick help text to display as you hover your cursor over the text next to any field, or you can launch the documentation that gives a full length description of the features within any page or section.
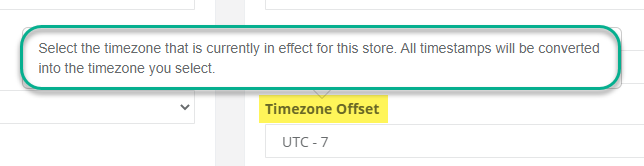
To view a quick description of a particular feature, hold the mouse over the field header as shown in this example:
If you would like to launch the documentation that is directly linked to the page you are viewing, simply click the icon in the upper-right corner of the page:
 (Keep in mind that the documentation is
being continually updated, and there are still pages that reflect
content from the last version.)
(Keep in mind that the documentation is
being continually updated, and there are still pages that reflect
content from the last version.)
During the installation process, you were given a choice to upgrade or populate your store with additional Sample data. For the purpose of this demonstration, the guide's illustrations may reference the sample data in some cases. By choosing to install the sample data, you will have products in your catalog that demonstrate many of the features of AbleCommerce.
Merchant Administration
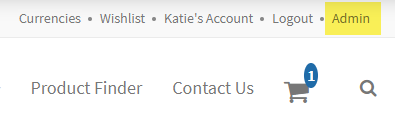
There are two ways you can access your Merchant Administration pages after logging in. The first is by accessing the home page of your new store and finding the Admin link. The second is by accessing the merchant administration URL directly.
Login through your Storefront
After logging in to your store from the customer-facing side, look for the Admin link in the header of any store page. You must be logged in as an administrator to see this link.
Or you can directly access the Merchant Dashboard by going to the /Admin page for the installation. e.g. http://myablestore.com/Admin
After a successful login, you should see the Merchant Dashboard as shown in the example below.
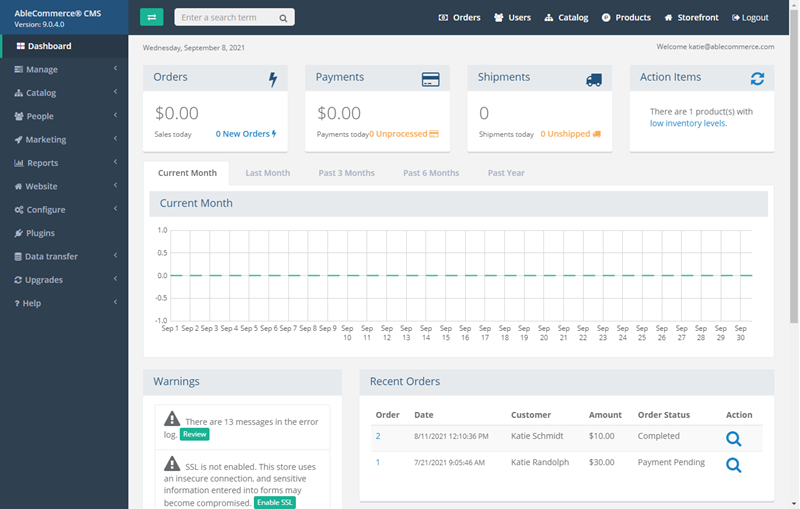
The opening screen will be your main work area. From this page, new orders and any action items will appear.
Click on the Help menu item to view available support resources.
Steps for Launching your Store
Configure basic store settings like a timezone, units, inventory messages, and order settings.
Make sure your store's warehouse address and contact information are correct.
Decide which countries you would like to do business with.
If you plan to ship, you can use one of the integrated shipping services or create your own shipping methods.
Taxes may be applicable. You can create tax rules based on zones, or use one of the integrated tax services.
Setup your payment methods and a gateway if you want to accept credit card payments.
Go to the catalog and create a few categories to organize your products.
Go to the product manager to view and create new products.
Preview your store and place a test order to make sure everything's working.
Now that you have a new order, take a look at the order management features.
Customize your website or add new webpages.
Make sure the store has a live license.
Prior to launch, make sure that you have SSL enabled and that you have set an encryption key.