|
Website > Themes and Display Pages > Setting Themes and Display Pages In this Topic Show |
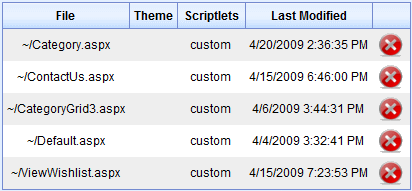
Setting Themes and Display PagesThe Themes and Display page allows you to select your theme and default display pages for your store. If you want to customize a theme or create a new one, please see Managing Theme Files. For an in-depth view of how you can modify AbleCommerce software, you can also reference the AbleCommerce 7 Customization Guide Keep in mind that the values you select here are simply defaults that will be used if there is no alternate display page or theme specified for the individual store page. If you so desired, you could create individual themes and custom displays for every page in your store. ThemesThe files that make up a theme are located in the corresponding sub-folders of the \App_Themes\ directory. After selecting the theme you wish to use for your store, you may want to make a copy of the theme before making changes. You can do this by using the Themes File Manager. A theme is composed of Cascading Style Sheets (.css) and Asp.Net Skin (.skin) files which allow you to customize the look and feel of your store. The purpose of this documentation is not to explain skinning or style sheets in detail. So, if you are not familiar with .CSS files or .SKIN files, you may want to search on Google for some more information. An AbleCommerce theme also includes the images used throughout your store. This includes the logo, add to cart buttons, and much more. You can view the \images\ folder for your selected theme to see which images are available. Replace these images with your own for a custom store appearance. Display PagesIn the root folder of the AbleCommerce program, there are about 35 Asp.Net Server Pages (.aspx) files. These are called scripts. The script file is nothing more than a collection of settings. Each one of the scripts has settings in it to determine which scriptlets will be used when constructing the page. The settings are tied to that file, NOT to a particular catalog object. So, if you wish to have a variety of display options for your products, you may need to create additional display pages. The target script uses it's settings to decide what scriptlets to use in constructing the page. Here is an example of the code that you would see in a display page: <asp:Content ID="Content1" runat="server" ContentPlaceHolderID="PageContent"> <cb:ScriptletPart ID="ContactUs" runat="server" Layout="Left Sidebar" Header="Standard Header" LeftSidebar="Our Departments" Content="Contact Us" Footer="Standard Footer" Title="Contact Us" AllowClose="False" AllowMinimize="false" /> </asp:Content> Notice that the enlarged text within the code above is simply a designation to determine which scriptlets will be used for the layout, header, sidebar, content, and footer. In order to achieve variation (different display styles), AbleCommerce has produced multiple script files out of the box. Each script file has a different default scriptlet setting. That way, when editing products and categories, you will be able to easily select different displays pages to choose from. Customized PagesAfter you modify a display page so that it is using a different layout or scriptlet, it will automatically show up on the Website > Customized Pages menu. This page was designed so you can view any display page changes. It was also created in case you accidentally select two incompatible scriptlets that break the display page. If that happens, click the
Setting the Store ThemeAbleCommerce provides fifteen built-in store themes. Most of the themes are very similar in layout and design. The main differences are the colors and styles used.
Setting the Admin ThemeIf you create your own merchant administration theme, you can select it here.
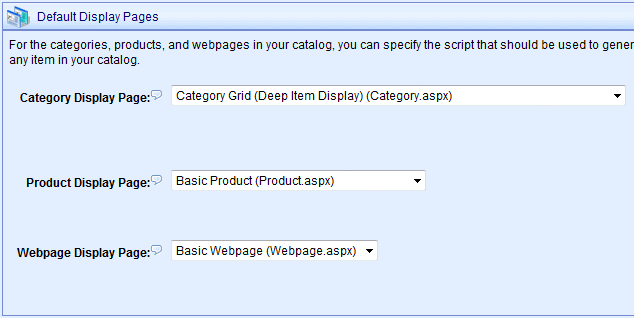
Setting the Default Display PagesFor the categories, products, and webpages in your catalog, you can specify the script that should be used to generate the display page. You can override this default setting for any item in your catalog. When the display page is not specified, the default display page you select here will be used. For each category, product, or webpage, you can individually select a Theme or Display page by going into Edit mode from the retail side. In the example below, the default values will be used. However, you will be able to individually change the Theme and/or the Display page for any page in your store.
|
|
Go to Site Map
|


