|
If you plan to customize the style sheets and images for your store, we recommend that you make a copy of one of the default themes available. You can use the built-in Themes File Manager, as documented here, or you can make a copy of the desired theme folder found under the \App_Themes\ directory.
Themes
The files that make up a theme are located in the corresponding sub-folders of the \App_Themes\ directory. After selecting the theme you wish to use for your store, you may want to make a copy of the theme before making changes. You can do this by using the Themes File Manager.
A theme is composed of Cascading Style Sheets (.css) and Asp.Net Skin (.skin) files which allow you to customize the look and feel of your store. It is not the purpose of this document to explain skinning or style sheets in detail. So, if you are not familiar with .CSS files or .SKIN files, you may want to search on Google for some more information.
A theme also includes the buttons and icons used throughout your store. This includes the logo, add to cart buttons, and much more. You can view the \images\ folder for your selected theme to see which images are available. Replace these images with your own for a custom store appearance.
Add or Delete a Theme
Make a copy of an original theme before you begin customizing your store.
-
From the Themes File Manager page, or from the top-menu, go to Website > Themes File Manager.
-
Find the Copy Theme section as shown below.

-
Select a Source theme to copy. Click here to view a sample of all AbleCommerce store themes. 
-
Enter the Copy Name which will be the name of your new theme.
-
Click the OK button. It may take a moment for the copy process to complete.
-
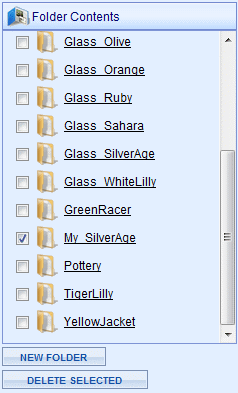
You can view your new theme from the Folder Contents section as shown in the example below.
-
If you want to add a new empty folder, click the NEW FOLDER button and enter a name. Click OK when finished.
-
If you want to remove a theme folder, check the box next the folder and click the DELETE SELECTED button.
Editing Theme Files
View and edit your CSS and SKIN files using the Theme File Manager.
-
From the Themes File Manager page, or from the top-menu, go to Website > Themes File Manager.
-
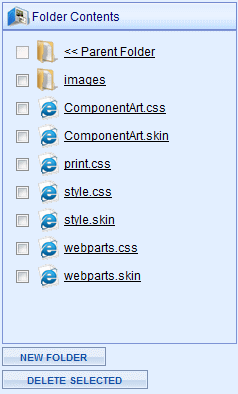
Find the Folder Contents section and click on the linked folder name. The contents of the theme folder will be displayed.
-
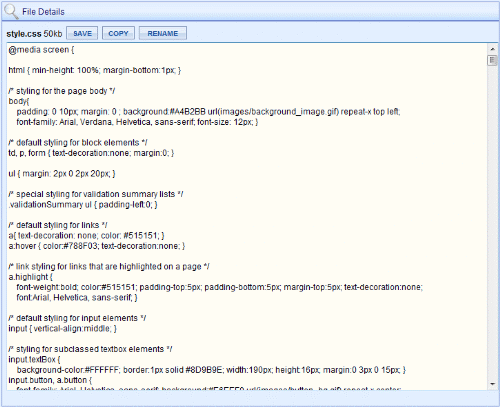
Click on a linked file name to view or edit the file from the File Details section.
-
Each style is annotated so you will have a better idea of the area within the store it is affecting. (See Tip below)
-
After you make changes, click the SAVE button.
-
From the File Details section, you can also COPY or RENAME the file by clicking the applicable button and entering an acceptable name for the file.
|
TIP:
|
Working with CSS files can be time consuming. Typically you would search the source code for a page, find the tag name that you want to change, and then search for the tag in the CSS file.
To make this task easier, there are a couple of third-party Add-ons for Mozilla Firefox. These are simple to use and easy to install.
|
-
-
Go to www.firefox.org and install the latest version, if you don't have this already.
-
With Firefox loaded, go to Tools > Add Ons. Click the Get Extensions link.
-
Search and install "CSSViewer". This add-on will allow you to mouse-over the content of any page and view the CSS properties.
-
Search and install "JSView". This add-on allows you to open any CSS file associated with a page and edit it. (you must have local access to the file to edit)
-
Use CSSViewer to find a style tag and view it's properties, and JSView to edit the style tag in your favorite CSS text editor.
Uploading or Deleting Theme Files
Use the Theme File Manager to upload new files and images, create folders, or remove them.
-
From the Themes File Manager page, or from the top-menu, go to Website > Themes File Manager.
-
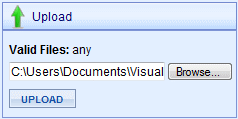
Find the Upload section.
-
Click the Browse button and select a file from your local computer.
-
Click the UPLOAD button. You can allow only specific file types to be uploaded by setting the values from the Configure > Security > System Settings page.
-
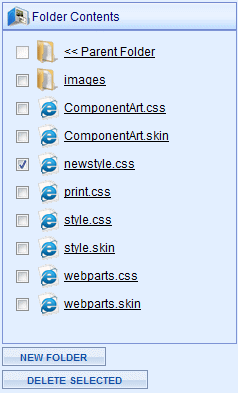
In the Folder Contents section, you should see the file you just uploaded.
-
If you want to add a new empty folder, click the NEW FOLDER button and enter a name. Click OK when finished.
-
If you want to remove a file from the theme folder, check the box next the file(s) and click the DELETE SELECTED button.
Theme File Definitions
-
Images: This is a subfolder with all of the images used by the theme. Images are either referenced in the CSS style, or are linked through the skin file.
-
ComponentArt.css: Contains styling information for ComponentArt controls used in the site. Each ComponentArt control has a lot of styling information, so it helps to keep this in a separate file.
-
ComponentArt.skin: Assigns CSS classes and configures other common properties for the ComponentArt controls.
-
Print.css: Contains styling information specific to printed media. When you print a page, these are the only styles that are applied.
-
Style.css: Contains the bulk of the styling information for a theme. When modifying a theme, this file is generally going to be the only one edited. Every style within is commented to assist in this process.
-
Style.skin: Assigns CSS classes to commonly used ASP.NET controls as well as provides image path information for graphic elements.
-
Webparts.css: Contains styling information used by the on screen page editor.
-
Webparts.skin: Assigns CSS classes and image paths to controls used by the on screen editor.
|


