Catalog
Table of Contents Show
Manage Catalog
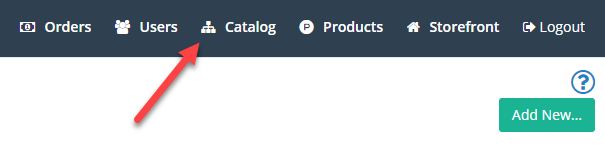
To access the store catalog, go to Catalog
> Categories using the menu, or use the short-cut in
the top menu.
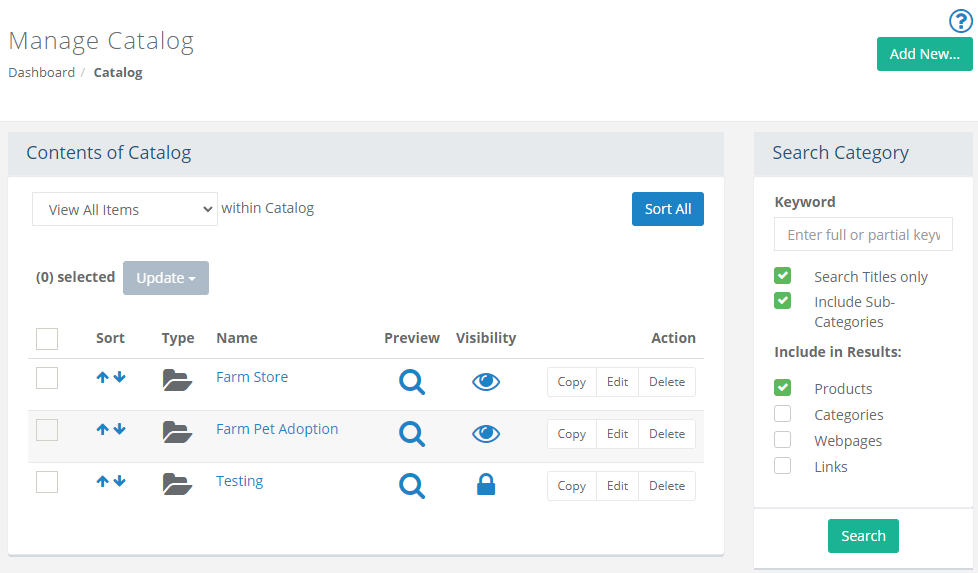
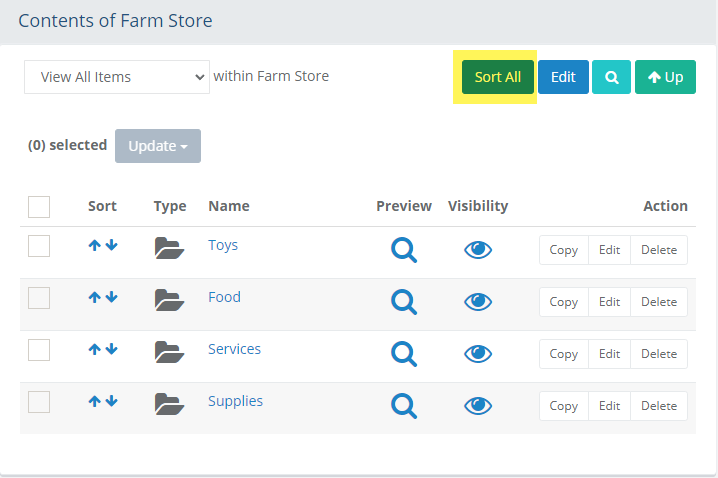
The Contents of Catalog
is shown below. These are only the top-level categories.
Once you have created top-level categories, you can further
organize your products with sub-categories as needed. Since a
product must be assigned to a category, you will never see product
listings at this level.
This is a multi-function page, giving you the ability view and create your category structure, but also to search, move, and manage the entire catalog. This part of the catalog has full management capabilities, and you can view your products as they appear within the catalog or view them from the Product Manager.
Sort All - this button, located in the upper-right corner of the section, is a quick sort of the category list instead of using the individual sort icons.
Checkbox - check the boxes in the first column to select individual catalog items. This will activate the Update button with actions such as change visibility, moving items, or deleting them. For additional information, see the section below on batch updates.
Sort - click the blue up or down arrows to sort individual items.
Type - an icon represents the type of catalog object. A category icon is shown in this example.
Name - The linked name of the category. Click this to view the next level below.
Preview - a magnifying glass represents a preview of the category page. This launches a new browser window to show you the corresponding store page.
Visibility - A visibility setting indicates whether the category is shown in the store, by direct link only, or locked and unable to be viewed.
Actions - to add images and descriptions to the category, you'll need to access the Edit page. You can also Copy or Delete individual items.
NOTE: At the top-level of your catalog, you will only be able to create new categories. Once a new category is available, you can create products, webpages, or links within it.
Add Category
Create categories so you can place products within them.
Go to Catalog > Categories page, or from the top-menu, click on the Catalog link.
Mouse-over the Add New... button from the upper-right corner of the page and select Category to view a pop-up form.
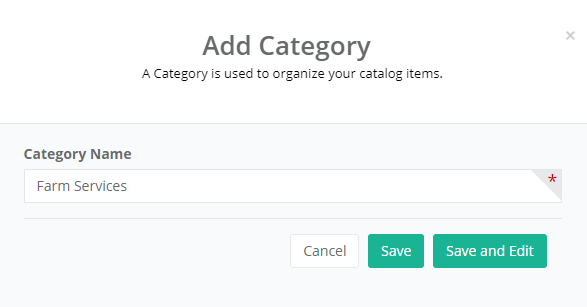
Enter a name for your category in the field provided.
Click the Save button to create a new category.
Your new category will be added and appears below any existing categories at this level.
Sorting Categories
Once the category is created, you can sort the list and arrange each how you would like them to appear in the store.
From the Catalog > Categories page, find the list of categories or sub-categories you want to sort.
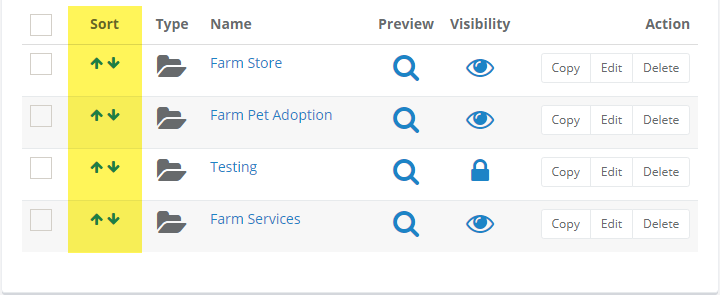
In the Sort column, there are blue up and down arrows which can be used to move a category up or down in the list.
Sorting sub-categories has an additional option to make sorting a large list easier.
Drill-down to the next level of categories to view a page similar to the one below.
In the top section of the sub-category list, there is a Sort All button. Click this button to view a page like the one below.
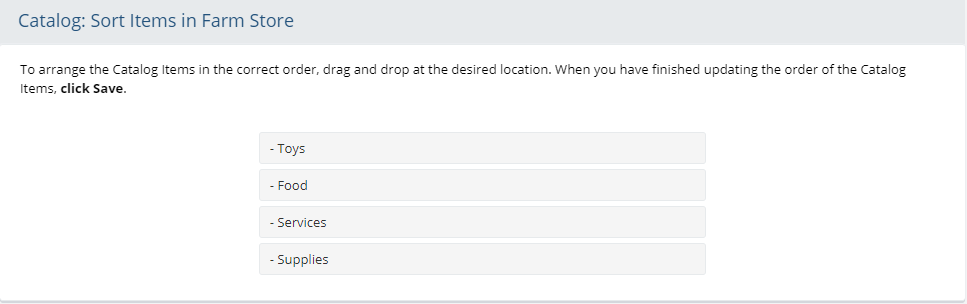
To make sorting a large list easier, drag and drop the category into the desired position.
When finished, click the Save and Close button.
Edit Category
When adding a category, click the Save and Edit button to create and add more information for the category, or...
Click the Edit button from the Action column for the category shown on the Manage Catalog page.

Basic Category Information
From the Edit Category page you will have a number of options available.
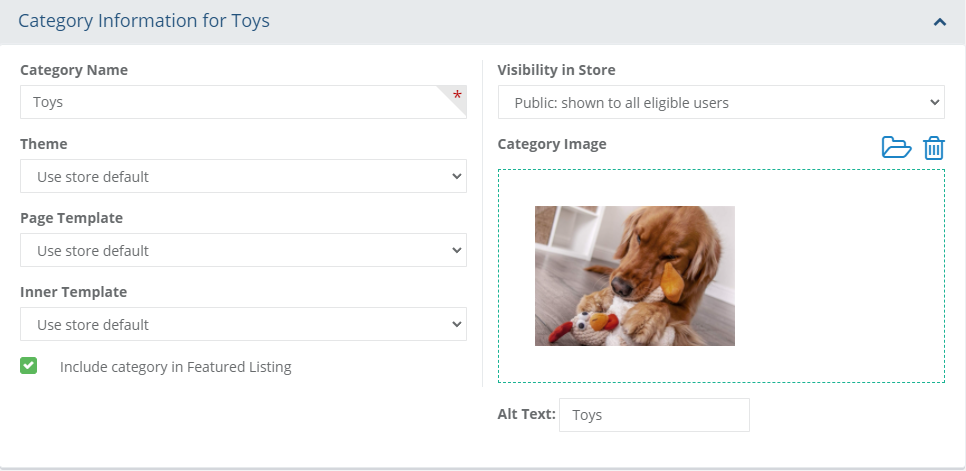
Category Name - This is the name of your category. It is the minimum required to create a new category. Maximum of 255 characters.
Theme - A theme is the style, or "skin" of your store. Generally, the theme is set for the entire store, but it can be applied to individual catalog items such as categories, products, or webpages. For more information, see Themes.
Page Template - The page template is used to display content that will surround the body of the page. It determines the page layout and containers that will hold components and where the inner template will reside. For more information, see Page Templates.
Inner Template - The main content area of the page determines how the content will be displayed. There are several inner templates that can be used for the category pages. Each will have its own settings to give you many different design options.
NOTE: You can set the Page Template and Inner Template default values for all category pages.Include category in Featured Listing - Check the box to include this category when displaying the Featured Categories widget.
Visibility in Store - A setting which determines whether the category will be shown to Public (shown to all eligible users), Hidden (available through direct link only), or Private (unable to view except as an administrator).
Category Image - Select an image from the server, or drag and drop one into this area. The image will be shown when categories are listed, or if using the Category Image widget.
Alt Text - This is the text that can be shown if the user hovers their mouse over the category's image. It is not displayed on the page.
After making changes, click the Save button.
Category Descriptions
From the Edit Category page, expand the section "Category Descriptions".
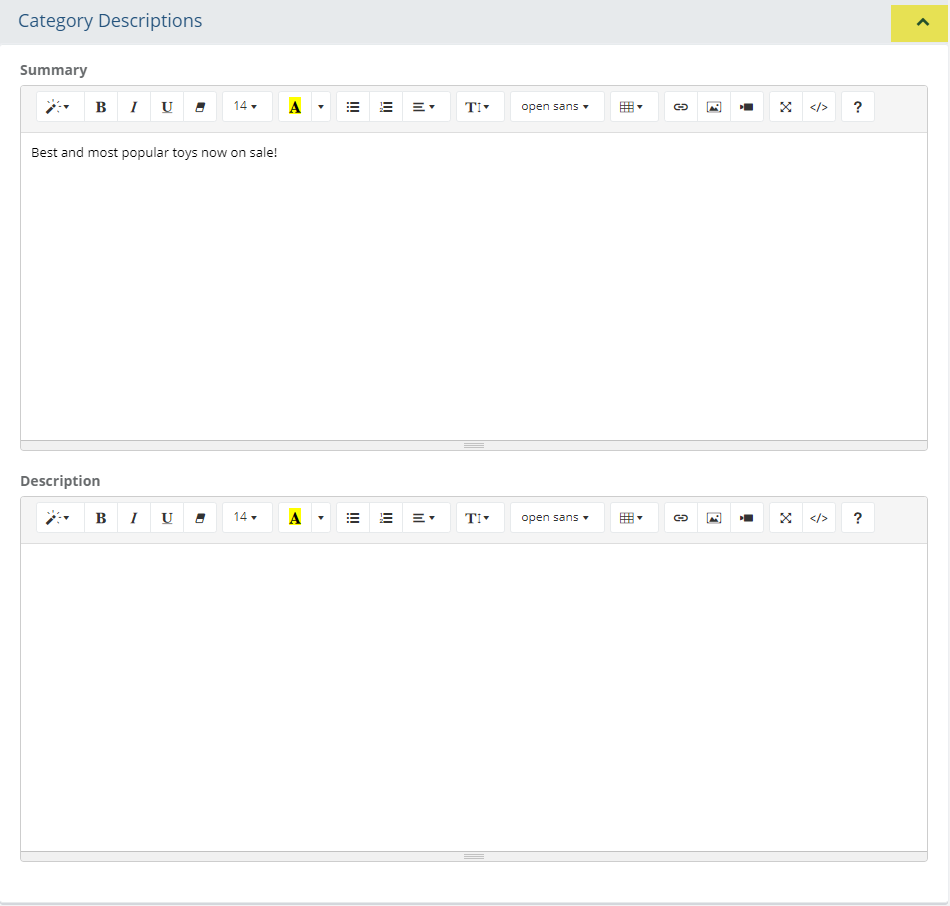
Summary - A short description that displays with the category listing.
Description - A full length description is available. HTML is supported. The description will be shown when using the Category Description widget on the category page.
When finished making updates, click the SAVE button.
Search Engine Optimization
From the Edit Category page, expand the section "Search Engine Optimization".
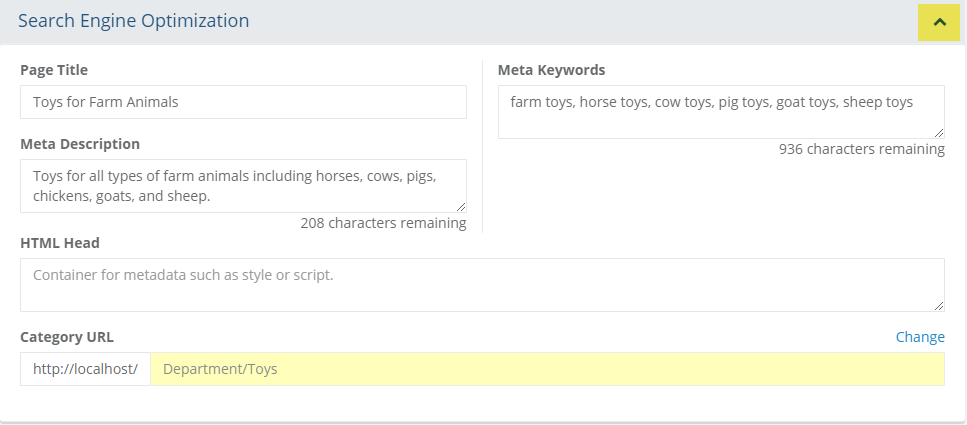
Page Title - If you want to enter a custom Page Title, then you can do so here. Otherwise, the product name will be used as the page title.
Meta Description - Enter a meta tag description if desired. Some search engines will use this as a summary for the page. It is not necessary to enter the html, only the content within the tags.
Meta Keywords - Enter the keywords that describe your page for search engines.
HTML Head - Enter data to be included in the <HTML> <HEAD> portion of the display page. Typically used for SEO purposes or adding Javascript.
Category URL - If desired, use the Change link to enter your own URL, or link to this category. These are relative URL's to the store installation path.
When finished making updates, click the SAVE button.
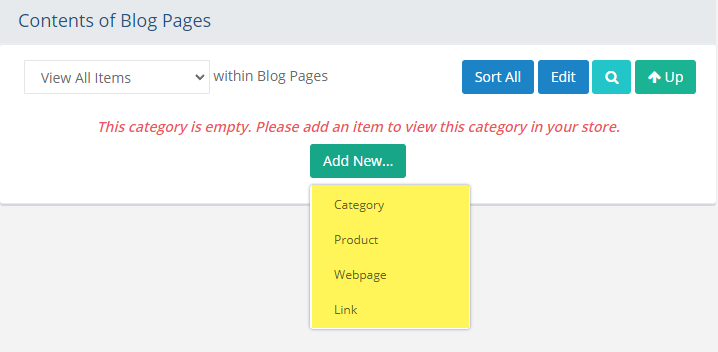
Managing Catalog Items
New products, or other types of catalog objects like sub-categories, webpages, and links must be belong to a parent category. The example sub-category shown below is empty.
From the Contents of [parent Category] page, click the Add New... button.
The drop-down selections include Category, Product, Webpage, or Link.
If you are concerned on how to initially categorize your products, we'll show you how easy it is to move items around to different categories.
Catalog Item Types
The screenshot below shows all four different types of catalog objects. Reference the image below. In the Type column, these are (from top to bottom) category, webpage, link, and product.
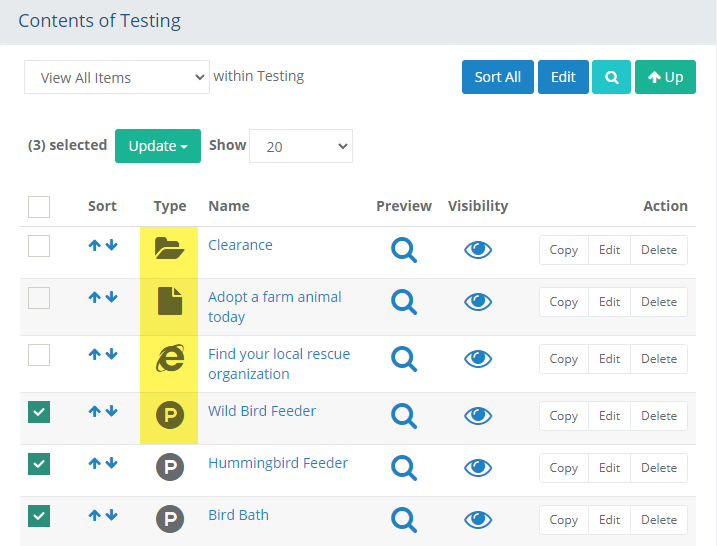
Category - a category is used to organize items in the catalog. You can create as many categories and sub-categories as needed. Category attributes include a name, image, short and long descriptions, and SEO features.
Product - a product has many different display options, attributes and features - too many to list here! Products are always displayed within a category so user navigation can be provided. See Products for more information.
Webpage - this type of catalog object allows you to provide content pages that are part of the catalog system. These have a basic set of features such as page name, image, and html page content.
Link - as the name says, this is a simple way to create lists of links, or URL's to other pages or sites. These links can be targeted to open in a new window. Link attributes include a name, image, and short description if desired.
Batch Actions
From the first column, select one or more checkboxes.
The Update button will activate.
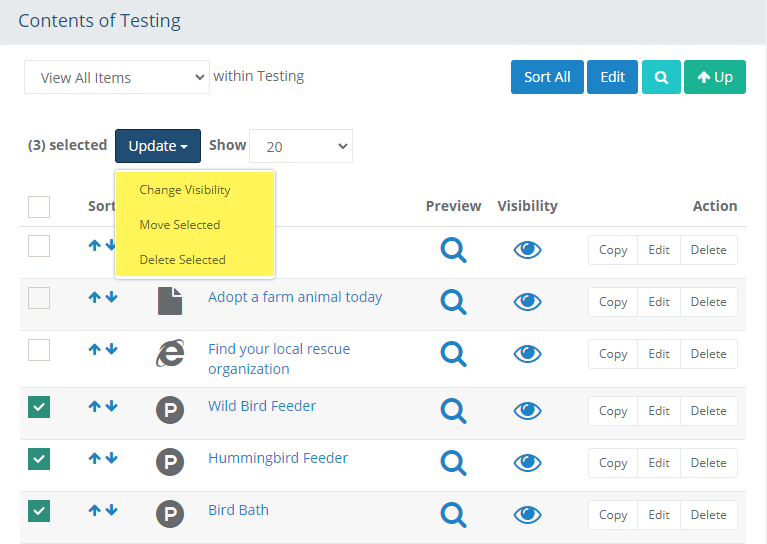
Three options will be available: Change Visibility, Move Selected, or Delete Selected.
Change Visibility
After checking the box next to one or more catalog items, use the Update > Change Visibility option.
On the next page, there will be two sections shown. Reference the example image below.
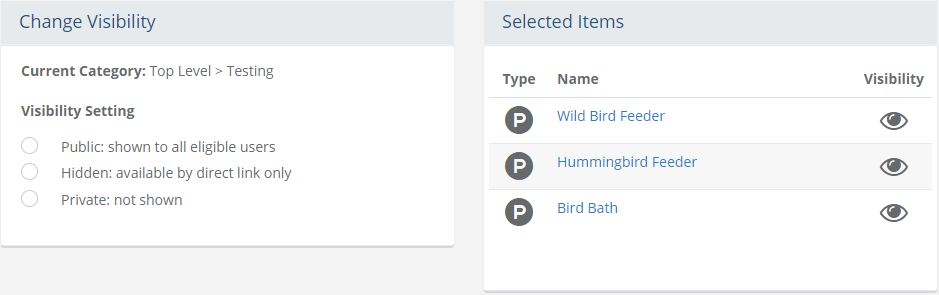
From the left side, the current category is displayed. Beneath that, there are three Visibility Setting options.
- Public: shown to all eligible users; these items will appear in any listings on the retail storefront pages so long as the user group assignment gives access to all users. Most items can be assigned to a user group which gives you more control over who can see what.
- Hidden: available by direct link only; typically this option is used for marketing purposes where you might want to share a URL to a particular item in the catalog but it won't appear in the listings on the retail storefront pages.
- Private: not shown; the item will not appear for any user in the storefront. The only way it can be viewed is by an admin user and they must preview it from the merchant administration pages.On the right side of the page, all the selected items will be shown.
Select a visibility setting and then click the Save or Save and Close button.
Move Selected
After checking the box next to one or more catalog items, use the Update > Move Selected option.
On the next page, there will be two sections shown. Reference the example image below.
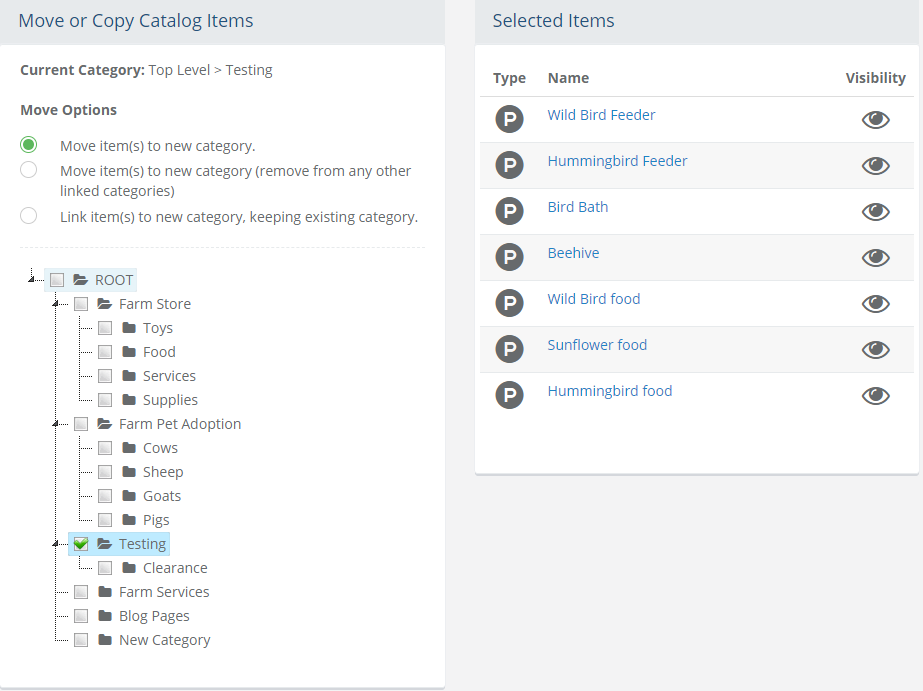
From the left side, the current category is displayed. Beneath that, there are three Move Options. Select a move option.
- Move item(s) to new category: this option will move the catalog item(s) to a new category, and each will be removed only from the current category if they happen to be assigned to multiple categories.
- Move item(s) to new category (remove from any other linked categories): this option will move the catalog item(s) to a new category while also removing them from all other categories in which they are assigned.
- Link item(s) to new category, keeping existing category: this option will add the item(s) to a new category but will not remove them from any other categories that they may be assigned to.On the right side of the page, all the selected items will be shown.
Check a box next to the category that is intended for the item to be moved to.
Click the Save or Save and Close button.
Delete Selected
After checking the box next to one or more catalog items, use the Update > Delete selected option.
A pop-up confirmation will appear.
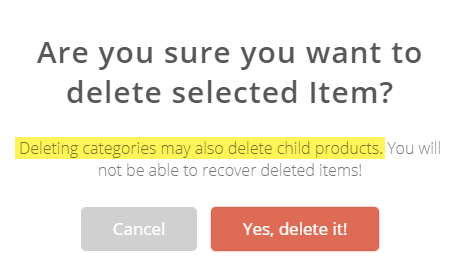
WARNING: If there are any items within a selected category, they will also be deleted with this action.Click the Yes, delete it! button to continue or use the Cancel button to return to the catalog listing.
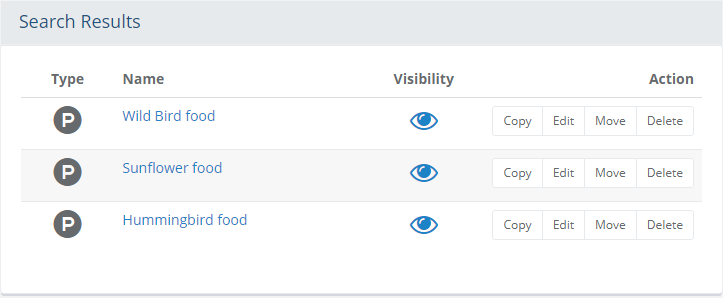
Search Category
The search category form will allow you to filter by catalog item type while also entering a search term.
If needed, enter a Keyword and use the checkboxes to further filter by searching through sub-categories beneath the one you are currently search from.
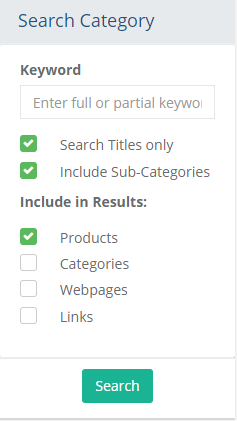
If you want to further narrow the results, you can select Products, Categories, Webpages, or Links. By default, only Products are selected.
Click the Search button.
The next page will appear with the search form and results of your search.
Assigning Categories to a Product
From Product Editing page, click on the Categories tab.

Your category tree will be displayed. You can click the + to expand the sub-categories.
For each category that you want your product to be displayed in, check the box. There is no limit to the number of times a product can be assigned to a category.
Click SAVE when finished.