Australia Post Shipping Service
Table of Contents Show
Australia Post makes it easy to sell online. Explore ways to help elevate your online business and let your customers shop the way they want.
Give your AbleCommerce store a competitive edge...
With record numbers of Australians continuing to shop online, more and more businesses are looking for ways to do eCommerce more efficiently. No matter the size of your business, our products and solutions can help you deliver a winning shopping experience, from notifications, to collection point options, to printer-less returns.
These are some of the ways we’re delivering for Australia.
Australia Post Features and Requirements
Connect your business with Australia Post. Streamline your fulfilment processes and give your customers a better shopping experience with tools from Australia Post.
In order to calculate order specific rates you will need to record the weight of your inventory.
Australia Post requires that your products ship from an origin within Australia. It will not be able to calculate rates for shipments that originate outside of Australia.
Australia Post expects all product measurements to be in Centimeters (cm). Rates will still be calculated if you use a different unit of measurement, but there is additional overhead in converting the measurements. You will have the best performance if you use Centimeters to begin with.
Australia Post supports the following services, Parcel Post, Express Post, Sea Mail, Air Mail, Express Courier.
Installing the Australia Post Plug-in for AbleCommerce
Login to your AbleCommerce installation.
Using the menu, go to the Plugins page.
Use the Filter Plugins option and select the type "Shipping".
Note: Australia Post plugin will be available in the list as shown in the screenshot below.

Click the green Install button in the far right column.
When the confirmation popup appears, click the green Yes, install it button.
Upon completion, click the orange Configure button.
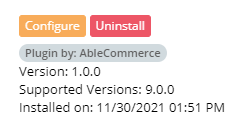
NOTE: Version shown may be different depending on the release of AbleCommerce you are using.
Activate Australia Post
In order to use Australia Post you must agree to include a Terms of Use notice to your customers.
After installing, go to the Configure > Shipping > Carriers page from the admin menu.
Any installed shipping carriers will be available from this page. Click the blue plus (+) button or linked name to continue to the registration page.
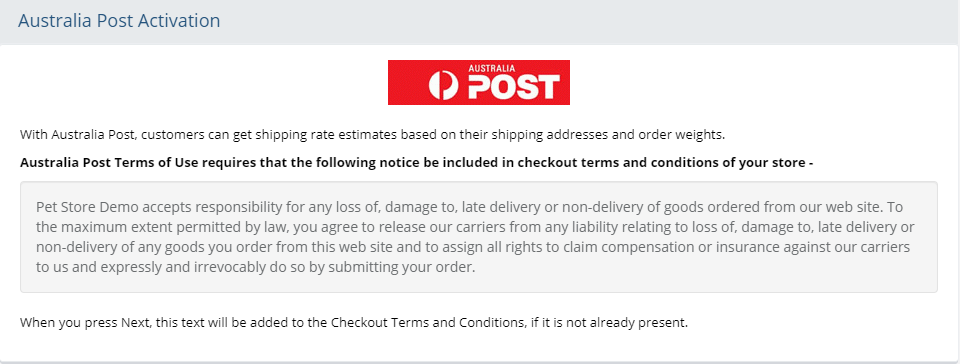
Carefully read the on-screen instructions before continuing.Click the NEXT button to continue to the Configuration page, or CANCEL to quit and return to the previous menu.
A change to the Checkout Terms will be made to your store. See the section below, "Configure Australia Post" to continue.
The Checkout Terms and Conditions feature of the store will be updated automatically. To view or change the text, go to Configure > Store > General and find the section within the Other Settings panel.
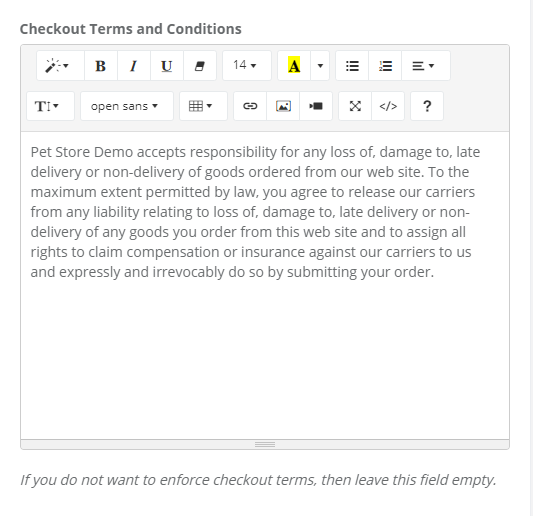
After completing the activation process, you will be on the Configure Australia Post page as shown in the next section.
Configure Australia Post
You must use a warehouse with an Australian address.
From Configure > Shipping > Carriers page, click the EDIT icon for Australia Post. This will bring you to the Configuration page.

The Maximum Weight is this carriers limit for a package. The default value is 20 kgs.
The Minimum Weight is the amount used when the order weight does not meet the minimum.
Check the box to Enable Package Breakup. If a shipment exceeds the maximum weight a carrier specifies, do you want the calculations to break the shipment into smaller packages? This will not create new shipments. It will calculate a single rate based on the total shipment weight, divided, to create two or more shipments within the rate allowance.
e.g. A customer orders 40 kgs of assorted items. The maximum weight for a single package has been exceeded. AbleCommerce divides 40 by 2 for a result of 20 kgs in two packages that are both within the allowed shipping weight. The rates for each package are calculated and added together so the customer will see just one rate for the shipment.
Debug Mode: When debug mode is enabled, all messages sent to and received from Australia Post are logged. This should only be enabled at the direction of qualified support personnel.
Default Log File Location: ..\App_Data\Logs\[gatewayname].logAfter making any changes, click the SAVE button. To complete the shipping carrier setup, see Adding or Removing Shipping Methods in the next section.
Or, you can click the SAVE AND CLOSE button to return to the Shipping Carriers page.
Adding or Removing Shipping Methods
Configuring Shipping Services for Australia Post
You must select the services you want to be available to your customers. Each service (shipping method) is configured separately once it's added.
In the bottom section of the page, you will see the Shipping Method menu. This is a list of all services offered by the provider. You should review the entire list of shipping services offered and decide which ones you want to make available as shipping options in your store.
You can use the buttons from the Action column to individually Add or Edit the shipping method.
Check the box next to one or more shipping methods, or check the box at the top of the first column to quickly select all methods.
This will activate the Update button, which will drop-down to provide 2 options: either Add or Remove the selected methods.
The update will take place immediately after selection.
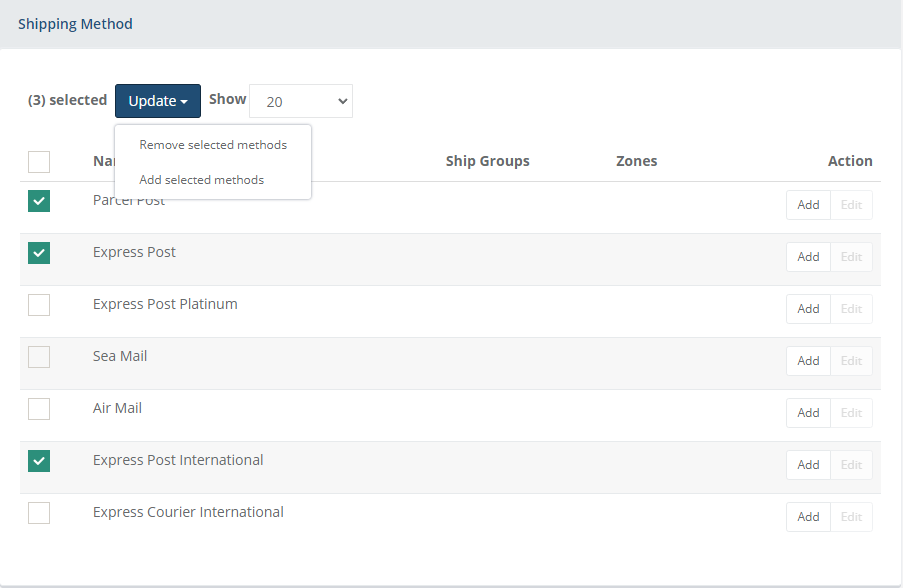
In this example, we will add and configure the "Express Post International" service. Check the box next to all others you want to offer as a shipping service.
Using the Update button, select the option Add selected methods.
The selected shipping services now appear at the top of the list and each will be linked for configuration.

To remove an individual shipping method, use the Remove button in the Action column, or you can select multiple methods by checking the box in the first column and activating the Update button which will give you the option to select Remove selected methods. The update will take place immediately after selection.
Configure a Shipping Method
Each shipping method will use its own configuration settings. To configure a shipping service, click the EDIT button to view the Configure page.

The above example shows the default configuration values for all shipping services that are added.
Change the Shipping Method Name if needed. This is the name that will be displayed to the customer and the merchant on all invoices and receipts.
Note: Most third-party carriers do not want the names of their shipping methods changed.If these shipping charges are taxable, then select a Shipping Tax Code. Make sure you understand the tax laws according to your local tax authority.
Taxes on shipping charges are combined with any other taxes calculated for the shipment.Use the Handling Fee field to include a charge for handling or processing. The handling fee can be a fixed amount, percent of the shipping charge, or a percentage of the shipment total. After entering the amount, select one of these three options available.
There is a display option to either show the Handing Fee included in the shipping cost, which will hide the amount in the shipping cost. Or to show the handling fee separately, where it will be displayed as a separate line item on the invoice. If you show the handling fee separately, you may then select a Handling Tax Code if you are required to collect tax on this type of charge.
The Minimum Purchase field is the designated minimum value of a shipment before this shipping method will be available. Until this limit is met, the shipping method will not display.
A minimum purchase value applies to the total of each shipment, not the total of the order.The Maximum Purchase field is the designated maximum value of a shipment before this shipping method will be available. If this limit is exceeded, the shipping method will not display.
A maximum purchase value applies to the total of each shipment, not the total of the order.When finished making changes, be sure to Save.
Additional Settings
There are three optional configurations which can be used to filter shipping methods that are shown to the customer.
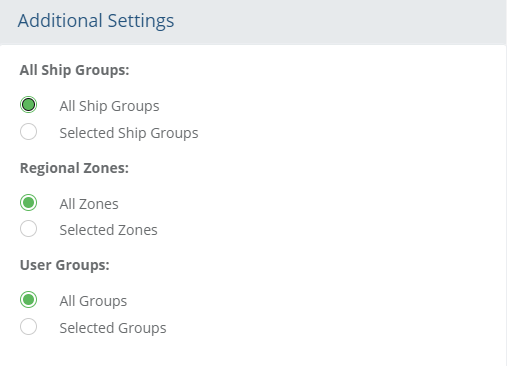
These additional settings allow you to display available shipping methods according to the shipping groups (used for custom shipping conditions and locations where products are shipped from), the zones (regions the products are shipped to), and/or any groups that a customer is assigned to. By default, every new method added will use all available destinations, special shipping conditions, and user groups. To make shipping methods explicit to any of these criteria, follow the steps given below.
Shipping with Ship Groups
Ship Groups are typically used for products that have special shipping requirements, such as perishables, oversized, or overweight. You can also define the shipping origin.
To setup Ship Groups, go to Configure > Shipping > Ship Groups using the menu.
If this shipping service needs to be applied to a specific warehouse(s), then you will need to setup Ship Groups first. The warehouse determines the origin of shipping, and ship groups allows you to choose specific warehouses and define which shipping methods and products will be available to them.
A warehouse determines the shipping origin. All Australia Post services must use a warehouse with an address in Australia.
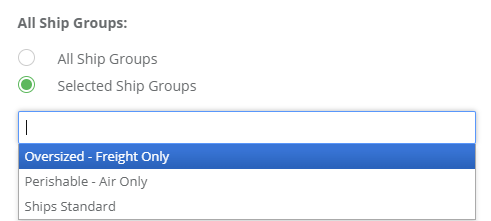
If this shipping method will be allowed from all locations and types, then keep the default All Ship Groups option selected.
Shipping with Zones
Zones allow you to configure specific places for use with many features, including shipping methods.
To setup Zones, go to Configure > Regions > Zones using the menu.
If the shipping service applies to a specific Zone(s), select it from the Selected Zones list.
A zone determines the shipping destination.
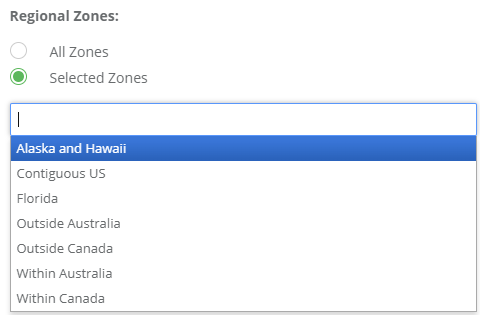
If the shipping service applies to all ship to locations, then keep the default All Zones option selected.
Shipping with User Groups
When you apply a shipping service to a user group, then it will only appear for the users who are logged in as members of that group.
To setup User Groups, go to People > Users > User Groups for regular customers. To setup User Groups for administrators only, go to People > Admins > Admin Groups.
If the shipping service applies to a specific User Group or Admin Group, select it from the Selected Groups list.
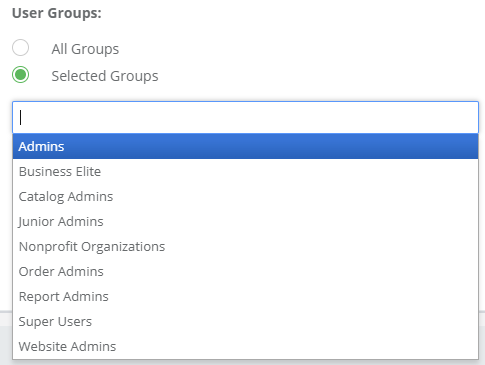
If the shipping service applies to everyone, admin and customers alike, then keep the default All Groups option selected.
When finished configuring this shipping method, press the Save button to continue.
Configuring Additional Services for Australia Post
At the bottom of the Configure Shipping Carrier page, there will be a list of service names for the selected carrier.
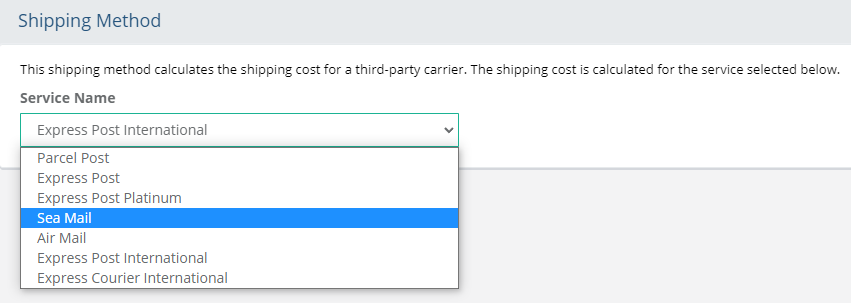
When finished configuring a shipping method service, you may want to Save and then select another service type to configure.
After you have completed all configurations, press the Save and Close button to return to the list of all methods. This will include all shipping methods for all carriers any custom methods you have created.
This will bring you back to the Shipping Methods page which displays all configured shipping service types available for the store.
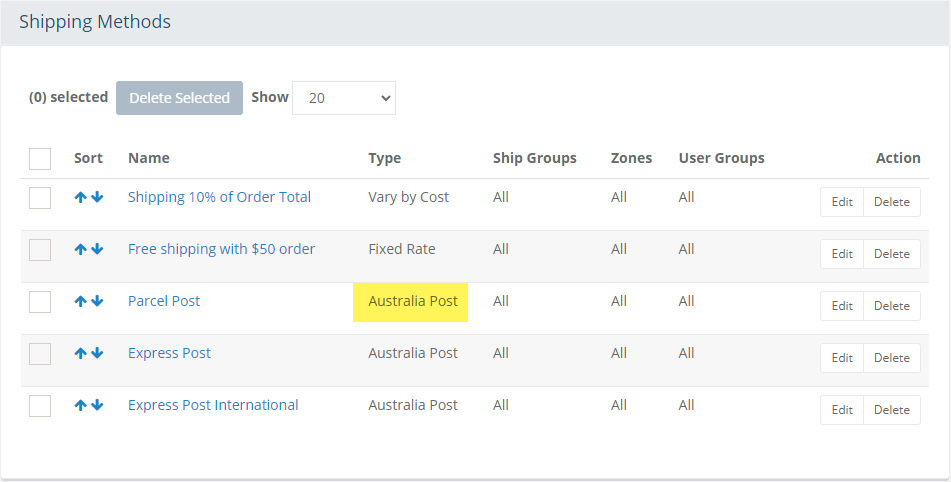
The Type column displays the shipping service and any custom methods in place.
Additional columns are shown for Ship Groups, Zones, and User Groups. Each of these features are documented separately.
From this page, you can add, sort, remove and configure all shipping methods.
To add a new shipping carrier, go to the Plugins page using the menu. You may have as many services and combinations of shipping carriers as needed.
Troubleshooting Techniques
Use this quick guide if the shipping methods are not appearing during the checkout process.
Confirm your product(s) are shippable and have a weight. Some carriers require dimensions as well. This information is found within the Shipping and Tax section of the Edit Product page.
Confirm you warehouse (the shipping origin) has a valid address for the carrier. Go to Configure > Shipping > Warehouses to check address information. On the same page, you will be able to find all the products assigned to this warehouse.
Confirm you are shipping to a valid address for the method. For example, some shipping methods will only appear if they are within a particular country or state. Another example, ground transportation is not available to Hawaii from the mainland United States.
If the carrier requires an account number or key, confirm the information is correct from the applicable service carrier's configuration page. This information is found under the Configure > Shipping > Carriers page.
Check the available shipping services you have configured and make certain they have the correct ship groups or zones defined for the package and address delivery. This step applies if you have configured special shipping situations using Ship Groups and/or Zones.
From the configuration page of the carrier, there is a checkbox to enable Debug Mode. Only use this feature if all steps above have been confirmed. Once debug is enabled, test a shipment calculation through the checkout process. This will log an entry.
Then you will need to access the debug log file which is located on the server in the following location ...\website\App_Data\logs\*carrier name*.log
Open the file and carefully review the data that was SENT and RECEIVED. In the received response, there should be a message or error indicating the reason the shipping method did not calculate on the shipment received. If needed, provide this information to technical support.
When finished troubleshooting, make sure to turn OFF debug mode.
Successful Shipping Rates
When the shipping carrier is setup correctly, the user should see the selected shipping methods and rates on the /Checkout/ShipMethod page:
