Marketing > Discounts > Add Discount
In this Topic Show
Add Discount
Before creating new discounts, you should understand a little more about the Discount Mode setting. This is a global store function, meaning that it needs to be set prior to you creating new discounts. Please see the Configure > Store > Discounts Settings page for more information.
Add Volume Discount
-
From the Manage Volume Discounts page, or from the top-menu, go to Marketing > Discounts.
-
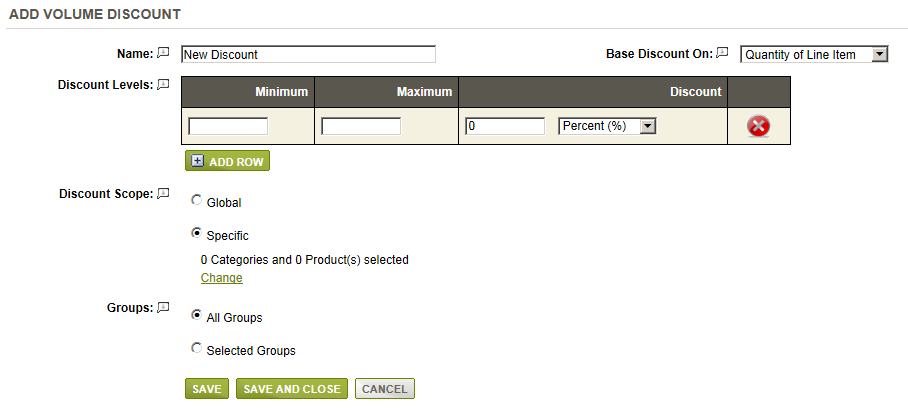
Click the ADD DISCOUNT button to see a page like the one shown below.
-
Enter a new Name for your discount. This will be displayed to your customers.
-
Select a Base on setting:
-
Quantity of Line Item - when the discount is based on the number of items in the basket.
-
Total Price of Line Item - when the discount is based on the total price of line items in the basket.
-
-
Create your Discount Levels by adding the minimum and maximum values required for the discount.

-
Enter the Minimum and Maximum amounts. The value can be a quantity or amount.
-
Enter the Discount amount.
-
Choose whether the discount is a percentage (%) or fixed amount off.
-
Repeat as needed to create the discount matrix.
-
-
Click the ADD ROW button to create each new discount level.
-
If you need to remove a row, click the red delete icon.
-
A blank field indicates the value has no limit.
-
-
Set the Discount Scope:
-
Global - sets the discount so it applies to all products in the store.
-
Specific - sets the discount so it applies to one or more categories or products.
-
-
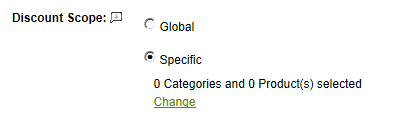
If you have chosen a discount that will be applied to Specific categories or products, click the [change] link to view a page similar to the one shown below.
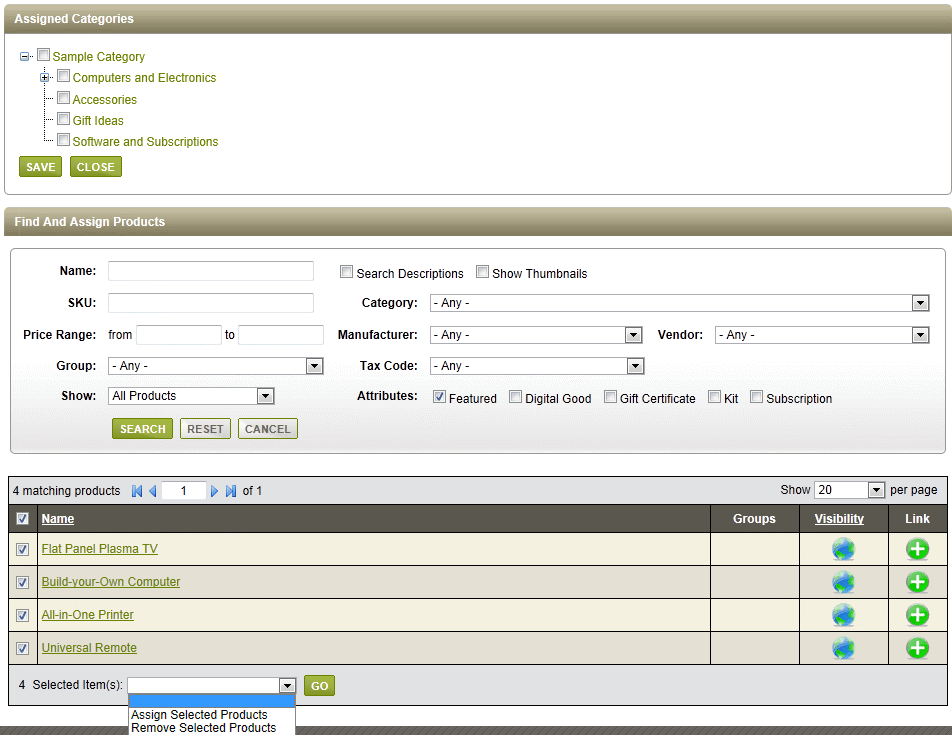
By default, you will see any Assigned Products that are currently associated to the Discount.
Using the detailed search form provided, you will be able to easily find more products that can be assigned to this Discount. -
Type in some search criteria, or select a filter, then click the SEARCH button
-
In the results section below, you can check the top box in the first column to select all product results, or select individual items as needed.
-
To associate product(s) to the Discount, simply click the green PLUS icon in the Link column.
-
Or you may select one or more products using the checkbox, and then use the batch options to Assign or Remove Selected products to/from the Discount.
-
You can remove the association by clicking the red delete icon.
-
When finished assigning products, click the CANCEL button to return to the Edit Discount page.
-
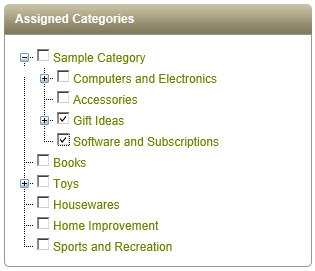
Additionally, you can select one or more categories by clicking the checkbox next to each one you wish to offer discounts on. The discount will apply to all products in the category unless they have an overriding discount.
-
When you have completed the selection process, click the SAVE button, or CLOSE button to return to the Edit Discount page.
NOTE about Category Discounts: If a discount is defined on a category, then whenever products under that category (including its sub-categories) are purchased together they are grouped together for the application of discounts. It does not mean that if a discount is defined on more than one category, all products from all such categories will be grouped together. If you desire to have discounts applied to the products grouped from more than one category, then you will need to define the discount on a parent category of these categories.
See the Configure > Store > Discount page for more information about the Discount Mode setting which can change the behavior of discounts.
-
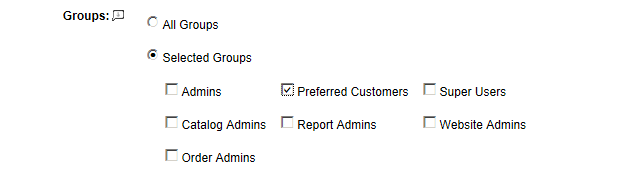
The last discount option allows you to select Groups.
-
If you choose All Groups, then any user may receive the discount available.
-
If you want the discount to be valid for only users that are part of a Selected Group, then check the box next to the name of the group it is valid for.
-
Click the SAVE button when finished. For each discount you create, it will automatically appear on the product detail page when applicable.
Adding a Volume Discount to a Product
You can assign discounts to products from the Discount page directly, and you also have the option to add existing discounts to products from the product editing page.
-
Go to the Edit Product page, from Catalog > Browse > Selected Category > Selected Product.
-
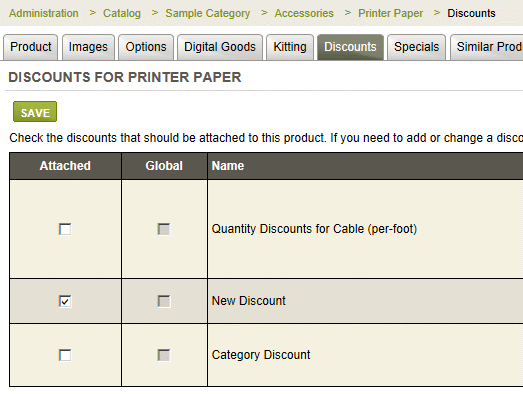
From the Edit Product page, click on the Discounts tab.
-
You will see all the available discounts that have been created.
-
Simply check the box next to the discounts you want to attach to this product.
-
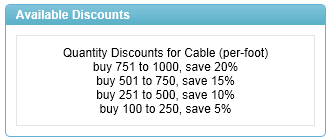
Click the SAVE button when finished. From the storefront, the available discounts will be shown as in this example.
![]()
Go to Site Map