Catalog > Add Product Kit
Add Product Kit
Use your products to create unique Kit configurations. Your Kits can be a simple assortment of items for a single price, or they can have several product choices where the price is based on the options selected.
Kits are setup using Components. These make up the display options for its member products.
Adding a New Product Kit
-
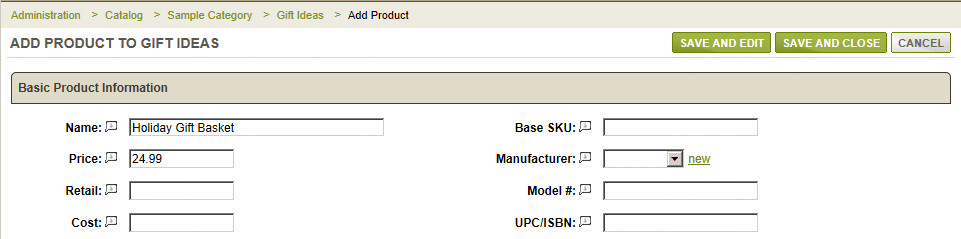
Find the Add Product page, create a new product for your Kit.
-
Enter a Name for your product Kit.
-
Enter a Price for the product Kit, unless you want to use the price of the products individually.
-
Click the SAVE button.
Before you can finish creating the Kit, you will need to have already created the products that will make up the Kit.
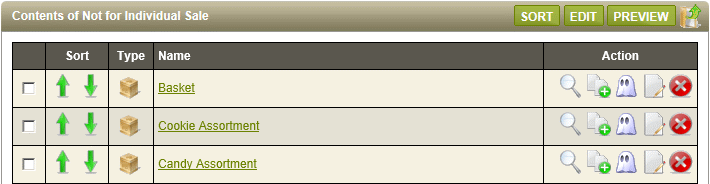
For this demonstration, we'll be using the three products shown above. Notice the Visibility setting is Hidden, which means that these products are not available for sale individually. You can certainly setup Kits to use products that are visible and offer additional product selections to your customer.
Adding a New Component
-
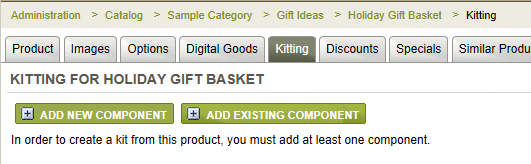
Using the product that you want to be the Kit, click on the Kits/Bundles tab from the left-column.
-
Click the ADD NEW COMPONENT button to view a pop-up screen like the one below.
-
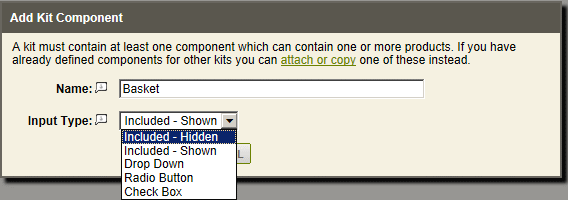
Enter a Name for this type of Component. Afterwards, you'll be able to one or more products.
-
The Input Type determines how the products within this component are going to be displayed or used.
Included Hidden - product(s) will not be shown to the customer, but they will be shown to admins, and on the packing slip.
Included Shown - product(s) are displayed to the customer. If the products included have options, they will available to the customer as additional selections.
Drop Down - use when you want to display a drop-down list of product selections. Only one option can be made.
An additional Header Option field is included for the default value. This would be a selection of nothing at all.
Radio Button - use when you want to display a list of products with a radio selection next to each. Only one option can be made.
An additional Header Option field is included for the default value. This would be a selection of nothing at all.
Check Box - use when you want to offer a list of products with a checkbox next to each. Customers can pick all or none.
Each type of input selection will change how the products are presented to the customer. -
Click the NEXT button to return to the Kitting page.
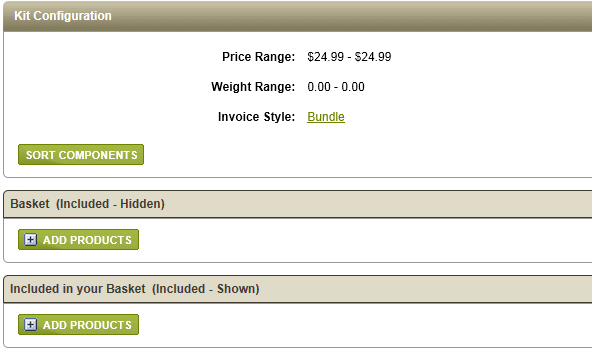
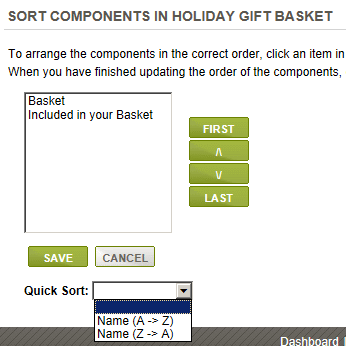
After you add more than one Kit Component, a new sorting option. Click the SORT COMPONENTS button.
Use the EDIT and DELETE icons to remove or change the properties of the Kit Component.

Repeat as needed until all Kit Components have been added. In the next section, we'll demonstrate adding products.
Adding a New Member Product
-
After you have created a Component for your Kit, you can now add one or more products.
-
Click the ADD PRODUCTS button to begin.
-
A search form will be shown. Enter a name or SKU for the product and click the SEARCH button.

Additional filters are available to limit your search to a single Category, Manufacturer, or Vendor. -
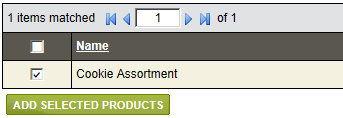
The results will be displayed with a checkbox next to each available product.

In the above example, notice the Holiday Gift Basket is not available as a selection because it is a Kit.
NOTE: You cannot add products that are Kits, to other Kits. -
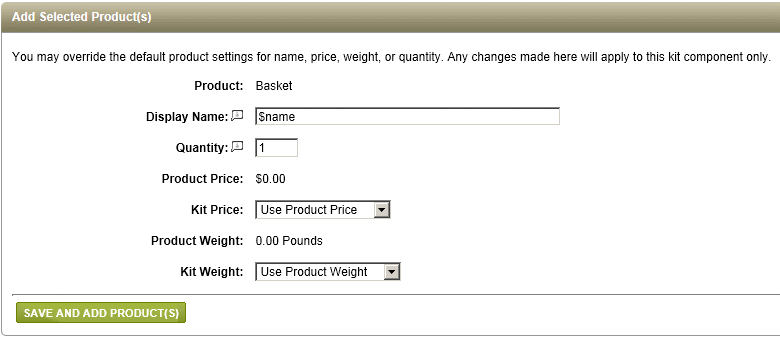
Check the box next to the product(s) that you want to add, and click the ADD SELECTED PRODUCTS button.
For each product selected, you will see the following kit product options as shown in this example.
-
The Display Name default value is $name. This means that the actual product name will be used.
You can over-ride this value with a new name that will only be referenced by this Kit. -
The Quantity will be 1 by default. One of this item will be included if this kit is purchased. Enter a different Quantity if desired.
-
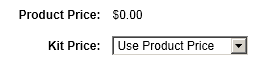
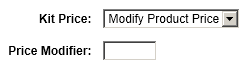
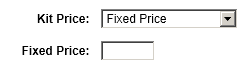
There are three pricing options for the member product being added.
Use Product Price - the actual product pricing is used, and automatically updated in the kit, if changed.
Modify Product Price - the price used for the kit will be a calculation of the actual product price adjusted by the modifier you enter here.
Fixed Price - the price entered here over-rides the actual price of the product, but only for this kit.
-
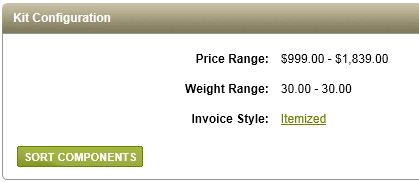
The Kit Weight option works identical to the Kit Price feature, except that you are choosing values for shipping weights instead.
-
When finished making your selections and updates, repeat as needed, click the ADD PRODUCTS button to return to the Kitting page.

Adding a New Member Product with Options
-
Click the ADD PRODUCT(S) button for an existing Kit Component.
-
Find the product(s) that you want to be part of this kit, and click the SEARCH button.
-
The results will be displayed in the right section of the page, with a checkbox next to each available product.
-
Check the box next to the product(s) that you want to add, and click the ADD SELECTED PRODUCTS button.
In this example, we've selected a product with options.
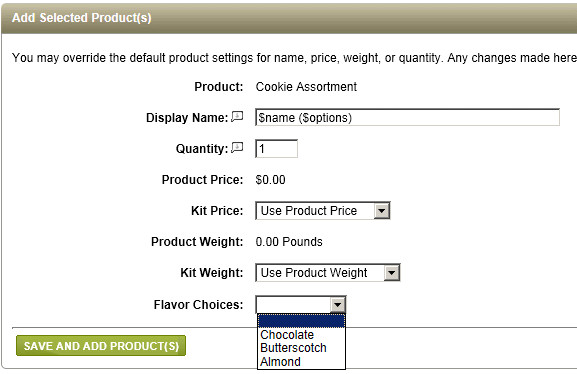
-
At the bottom, you'll see the product options and choices available. Make your selection(s).
NOTE: Any option attributes, such as price or weight, will update Kit's combined price or weight. -
When finished, click the SAVE and ADD PRODUCTS button to return to the Kitting page. Any adjustments to Price and Weight are shown.
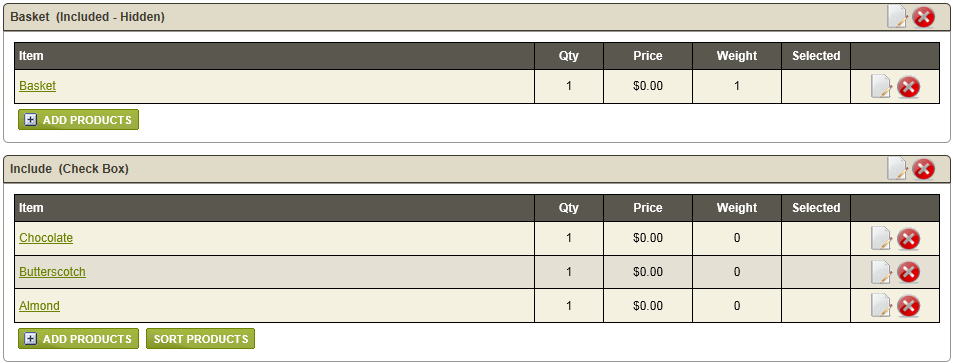
For this Gift Basket example, we've used options that can be selected individually by way of checkboxes. By changing the Input Type for the component, you can show your options is a variety of ways.

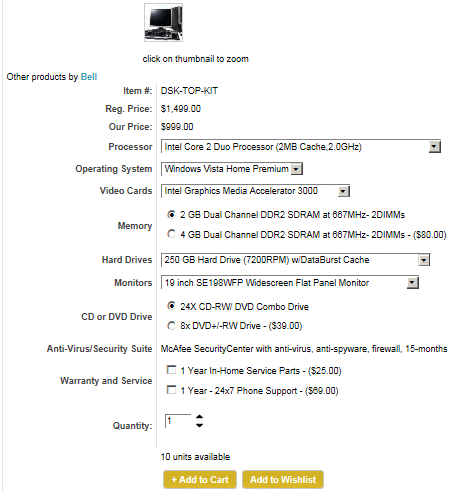
You can easily add products that can be individually selected, as shown in the Build-your-Own Computer system included with the sample data.
This example shows you each type of Kit Component that can be added.
Find your Kits
-
Mouse-over the Catalog menu item and then select Products.
-
Enter a Name into the search form, or you can check the box next to KIT to show all products that have Kitted items.

-
You can select the box to Show Thumbnails for each Kit as shown in the example above.
-
Click the SEARCH button to view the results.
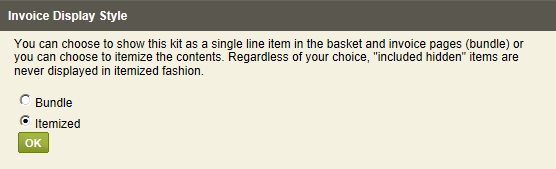
Kit Display Options
For each Kit you create, you'll be able to select from two invoice styles, Bundle or Itemized. Let's take a look at each one, and how the Computer System example would look using both settings. This change has no effect on calculations. It is a change that affects display behavior only.
-
To change the Invoice Style for a Kit, click the linked Bundle or Itemized link that you see on the top section of the page.
-
Let's change the setting to Itemized.
-
Click OK when finished.
The next three examples are a comparison of Bundle and Itemized display styles, showing the different areas where this change will take effect.
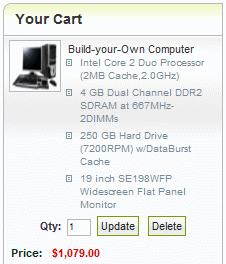
Mini-Basket Example
|
Bundle Display:
Note in the Itemized Display, an additional purchase option was selected, and this is shown in a detailed format. As a comparison, the Bundle Display shows the total price without any indication of which option increased the price. With that said, we can say that it is more typical to use a Bundle kit display when you are packaging together items that do not have price changes or options. |
Itemized Display:
|
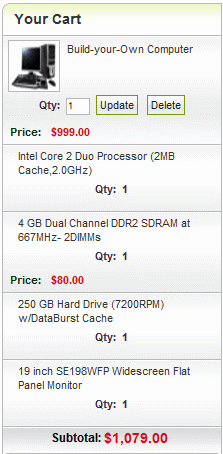
Shopping Basket Example
|
Bundle Display:
Within the shopping basket, the bundle display shows everything on one line item, with a single price. The itemized version keeps each item on it's own line. Itemized Display:
The itemized version keeps each item on it's own line. Individual prices of each item within the kit would be shown if I had used a better example :P |

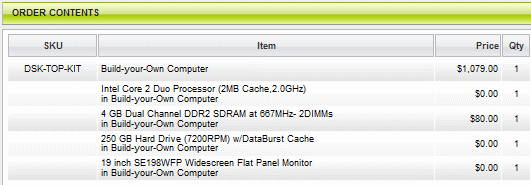
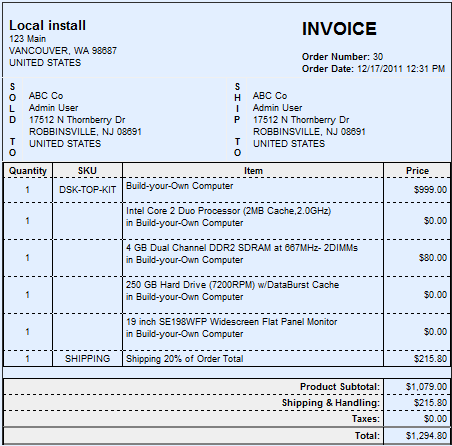
Customer Invoice Example
|
Bundle Display:
Itemized Display:
|
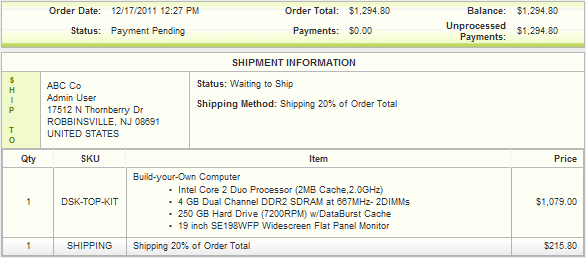
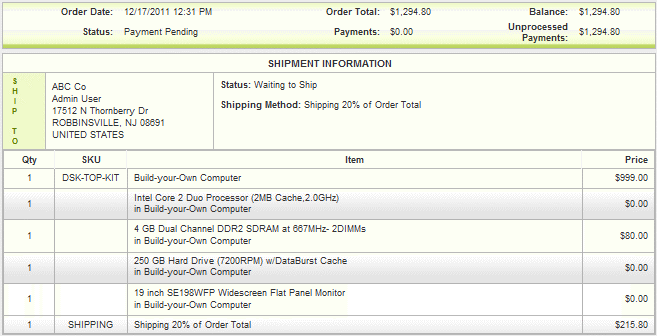
After the order is placed, the Kit display style will not change for the customer invoices and packing slip.
|
Bundle Display:
Itemized Display:
|

![]()
Go to Site Map