Webpages > Contact Form
In this Topic Show
Contact Form
In AbleCommerce Gold R11, a new Contact Form has been added. You can collect information for sales or support issues and improve the ability to communicate with your customers. To see this feature, simply click on the "Contact Us" link from the main menu of your store. If you have been using an older version of AbleCommerce, you will find instructions on how to customize your existing Contact Us page to support this feature.
NOTE: The basic contact form uses email as a way to notify the merchant and person submitting the form. Messages are not stored in the database.
Using the Contact Form
-
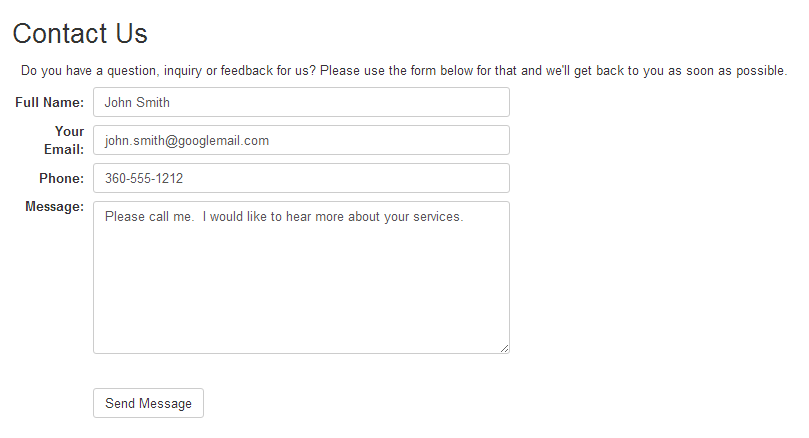
From the retail side of the storefront, click the Contact Us link in the top menu. You should see a page that looks similar to the one below.
-
The user will need to enter information into all fields available. If they are already logged in, then the name and email will be pre-populated.
-
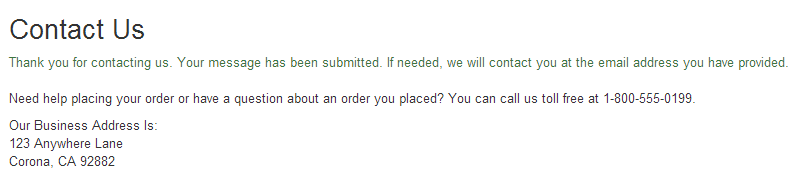
When the Send Message button is clicked, a secondary confirmation page will be shown.
-
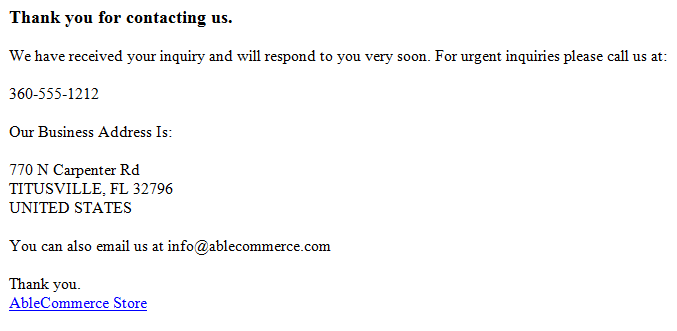
After the form is submitted, an email confirmation can be sent out to the person submitting.
-
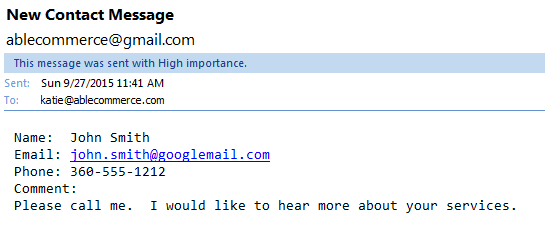
The merchant will receive a new contact message. This is sent to the default email address for the store or to the address specified.
Customizing the Contact Us page
-
From the Website Menu, or from the top-menu, go to Website > Webpages.
-
Click the "Contact Us" linked Webpage, or click the Edit icon in the Action column.

-
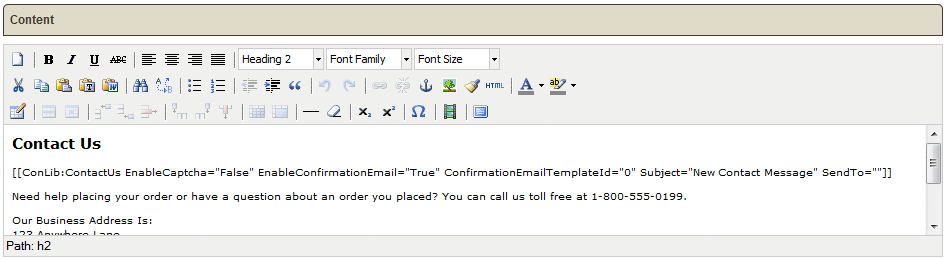
Scroll down the page until you see the "Content" section as shown in the example below.
-
Note that near the top of this page's contents is a control which is a "ConLib" code reference. This will output a basic contact form which can be modified by changing the parameters given below. For more in-depth customization, you will need to modify the ..\ConLib\ContactUs.aspx pages.
To add this control to your existing contact page, simply copy and paste the code below into the content portion of any webpage.
[[ConLib:ContactUs EnableCaptcha="False" EnableConfirmationEmail="False" ConfirmationEmailTemplateId="0" Subject="New Contact Message" SendTo="Store email address"]]Parameter
Description
Possible Values
EnableCaptcha
Indicates whether the captcha input field is enabled for protection from spam messages.
True or False
EnableConfirmationEmail
Indicates whether the confirmation email is enabled. If true then a confirmation email will be sent back to customer.
True or False
ConfirmationEmailTemplateId
If confirmation email is enabled, the email template will be used to generate confirmation email.
Leave '0' to use the selection or enter an ID of a custom email template
Subject
Default email subject for the contact us email message.
Text
SendTo
Single or a comma separated list of email addresses, use the format like 'info@ourstore.com,sales@ourstore.com' to specify email addresses. If no value is specified store default email address will be used.
Valid email address(es)
-
By default, CAPTCHA is disabled. You can enable this feature by changing the EnableCaptcha value to "True". When CAPTCHA is used, the person using the form will be required to enter some random characters from the image being displayed on the screen.
-
To select the confirmation email template, which is sent to the user after they submit the form, find the Configure > Email > Settings page using the menu.
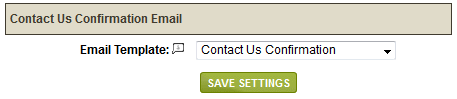
Select your custom email template or choose the default one named "Contact Us Confirmation".
OPTIONAL: You may enter an ID of any email template into the available parameter in the ContactUs control. To locate the ID of a confirmation email template, you will need to the Configure > Email > Templates page. -
The Subject parameter of the Contact Us control can be used to specify the subject of the email that is sent to the merchant. By default, it is "New Contact Message"
NOTE: The Subject of the email that is sent to the person submitting the form will be coming from the Email Template. -
The SendTo parameter can be used to over-ride the default email address for the store. This is where the message submitted by the user is sent. The default email for the store is shown on the Configure > Email > Settings page. If you want to use an alternate email address, simply modify the control to add a different email address. You can send to multiple email addresses by using a comma delimited list.
-
When finished click the SAVE or SAVE AND CLOSE button.
![]()
Go to Site Map