Webpages > Creating a Blog Webpage Listing
In this Topic Show
Creating a Blog Webpage Listing
In AbleCommerce Gold R11, a new feature has been added so you can create your own website blog fully integrated into your existing store pages. We will walk you through the steps to do this below. Before beginning, you should have some content prepared in advance for your blog pages.
An overview of the process includes creating a special Layout that can display your Blog Articles in a sidebar and a category display page that will display the content of each Blog Article. Many custom parameters are available and we will explain each of them as we go along.
NOTE: At this time, the blog feature is designed to be used with Webpages. We chose to use Webpages because it was already fully integrated with the store's catalog and navigation system. Our blog is not the traditional blog system where user's can comment and have discussions about the content. If there is a strong demand for Blog Comments, then please go to http://ablecommerce.uservoice.com and request the feature.
Add a new Layout for your Blog Pages
-
From the Website Menu, or from the top-menu, go to Website > Layouts
-
Click the ADD LAYOUT button.
-
Enter a NAME and a DESCRIPTION for your Layout.
-
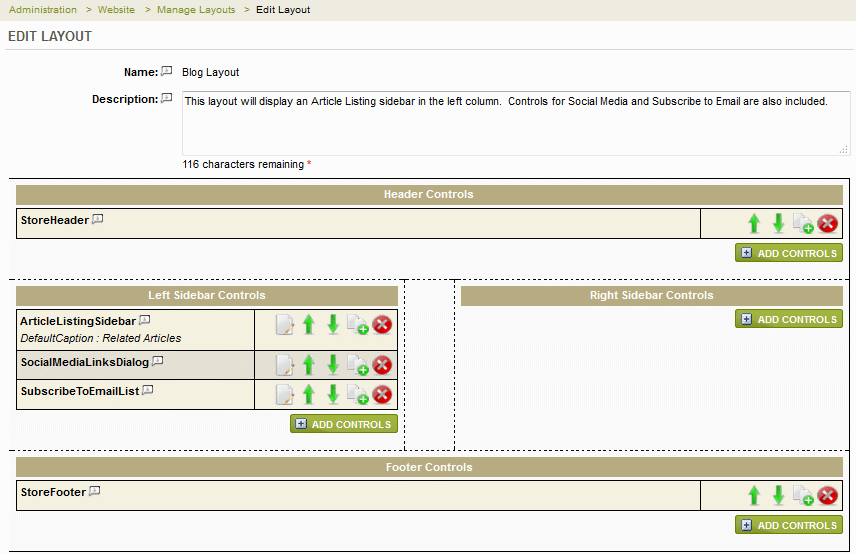
Add the "StoreHeader" control and a "StoreFooter" control for your page header and footer.
-
If desired, include the "ArticleListingSidebar" control for either the Left Sidebar and Right Sidebar.
-
In the example below, a Blog Layout page was created also using the "SocialMediaLinksDialog" and "SubscribeToEmailList". However, you can customize your Layout by adding any of the available controls, or none at all.
-
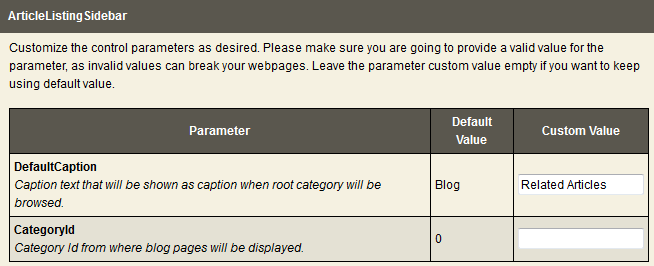
Upon adding the "ArticleListingSidebar" control, there are some optional parameters that are available.
-
The "DefaultCaption" option has a default value of "Blog" but you can enter your own custom value as shown in the example above.
-
If you wish to specify a single CategoryID, you may do so. Otherwise, the Layout may be used with any Category page by using the default value of "0".
Adding a New Webpage for your Blog
-
From the Website Menu, or from the top-menu, go to Website > Webpages.
-
Click the ADD WEBPAGE button to begin with a new blank webpage, or make a copy of an existing page by clicking the COPY icon.


-
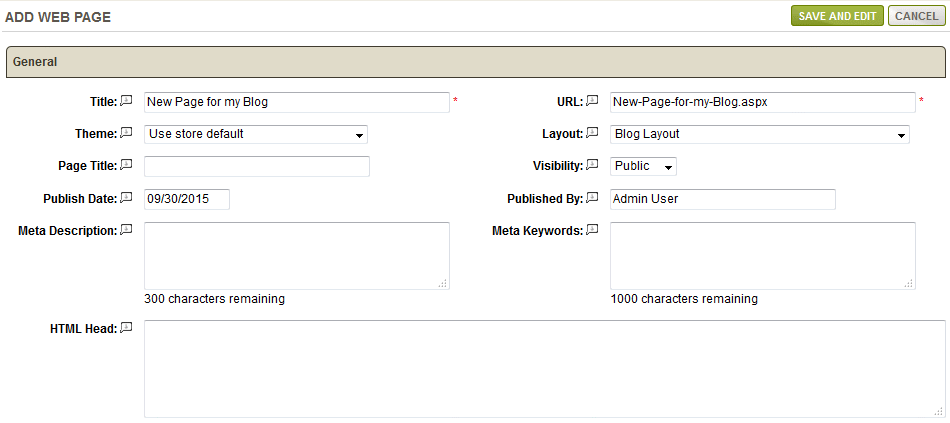
For this example, we'll create a new Webpage for our Blog as shown below.
-
Enter a Title for your webpage in the field provided.
-
The URL field will populate using your webpage name. You may change this as needed, but it must be a valid page URL. Enter the URL as it would be relative to your store directory. e.g. /webpages/mypage.aspx or mypage.aspx
-
For the next selection, you can pick a different Theme or use the store's default setting.
-
Select a Layout for this webpage. Select the "Blog Layout" that was created in the previous section.
-
The Page Title is an optional field. If you want the page title to be something different from the Title entered in the first field, then enter it in the separate field provided.
-
The Visibility setting determines whether the webpage will be Public (shown to all users), Hidden (available through direct link only), or Private (unable to view except as an administrator).
-
You can enter a Publish Date which will only appear when using the built-in Blog control. This allows you to provide some sorting options for your customers.
-
The Published By field is an entry for the name of the person who is authoring the webpage blog. Both publishing fields are optional.
-
If desired, you can enter a Meta Description. Some search engines use this as a summary. A maximum of 150 characters available. Enter text only.
-
The Meta Keywords will be used within the meta tag. Enter single words separated by commas. A maximum 1000 characters available.
-
The HTML Head field can be used to enter your custom Javascript code, or anything that needs to go into the <HTML><HEAD> portion of the webpage.
-
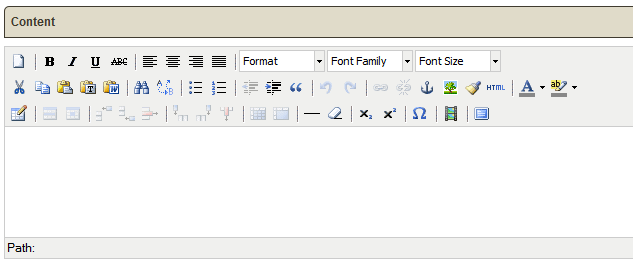
In the Content section you can use the built-in editor to create the content for your Blog.
-
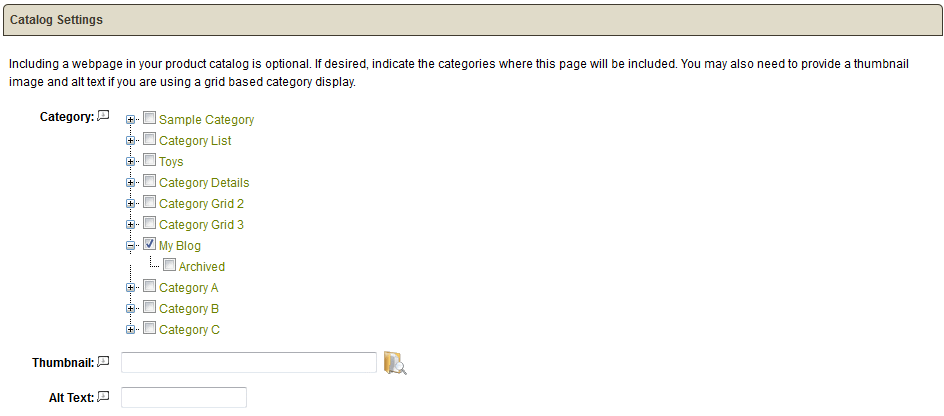
The Catalog Settings section is optional if you want to add direct links to any page. However, by checking the boxes next to any categories, this webpage can be displayed in a Blog format using the sidebar control previously added to the layout.
You may want to create a new category that will be used for your Webpage assignments. These categories can be used to organize your Blog pages.
In the example below, we have assigned this webpage to the "My Blog" category by checking the box as shown.
-
Select a Thumbnail image if you would like to include a small image with your Blog webpage.
-
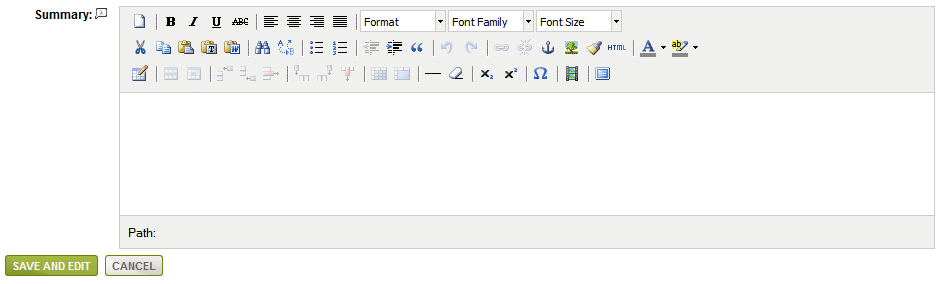
In the last section, you may wish to enter a summary description for this webpage. If a Summary description is used, you can list more Blogs per page and each one will be linked to the full Blog webpage automatically. Later on, in this section, we will show you how to change the custom Webpage control to change how your listings are shown.
-
When finished click the SAVE or SAVE AND EDIT button.
-
A PREVIEW button will be available after saving. You can return to the Manage Webpages area by clicking the SAVE AND CLOSE or CANCEL buttons.

-
In the right column, the actions available are Preview, Copy, Visibility, Edit, and Delete. If we preview a sample webpage, you can see how it is displayed using the default store theme and layout.
Adding a New Category to display your Blog pages
For this next step, you may want to create a Category page to display your Blog pages. This feature assumes that you have assigned your Webpages to a category as described in the section above.
-
From the Website Menu, or from the top-menu, go to Website > Category Pages.
-
Click on the ADD CATEGORY PAGE button.
-
Enter a Display Name for this category display page. This is for admin use only.
-
Select a Theme or use the store default.
-
For Layout, you can use the "Blog Layout" created in the first section of this document. This will allow your customer's to easily navigate existing Blog pages and categories.
-
Enter a short description for this category display page. This is for admin use only.
-
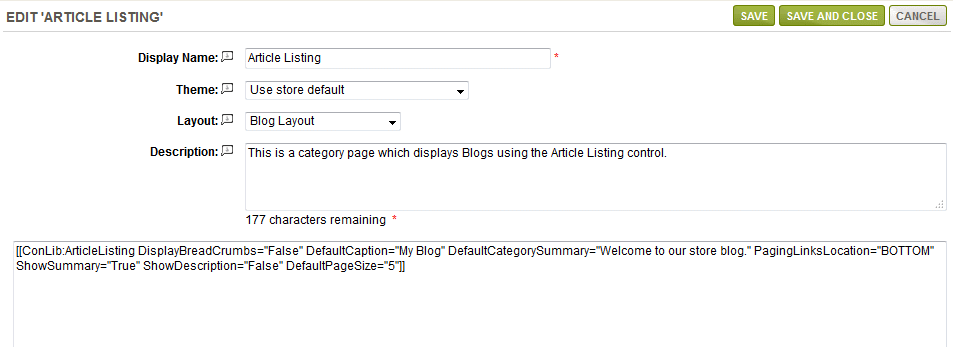
In the next field, we will add the code to display the "ArticleListing" control. This control has a number of parameters which can be changed to customize the page and how it will display the Blog webpages. You can copy the code below to add this control, or you can go to the Help > ConLib Reference page to find the control and see a description for each of it's options.
[[ConLib:ArticleListing DisplayBreadCrumbs="True" DefaultCaption="Blog" DefaultCategorySummary="Welcome to our store blog." PagingLinksLocation="BOTTOM" ShowSummary="True" ShowDescription="False" DefaultPageSize="5"]] -
For this example, we are going to use the default options. You may change any parameter value as needed.
-
When finished, click the SAVE and CLOSE button.
-
The last step will be to edit the Category you are using to display your Blog Webpages and assign it to the Category Display page that uses the "Article Listing" control. This should be the same Category that you assigned to your Blog webpages to (e.g. My Blog).

-
Save the Category when finished changing it's display page. You can assign any number of Categories so it uses the "Article Listing" display page.
Viewing your Blog Webpage Listings
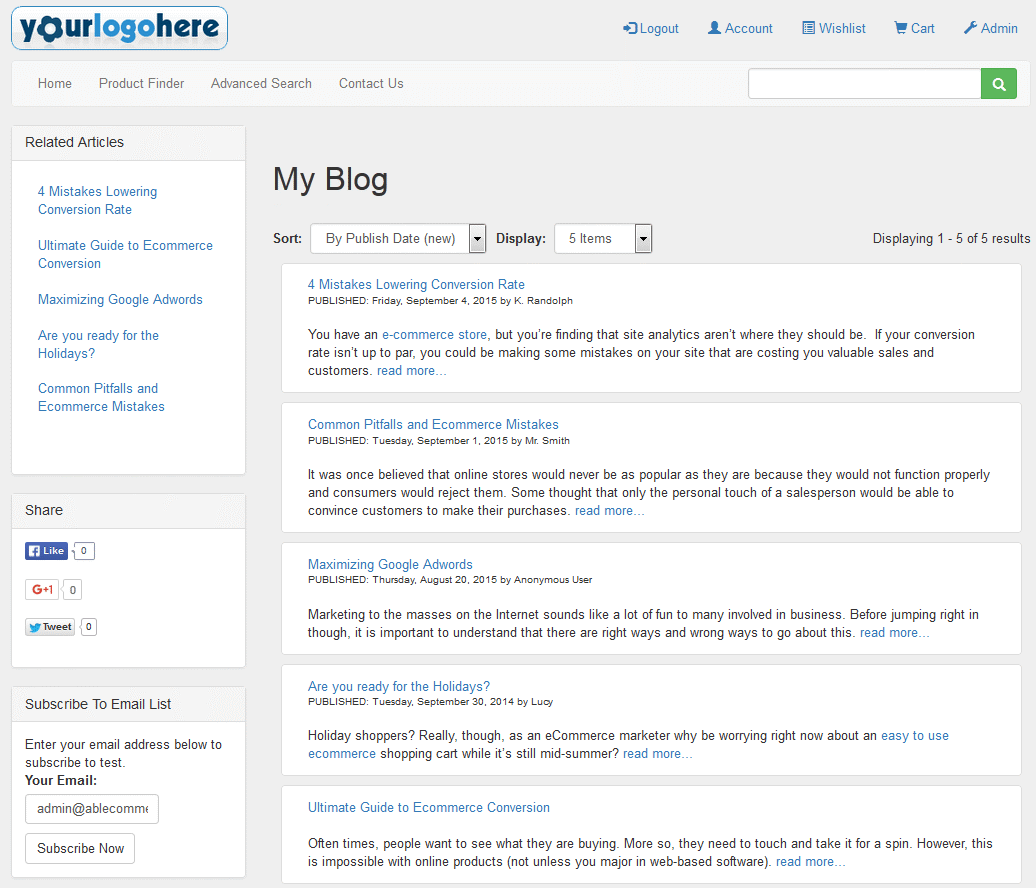
Use the Preview icon for the Blog category you created, or simply go to the store and find the category within your navigation menu. The sample below is a completed Blog page which uses the Blog Layout, Article Listing Sidebar, and Category page Article Listing control. All of which are described in the sections above.
The options available for the ArticleListing category control are as follows:
-
DisplayBreadCrumbs - Enable or disable the display of breadcrumbs. Example has this option disabled.
-
DefaultCaption - Caption text that will be shown as caption when root category will be browsed.
-
DefaultCategorySummary - Summary that will be shown when root category will be browsed.
-
PagingLinksLocation - Indicates where the paging links will be displayed, possible values are "TOP", "BOTTOM" and "TOPANDBOTTOM".
-
ShowSummary - Indicates whether the summary should be displayed or not, default value is true. Example has summary enabled. If desired, you can show the full webpage.
-
ShowDescription - Indicates whether the description should be displayed or not, default value is false. If this is enabled, then the full webpage blog will be shown.
-
DefaultPageSize - Number of blog posts to list at one page by default.
Viewing the Blog Webpage Details
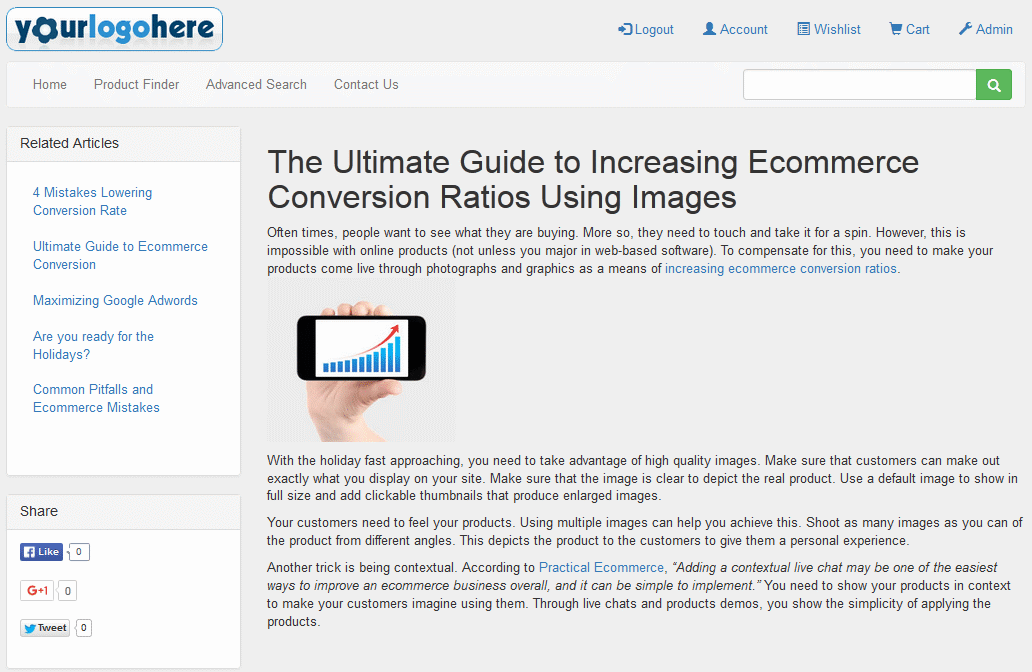
The example below shows one of the Blog Webpages in detail with the full description. Since the page is also using the Blog Layout we created in the first section, then a navigation menu is available for the customer to find other articles of information.
Viewing the Blog Listing from a Product page
You can easily create informational pages that are related to the products you sell. In the example below, we used the Blog Layout for this product page. In the left column, you'll notice product specific articles that might help the customer make a purchasing decision. To do this, simply assign the Blog webpages to the same category that the product is assigned to. If this is not desirable, then you can also create a custom Blog layout which specifies a category ID for the ArticleListingSidebar control. That way, the webpages can be located in a different category for organization purposes, but they can still be referenced by pointing to a specific category which holds the webpages.

![]()
Go to Site Map