Configure > Store
General Settings
The general settings section allows you to change your store name, URL, and enable SSL for secure pages. You may also include a site disclaimer message that will be presented to users before they can view your store.
Before accepting orders, you should make sure that your AbleCommerce license key is installed and that your website has a working secure certificate. This document will explain how to enable the SSL setting. It is not intended to explain the process of installing a secure certificate. For that purpose, you will need to contact a company who issues SSL certificates. There are many SSL providers to choose from, but we recommend Comodo, GeoTrust, Thawte, or Verisign because they are compatible with most browsers.
Update the General Settings
The General settings section is where you can change the name of your store, the URL, and the secure mode of your store.
-
From the Configure Store page or using the top-menu, go to Configure > Store > General.
-
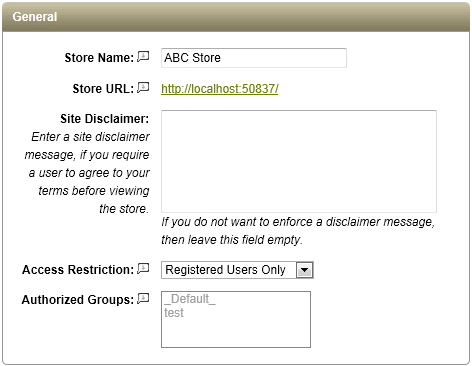
Find the General section as shown in the example below.

-
In the Store Name field, enter a name for your store. This information will appear in your email and invoices. It will not change the domain or URL for your store.
-
In the Store URL field, enter the web address for your store. This information will not change your installation parameters, instead, it will appear anywhere a link to your store is generated.
-
In the next row, you will see a field for Site Disclaimer
A site disclaimer can be used to require users to agree to the terms and conditions you set forth before they may enter your store. This feature can be used if you sell products or services that require an agreement before users can view the products in your store. Additionally, AbleCommerce provides a similar feature where the user must agree to terms and conditions before a purchase can be completed. These features can be used together or alone. -
Enter your terms or conditions into this field. The field accepts html code.
As shown in the example below, the user will be presented with a special "disclaimer" page before they may enter your store.

The user must click the I ACCEPT button before they can view any page in your store.
-
The Access Restriction feature allows you to create a members only store. NEW in R6
You will have the following 3 options:
-
None - This is the default value. When selected, any user (anonymous or registered) can view the retail storefront.
-
Registered Users only - By selecting this option, you will not allow an anonymous user to view the storefront. A user is anonymous when he/she is not a registered user. A registered user must have an account created in the store with a minimum of a username/email and password. A login form will be presented to anonymous users.
-
Authorized Groups only - When this option is selected, the user must be registered and be a member of the Authorized group(s) selected in order to view the retail storefront. This feature is intended for a business to business (B2B) membership store.
-
Click the SAVE button to update. Any changes will take effect immediately.
WYSIWYG HTML Editor
Almost all fields that accept html code will have the option to use a built-in HTML editor. In AbleCommerce Gold R10, you can choose how you want the editor to display.
-
From the Configure Store page or using the top-menu, go to Configure > Store > General.
-
Find the WYSIWYG HTML Editor section as shown in the example below.

-
The setting (enabled by default) allows you to decide if the editor is always embedded in the page or if you would prefer to have it has an option to open in a pop-up page.
ENABLE WYSIWYG EDITOR (In-line):
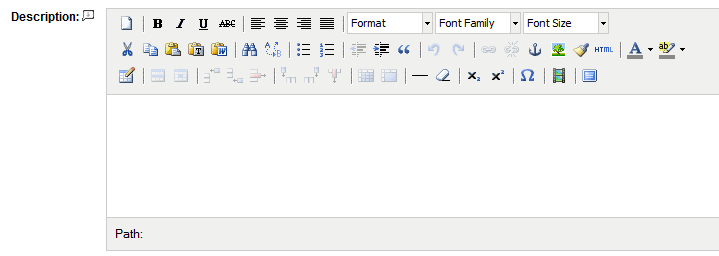
Notice how the editor is embedded in the page in this example.

DISABLE WYSIWYG EDITOR (In-line):
Notice the tiny HTML icon still allows you to use the WYSIWYG editor in a pop-up page, making it optional if you wish to use your own HTML code.
