Catalog > Add Product Template
In this Topic Show
Add Product Template
Add product templates to collect information from customers, or use them to create custom product attributes for the merchant.
As of the AbleCommerce Gold R9 release, you can use a product template to create a faceted search page where your customers can filter and shop by many different aspects that are defined for the product. For example, you can setup shop by fields for gender, price range, age, color, style, condition, or anything unique about the product that will make it easier for your customer to find exactly what they are looking for.
Adding a New Product Template
-
From the Product Template page, or from the top-menu, go to Catalog > Product Templates.
-
Find the Add Template section in the right column of the page.

-
Enter a Name for your template in the field provided. This is for admin purposes only.
-
Click the ADD button to create a new Template.
-
Your new Template will shown on the Edit Product Template page.
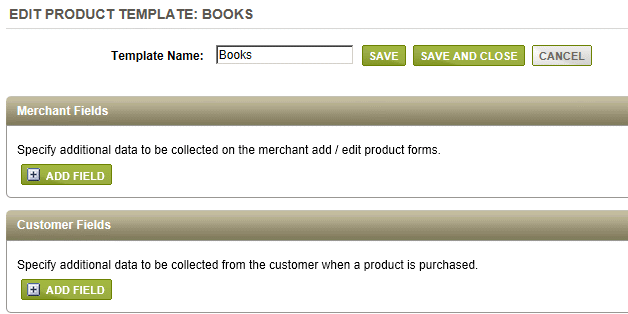
For each template, you can add Merchant and/or Customer fields to collect additional information about the product it is assigned to.
Merchant Fields
Merchant fields collect information that can be used for two purposes:
-
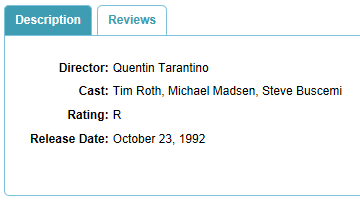
When a merchant field is assigned to the product, then additional information is shown and selected on the product editing page. This makes it easier for the merchant to create custom fields and present data on the product page like in the example below.
-
Additionally, the merchant can create product templates, using Shop By fields, that are used for the Product Finder search page or the Category Search Sidebar control.
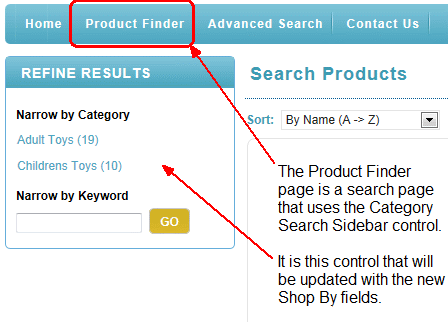
The Shop By feature is documented in the next section below. [NEW in Gold R9]
Adding a new Merchant Field
-
Find the Merchant Fields section of the Product Template page, and click the ADD FIELD button.

-
Only Merchant Fields will include the ShopBy option. This feature is documented in the next section below.
-
First, choose the Input Type. The different types are shown in the example below.
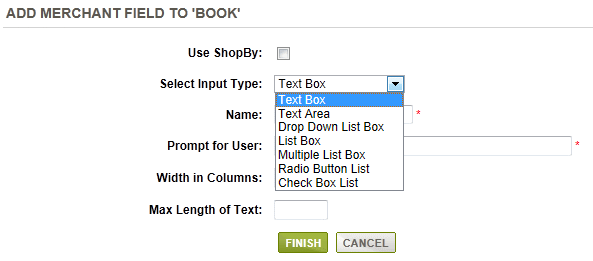
-
Each type of input selection will change the form accordingly. An example of each input type are shown in the sections below.
-
When finished updating and/or adding choices, click the FINISH button.
Using the Shop By Feature with Product Templates
-
Find the Merchant Fields section of the Product Template page, and click the ADD FIELD button.

-
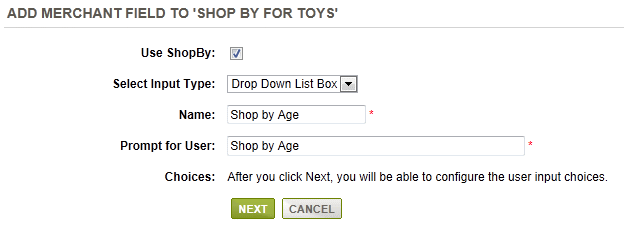
Only Merchant Fields will include the Use ShopBy option. Check the box to show this product template field on the Product Finder page.
-
The Select Input Type is only applicable for the merchant. This is how the field choices will be displayed from the product editing pages.
-
The information entered into the Name field appears for the customer on the Product Finder page.
-
The information entered into the Prompt for User field only appears for the merchant on the product editing pages.
-
Click the NEXT button to begin entering the field choices that customers will use to find the products that interest them most.
-
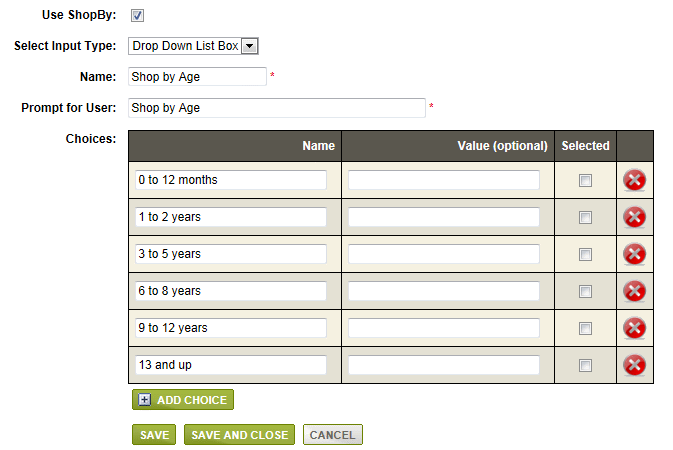
In this example, the field choices are entered for the custom Shop by Age field.
-
The Value column and Selected are only applicable for the merchant. This information will not be shown to the customer. When finished adding choices, click the SAVE and CLOSE button.
-
Before the information will appear on the Product Finder search page, you must first assign the product template to the product. This is covered in the Manage Product Templates page.
-
For the Shop By feature to be effective, it is recommended that you add as many fields and choices as possible to allow the customer to narrow down the search results to the products that most fit their buying requirements. In the following example, we have added additional fields to the Shop By merchant template.

You can create one or more Merchant Fields to organize your Shop By options. In the above example, a single merchant field was created for the purpose of using Shop by on a particular set of products. The "Shop by Toys" merchant field contains three Shop by options for Age, Gender and Price. Each of the Shop by options contain choices for the customers to filter their search. Note that there is a ShopBy column to indicate whether or not the field will be used for this purpose. -
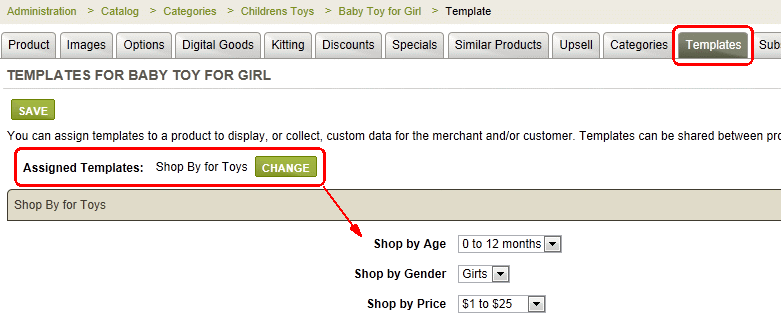
After creating your Shop By fields and options, you will need to first assign them to products. Then you will be able to select the appropriate options for each product. In the following example, the template "Shop By for Toys" was assigned to all toys using the batch assignment feature which is documented in the Manage Product Templates page. After assignment of the template to the product, you will need to go to the product editing page and select the choices that best match the product.
-
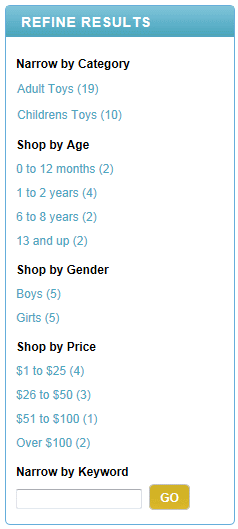
Once that is done, your customers can use the Product Finder search page to easily find the exact product that meets their needs. Here is an example of the Product Finder's Category Search Sidebar control. Keep in mind that the control can be modified to hide the Shop By fields and/or product counts for each option. For a store that has thousands of products, the control would be best suited to work with individual categories and hidden from this page.
Adding a New Customer Field
-
Find the Customer Fields section of the Product Template page, and click the ADD FIELD button.

-
Select an Input Type. The different types available are the same for Merchant fields and Customer fields.
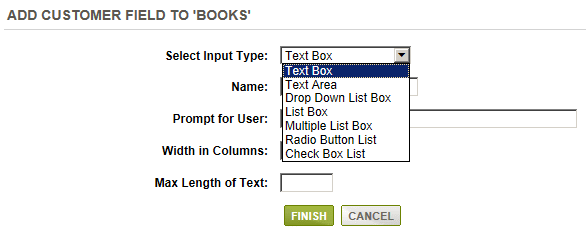
-
When finished updating and/or adding choices, click the FINISH button.
An example of each input type are shown in the section below.
Input Types
The Input Types can be put into two groups. The first type of input simply requires that text is entered. The second type of inputs are based on the selections that you create.
-
Text Box - A single line input form.
- The input Name is for admin use only.
- The Prompt is required and displays in front of the input field.
- Number of Columns determines how wide the field displays on the page.
- The Max Length is the total number of characters this field can accept.
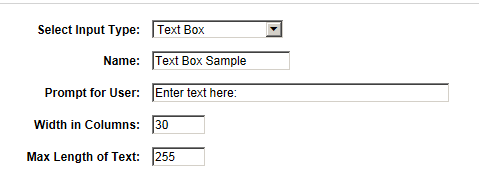
results in >>>
-
Text Area - A scrolling input field that can accept a very large amount of data.
- The input Name is for admin use only.
- The Prompt is required and displays in front of the input field.
- Number of Rows determines how long the field displays on the page.
- Number of Columns determines how wide the field displays on the page.
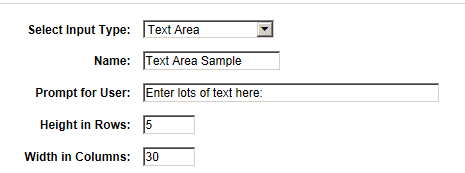
results in >>>
-
Drop Down List Box - A single selection box showing the choices you've added.
- The input Name is for admin use only.
- The Prompt is required and displays in front of the selection.
- You will need to add your Choices for the selection list. A Value for the selection choices is optional (for custom use),
- One Default choice to appear first in the list can selected by checking the applicable box.
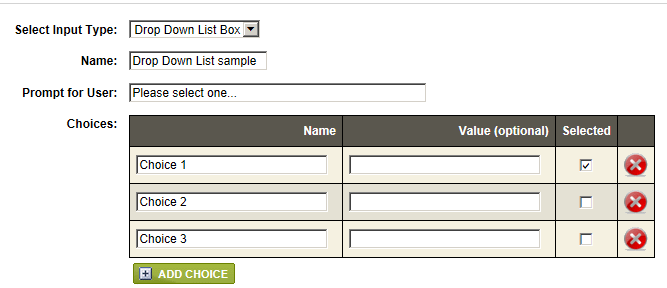
results in >>>
-
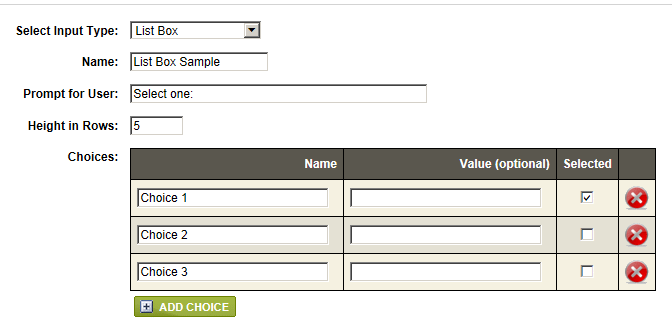
List Box - A re-sizable selection box showing the choices you've added.
- The input Name is for admin use only.
- The Prompt is required and displays in front of the selection.
- Number of Rows determines how long the field displays on the page.
- You will need to add your Choices for the selection list. A Value for the selection choices is optional (for custom use),
- One Default choice to appear first in the list can selected by checking the applicable box.
results in >>>
-
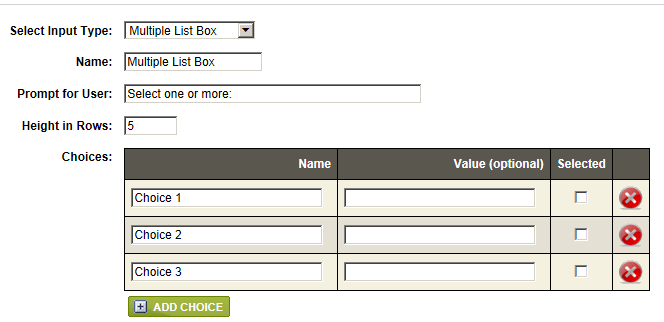
Multiple List Box - A re-sizable multiple selection box showing the choices you've added.
- The input Name is for admin use only.
- The Prompt is required and displays in front of the selection.
- Number of Rows determines how long the field displays on the page.
- You will need to add your Choices for the selection list. A Value for the selection choices is optional (for custom use),
- One Default choice to appear first in the list can selected by checking the applicable box.
results in >>>
-
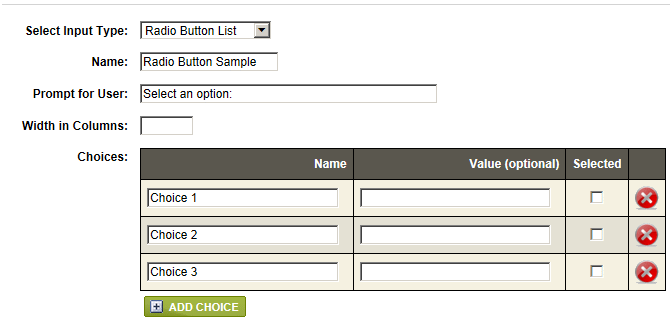
Radio Button List - A list of choices listed where one selection can be made.
- The input Name is for admin use only.
- The Prompt is required and displays in front of the selection.
- Columns determines if the list will be displayed in a single column, or each choice shown in it's own column.
- You will need to add your Choices for the selection list. A Value for the selection choices is optional (for custom use),
- One Default choice to appear first in the list can selected by checking the applicable box.
results in >>>
-
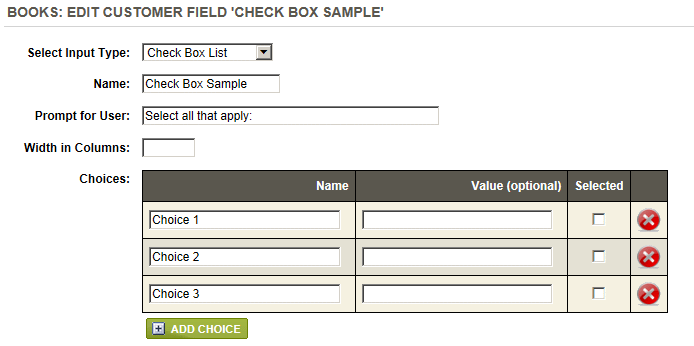
Check Box List - A list of choices where more than one selection can be made.
- The input Name is for admin use only.
- The Prompt is required and displays in front of the selection.
- Columns determines if the list will be displayed in a single column, or each choice shown in it's own column.
- You will need to add your Choices for the selection list. A Value for the selection choices is optional (for custom use),
- One Default choice to appear first in the list can selected by checking the applicable box.
results in >>>
Go to Site Map