Skipjack
The Skipjack payment gateway is very simple to setup. There are no additional software requirements besides having AbleCommerce installed. To enable SkipJack you will need to provide both the HTML and the developer serial numbers given to you with your merchant account.
All AbleCommerce payment gateway integrations offer full support for post-order processing. This means that after an order is placed, you can authorize, capture, refund, and void transactions from the AbleCommerce order administration area.
Skipjack Processing Features
AbleCommerce supports all the standard features of the payment gateway. In addition, there are additional services such as recurring billing and fraud protection which can be added to your account. For more information on the services and features available, visit Skipjack 
-
Authorize - where the cardholder's funds are verified as available and set aside for the pending transaction.
-
Capture - a full or partial transfer of funds from the cardholder's pending authorization to the merchant.
-
Partial Capture - where you can capture additional funds on what remains of the pending authorization.
-
Void Authorization - when the pending authorization of funds is canceled. This does not refund a payment.
-
Refund - when funds have been transferred to the merchant, and a full or partial refund is returned to the cardholder.
-
Partial Refund - where multiple refunds to the customer are possible.
-
Recurring Billing - where the recurring billing feature within your gateway is initiated by AbleCommerce. Skipjack maintains the billing and notifications after the initial order is placed.
At this time, multi-currency is not a supported feature of AbleCommerce's Skipjack integration. All amounts will be in USD.
|
NOTE:
|
There may be additional features within your SkipJack account that have not been tested with AbleCommerce. If you enable unsupported features, you are doing so at your own risk.
|
Enable Skipjack Payment Gateway
Before you begin, make sure that you have your Skipjack account information supplied by Skipjack merchant services.
You will need to provide both the HTML and the developer serial numbers given to you with your account. This applies to test and live accounts equally.
-
From the Payment Gateways page, click the ADD GATEWAY button.
-
From the Add Gateway page, click the SKIPJACK button.

-
You will now be on the Add Gateway configuration page for SkipJack.
-
In the first field, enter the HTML Serial Number associated with your account.

-
In the second field, enter the Developer Serial Number associated with your account.

-
Choose the Gateway Mode.

-
Debug Mode is an optional feature and should only be enabled at the direction of AbleCommerce support.

-
Scroll down to the bottom of the page and find the section called Payment Methods.
-
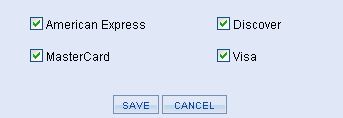
Click the box next to all credit card payment methods that will use the Skipjack gateway.

-
At the bottom of the page, click the SAVE button.
Activating your Skipjack Account
If you have been using a test HTML serial number prior to ”r;going live”, it is important that you replace that test serial number with a live one when you are ready to process live transactions.
Testing with Skipjack
-
Edit the Skipjack gateway configuration page in AbleCommerce.
-
Change the Gateway Mode to Test.
-
At the bottom of the page, click the SAVE button.
When testing Skipjack, keep in mind there are some requirements:
-
You must use a Street Address of "8320" (no street name)
-
You must use a Zip Code of "85284"
-
You must use a Visa card number of "4445999922225"
-
You must use a CVV number of "999"
-
The maximum amount of the order must be $150 or less.
|


