In this Topic Show


Add Product Template

Add product templates to collect information from customers, or use them to create custom product attributes for the merchant.

Adding a New Product Template

  1. From the Product Template page, or from the top-menu, go to Catalog > Product Templates.

  2. Find the Add Template section in the right column of the page.

    template_add.gif

  3. Enter a Name for your template in the field provided.  This is for admin purposes only.

  4. Click the ADD button to create a new Template.

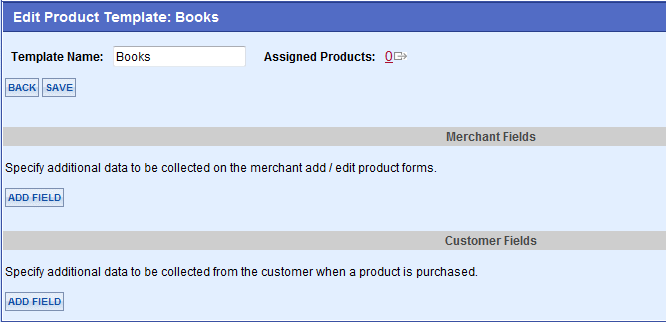
  5. Your new Template will shown on the Edit Product Template page.
    template_edit.gif

    For each template, you can add Merchant and/or Customer fields to collect additional information about the product it is assigned to.

Adding a New Merchant Field

  1. Find the Merchant Fields section of the Product Template page, and click the ADD FIELD button.

    template_merchant_add.gif

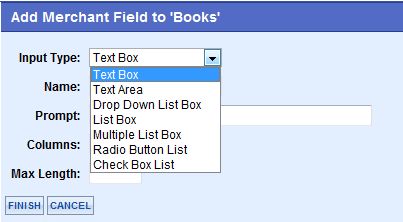
  2. First, choose the Input Type.  The different types are shown in the example below.
    template_inputtype.gif

  3. Each type of input selection will change the form accordingly.  An example of each input type are shown in the sections below.

  4. When finished updating and/or adding choices, click the FINISH button.

Adding a New Customer Field

  1. Find the Customer Fields section of the Product Template page, and click the ADD FIELD button.

    template_cust_add.gif

  2. Select an Input Type.  The different types available are the same for Merchant fields and Customer fields.
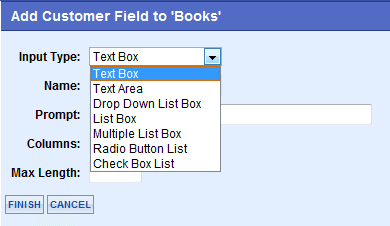
    template_cust_input.gif

  3. When finished updating and/or adding choices, click the FINISH button.

    An example of each input type are shown in the section below.

Input Types

The Input Types can be put into two groups.  The first type of input simply requires that text is entered.  The second type of inputs are based on the selections that you create.

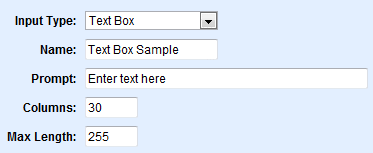
  • Text Box - A single line input form.  

    - The input Name is for admin use only.  
    - The Prompt is required and displays in front of the input field.
    - Number of Columns determines how wide the field displays on the page.  
    - The Max Length is the total number of characters this field can accept.

    template_input_textbox.gif results in > template_input_textbox1.gif

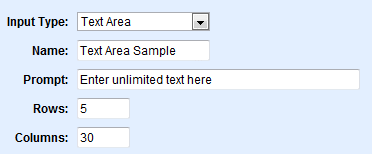
  • Text Area - A scrolling input field that can accept a very large amount of data.

    - The input Name is for admin use only.  
    - The Prompt is required and displays in front of the input field.
    - Number of Rows determines how long the field displays on the page.  
    - Number of Columns determines how wide the field displays on the page.

    template_input_textarea.gif  results in > template_input_textarea1.gif

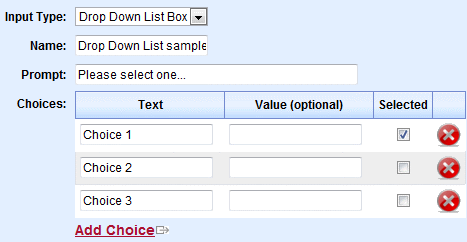
  • Drop Down List Box - A single selection box showing the choices you've added.

    - The input Name is for admin use only.  
    - The Prompt is required and displays in front of the selection.
    - You will need to add your Choices for the selection list.  A Value for the selection choices is optional (for custom use),
    - One Default choice to appear first in the list can selected by checking the applicable box.

    template_input_ddlist.gif results in > template_input_ddlist1.gif

  • List Box - A re-sizable selection box showing the choices you've added.

    - The input Name is for admin use only.  
    - The Prompt is required and displays in front of the selection.
    - Number of Rows determines how long the field displays on the page.
    - You will need to add your Choices for the selection list.  A Value for the selection choices is optional (for custom use),
    - One Default choice to appear first in the list can selected by checking the applicable box.

    template_input_list.gif results in > template_input_list1.gif

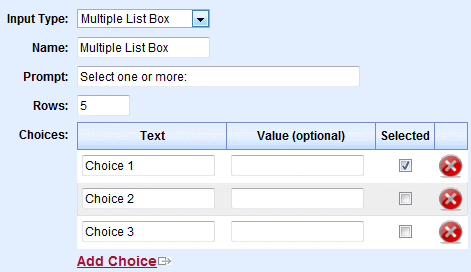
  • Multiple List Box - A re-sizable multiple selection box showing the choices you've added.

    - The input Name is for admin use only.  
    - The Prompt is required and displays in front of the selection.
    - Number of Rows determines how long the field displays on the page.
    - You will need to add your Choices for the selection list.  A Value for the selection choices is optional (for custom use),
    - One Default choice to appear first in the list can selected by checking the applicable box.

    template_input_multiple.gif results in > template_input_multiple1.gif

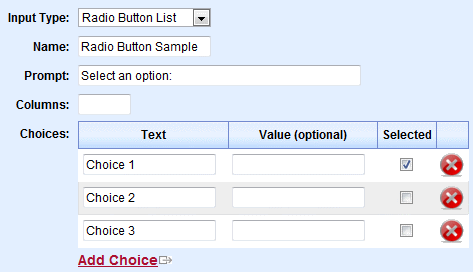
  • Radio Button List - A list of choices listed where one selection can be made.

    - The input Name is for admin use only.  
    - The Prompt is required and displays in front of the selection.
    - Columns determines if the list will be displayed in a single column, or each choice shown in it's own column.
    - You will need to add your Choices for the selection list.  A Value for the selection choices is optional (for custom use),
    - One Default choice to appear first in the list can selected by checking the applicable box.

    template_input_radio.gif results in > template_input_radio1.gif

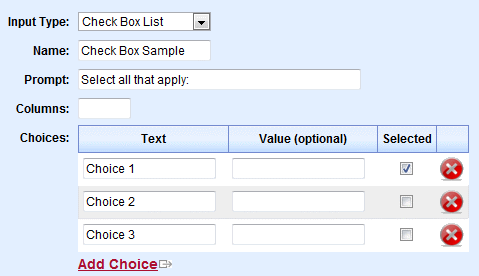
  • Check Box List - A list of choices where more than one selection can be made.

    - The input Name is for admin use only.  
    - The Prompt is required and displays in front of the selection.
    - Columns determines if the list will be displayed in a single column, or each choice shown in it's own column.
    - You will need to add your Choices for the selection list.  A Value for the selection choices is optional (for custom use),
    - One Default choice to appear first in the list can selected by checking the applicable box.

    template_input_checkbox.gif results in > template_input_checkbox1.gif


 Related Topics

Back to Top

Go to Site Map