User Manager
Table of Contents Show
Search Users
The Manage Users menu allows you to search for user records in your store. From this page, you can add, edit, delete, or simulate a login of the user. Additionally, you may select multiple records to send an email message to one or more users.
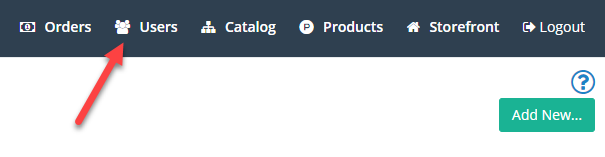
From the menu, go to the People > Users > Manage Users page, or use the short-cut in the top menu.
The top section of the User Manager page provides common search options.
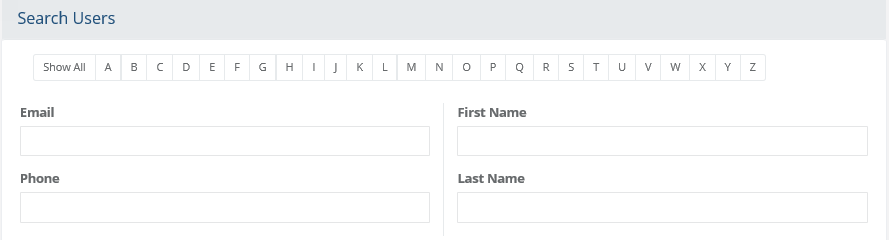
Quick Search - an easy way to find all records where the user name begins with the letter selected.
Search fields - use any of the search fields to narrow down the search results by name, email, or phone. Use of wildcard characters accepted.
For additional search criteria, expand the Advanced Search Options section as shown in the example below.
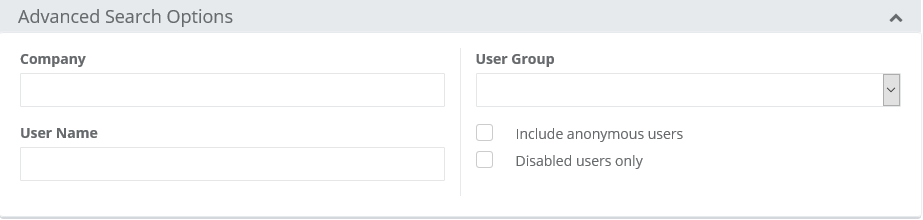
Company - find users associated to a company.
User Name - find users by their user name. This can be different from an email address.
User Group - filter your search to only members of the selected user group. This excludes any admin groups.
Note: To manage your admin users and groups, you will need to go to People > Admins > Users using the menu.Anonymous - check this box to display anonymous user records. These are unknown users who visit the store.
Disabled users only - check this box to only show user records that have been disabled.
After entering your search criteria, click the Search button to display the results as shown in this example.
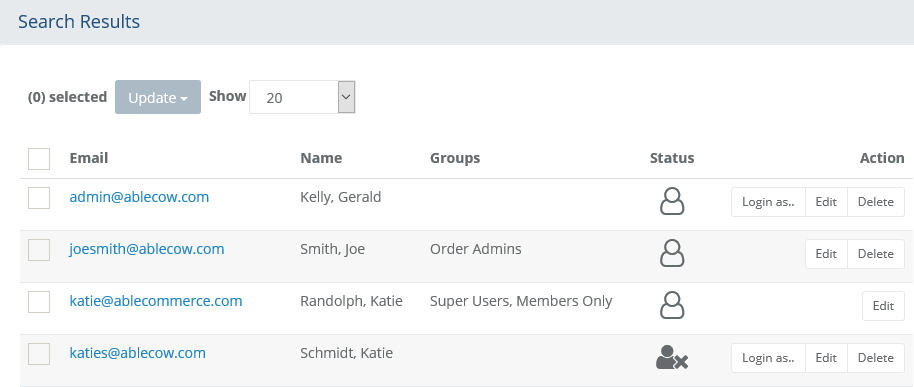
Within the search results, there are buttons available within the Action column to Edit or Delete users, as well as test their account by clicking the Login as.. button.
Note: It is not possible to delete the user you are currently logged in with.Additional information on the page, shown left to right:
Email - the user's email address with a link to edit the user's record.
Name - if known, the first and last name of the user.
Groups - if the user is assigned to group(s), they will be shown here.
Status - a user's status can be either be enabled or disabled. If it is disabled, the icon will show an X. This indicates the user has no ability to login and access the storefront.
Edit or Delete a User
To edit an existing user, either click the linked email address or click the Edit button from the Action column.
The user's account profile will be displayed as shown in the example below.
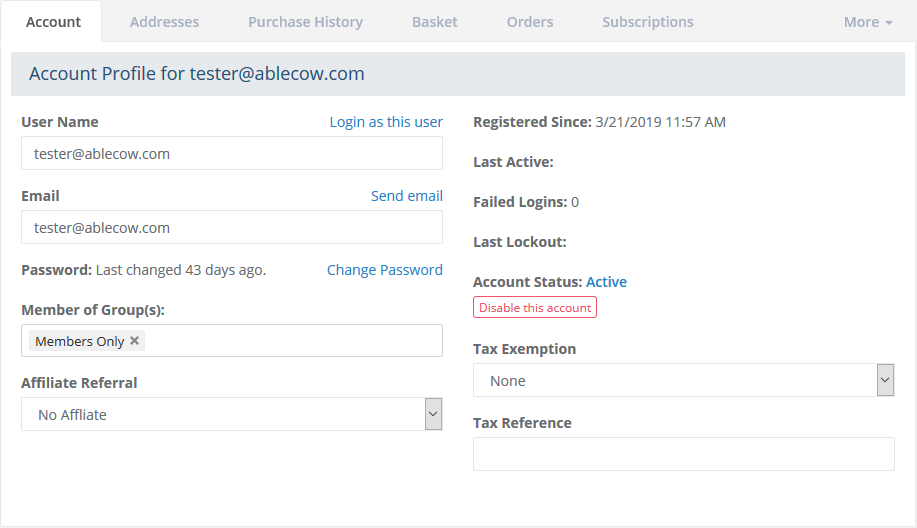
Continue to User Accounts for information and editing of a user's profile.
To delete a user, click the Delete button from the Action column.
A confirmation pop-up will be shown. This action cannot be undone!
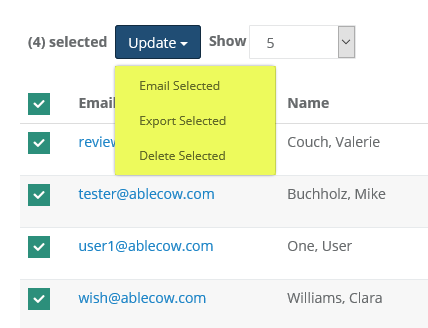
You can also delete multiple users at once by checking the boxes in the first column.
This will activate the Update button which will drop-down to provide an option to Delete Selected users.
A confirmation pop-up will appear. Confirm or cancel the action.
Add User
From the upper-right corner, click the Add User button to view a pop-up similar to the one below.
Note: The minimum requirements for a registered user account are email and password.
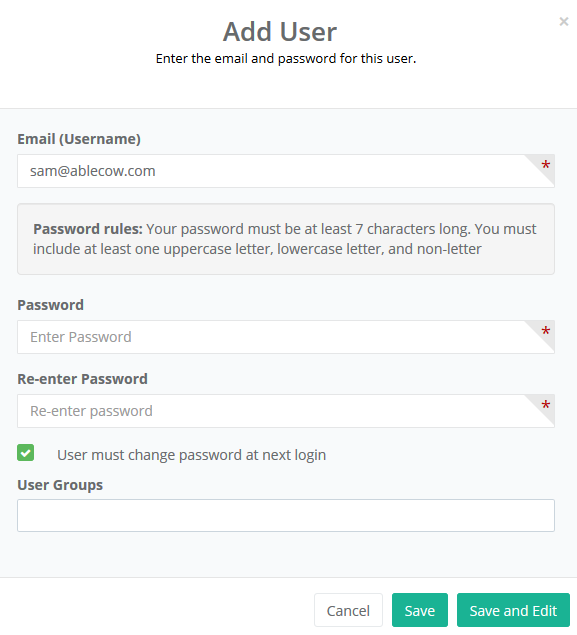
Enter an email address which will be also be used as the Username for the user. After the user logs in, he or she can change the username and email from the retail My Account pages.
Enter the same password into the next two fields shown. The password needs to meet the minimum requirements shown on-screen. If you need to change the rules for creating a password, please see password policy for instructions.
By default, the checkbox to require this user to change his or her password at first login is active. You may uncheck the box if you want to use the same password entered in the form.
A User Group selection is optional. By assigning a user to a Group, you will be establishing special rights.
When finished, click the Save button to create the record. If you wish to view or edit the new record, click the Save and Edit button.
Email Users
From the menu, go to the People > Users > Manage Users page.
Using the search form, find the users that you want to email.
Check the box next to one or more users, or check the box at the top of the first column to quickly select all users in the search results.
This will activate the Update button, which will drop-down to provide 3 options: Email Selected, Export Selected or Delete Selected users.
Choose the Email Selected option which will bring you to the Compose a Message page.
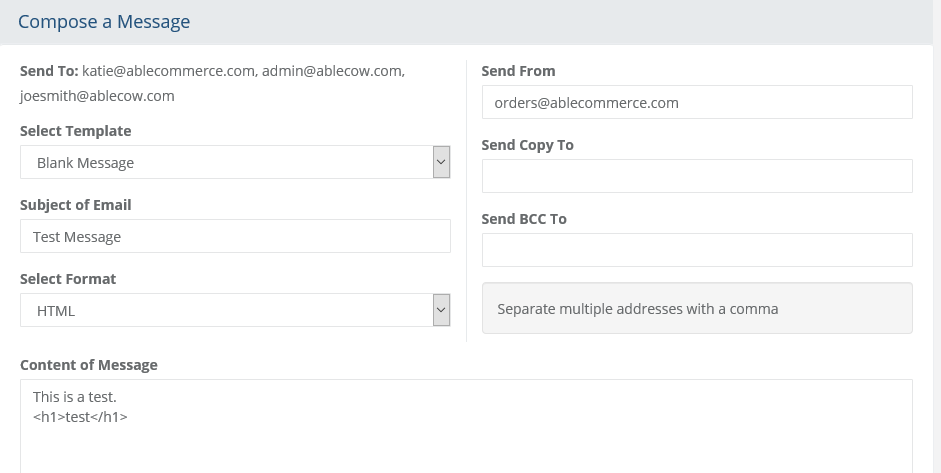
From here, you can either select an existing template or compose a new message.
When finished, press the Preview button in the admin footer to continue.
The next page will allow you to preview the message before sending. If everything looks good, then press the Send Message button, or go back to Edit the Message if needed.
The email message will be sent to all selected recipients.
Export Users
Please see Export Users for documentation.