Manage Subscriptions
Table of Contents Show
Subscription Management
When you create new products, there is an option to create new subscription plans when the product is purchased. The plan is created according to the merchant settings, and it can be viewed and managed from the Manage Subscriptions page.
Subscription plans don't really need much for maintenance. The expiration dates are tracked in AbleCommerce, and daily maintenance will automatically unsubscribe users from the plan and any groups they may be assigned to because of it.
You can email your subscription holders and let them know when expirations are coming due, when payments will be processed, updates are made, and many other settings which can all be configured and customized.
Finding Subscription Plans
From the merchant administration, you can easily see all of your subscription plans by going to Manage > Subscriptions.
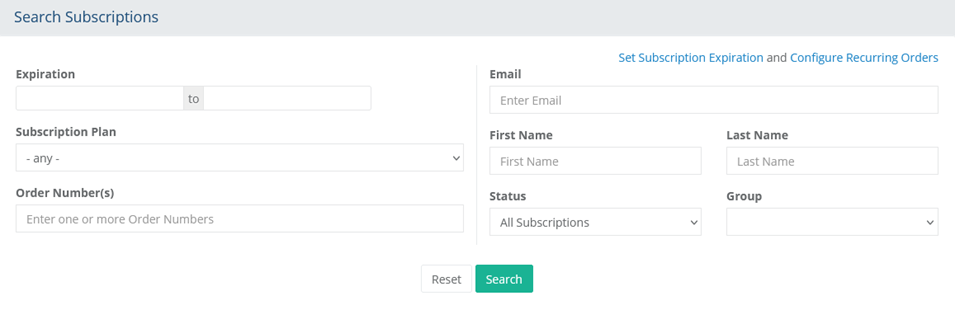
By default, this page will show you all active subscriptions. You can, however, use the search form to filter your results by selecting the name of the Subscription Plan.
The search form allows you to find specific subscription plans by entering a user's email address, name, or order number.
Or, you can search on plans by expiration date, group, or using the Status filter which has options to show Active and Inactive plans.
Managing Subscription Plans
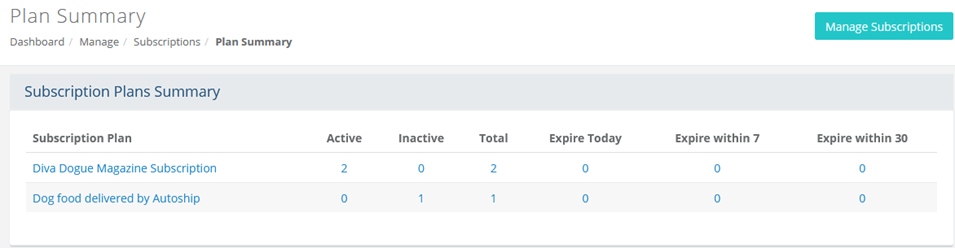
The Subscription manager is a tool for merchants so they can easily see all the subscription plans ever created. The default view is a Subscriptions search result list, but you can also view a Plan Summary page which shows you the combined totals for each unique subscription plan in your store.
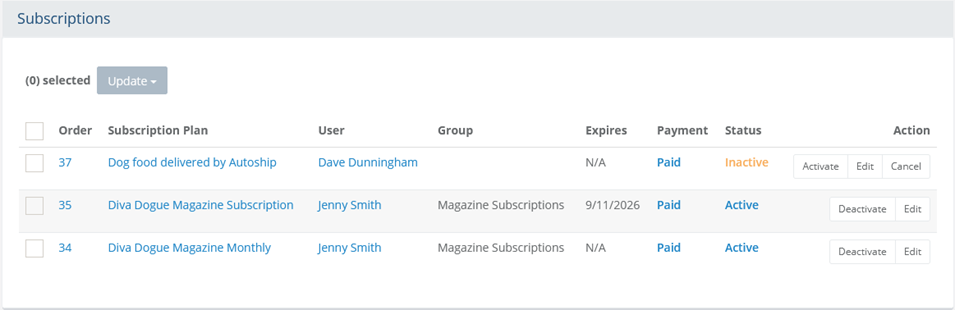
Switch between the Manage Subscription and Plan Summary pages using the buttons in the upper-right corner of the page.
The screenshot below shows the Plan Summary, a different way to view the subscriptions showing.
Let's go back to the main Manage Subscription page. In the results, the Subscription Plan name is shown, with the Order Number, Name and Email of the customers, and the subscription expiration date. You can select groups of users with subscriptions and export or email them. For subscriptions using the automatic Recurring Orders feature, a processing status will be shown in the Payment column.
You can manage all of your subscription holders from this page.
If you wish to change the subscription plan or view the details of any plan, then click the EDIT button.
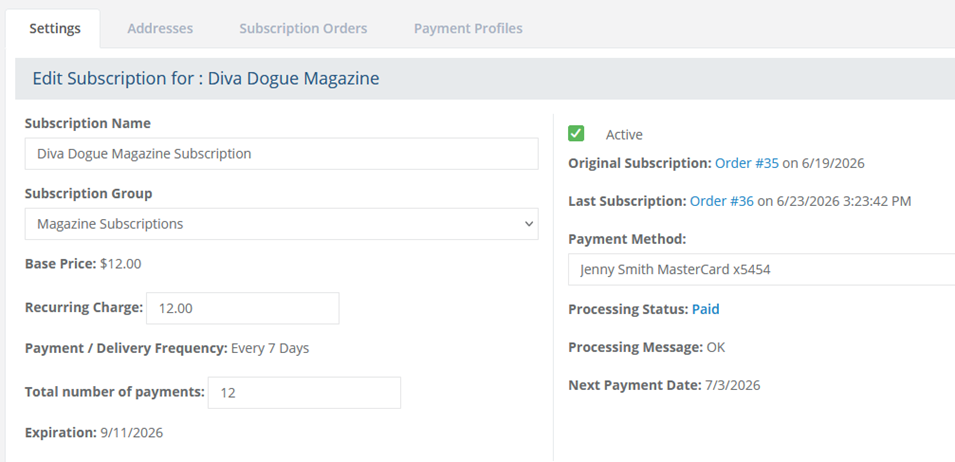
Not everything about the subscription plan can be changed because the information is submitted to the payment gateway. However, you will be able to change basic information like, Subscription Name, Group, Payment Frequency, Recurring Charge, and Total Number of Payments.
Address changes can be made by the customer, if the option to change the subscription is available. The merchant can also make address updates by clicking on the Addresses tab. Billing and Shipping information can be changed for the next orders that are generated by the subscription.
From the Subscription Orders tab, you can see a history of all orders that have been placed by the customer.
The Payment Profiles tab will show you the different payment methods added by the customer and which ones are being applied to the different subscriptions.
For more information on this page, please see Fulfilling Subscriptions.
To Email Subscription Users
From the Manage > Subscriptions page and use the search form to filter subscriptions by intended email.
Select one or more subscription plans by checking the box(es) in the first column, or checking the first box to select all results.
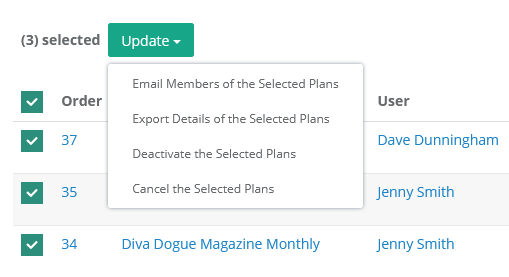
The Update button will activate. Select the "Email Members of the Selected Plans" option.
The Send To option allows you to send an email to the users you have selected. You can send an email to all users by changing this selection.
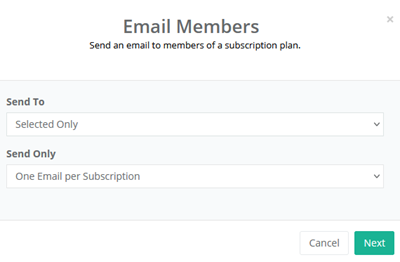
The Send Only option will allow you to send One email per subscription, or one email per user in case you want to avoid sending multiple emails to users with more than one subscription.
Click the NEXT button to compose a new email message or select one of the pre-configured email templates.
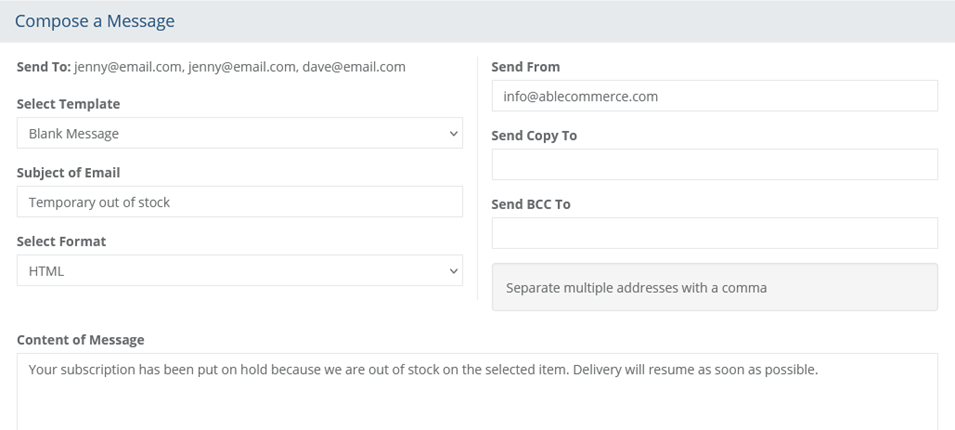
A list of email addresses will be shown in the Send To row. Change the Send From field as needed.
Use the Blank Message option unless you want to select an email template from the ones available.
If needed, type the Subject of the email.
Select the format of text to be in HTML or straight text.
Enter a message using the built-in text editor as needed.
Click the PREVIEW button to when finished.
After confirming that everything looks right, click the SEND button.
To Export Subscription Users
From the Manage > Subscriptions page and use the search form to filter subscriptions as needed.
Select one or more subscription plans by checking the box(es) in the first column, or checking the first box to select all results.
The Update button will activate. Select the "Export Details of the Selected Plans" option.
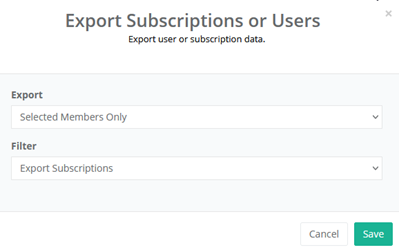
The Export option allows you to export only the members you have selected. You can export all members by changing this selection.
The Filter option will allow you to Export Subscriptions or Export Unique Users. Select which one you need and click Save.
The export file subscriptions.csv will be saved to your local computer.
To Deactivate Subscription Users
You can individually deactivate a subscription by clicking the Deactivate button from the Action column. To deactivate multiple subscriptions, use the update process below.
From the Manage > Subscriptions page and use the search form to filter subscriptions as needed.
Select one or more subscription plans by checking the box(es) in the first column, or checking the first box to select all results.
The Update button will activate. Select the "Deactivate the Selected Plans" option.
You will be prompted to confirm or cancel the action. Click the red Yes, deactivate! button to continue.
To Cancel Subscription Users
You can individually cancel a subscription by clicking the Cancel button from the Action column. To cancel multiple subscriptions, use the update process below. A subscription should be deactivated before it is canceled.
From the Manage > Subscriptions page and use the search form to filter subscriptions as needed.
Select one or more subscription plans by checking the box(es) in the first column, or checking the first box to select all results.
The Update button will activate. Select the "Cancel the Selected Plans" option.
You will be prompted to confirm or cancel the action. Click the red Yes, cancel! button to continue.
Additional Resources
For additional information:
Configure Recurring Order Subscriptions
Creating New Subscription plans
Fulfilling Orders with Subscriptions