Catalog > Product Images
In this Topic Show
Product Images
Image upload and automatic resize tool for products.
Upload and Resize Product Images
-
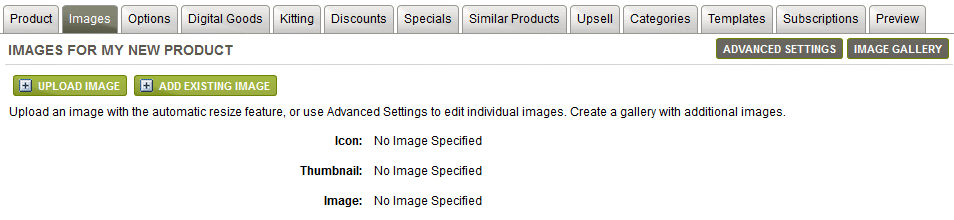
From Product Editing page, click on the Images tab.
-
From this screen, there are three image upload options available.
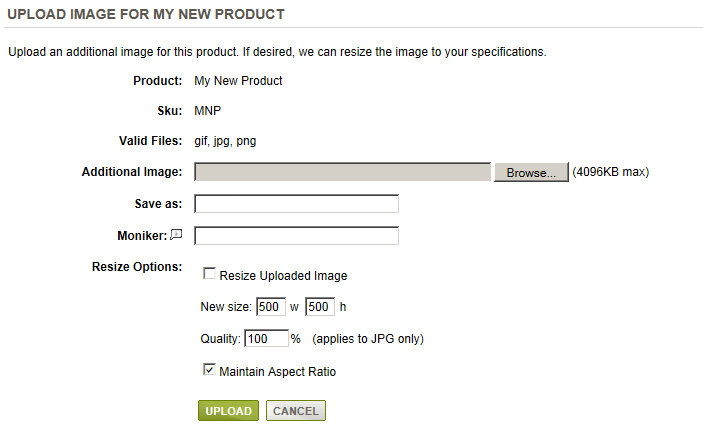
The most common, and easiest, way to upload your product images is by using the automatic resize feature. -
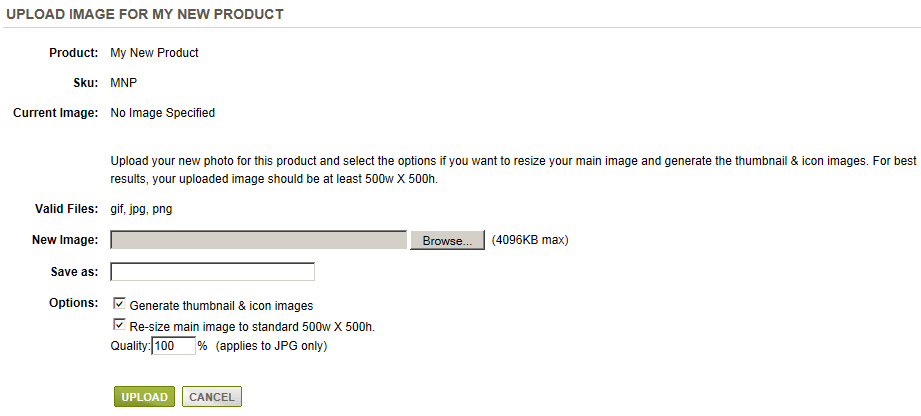
Click the UPLOAD IMAGE button.
-
Use the Browse button to select a New Image from your computer. For best results, your uploaded image should be larger than the maximum size value that is configured for the store.
-
After selecting an original image for upload, the Save As field will contain the actual file name of your image. You can modify this value as needed.
-
In this example, there are two Valid File types for upload. They are .gif and .jpg. You can add or change the file types for upload through store configuration.
A JPG image allows you to reduce the Quality on upload, if you are concerned with file sizes. -
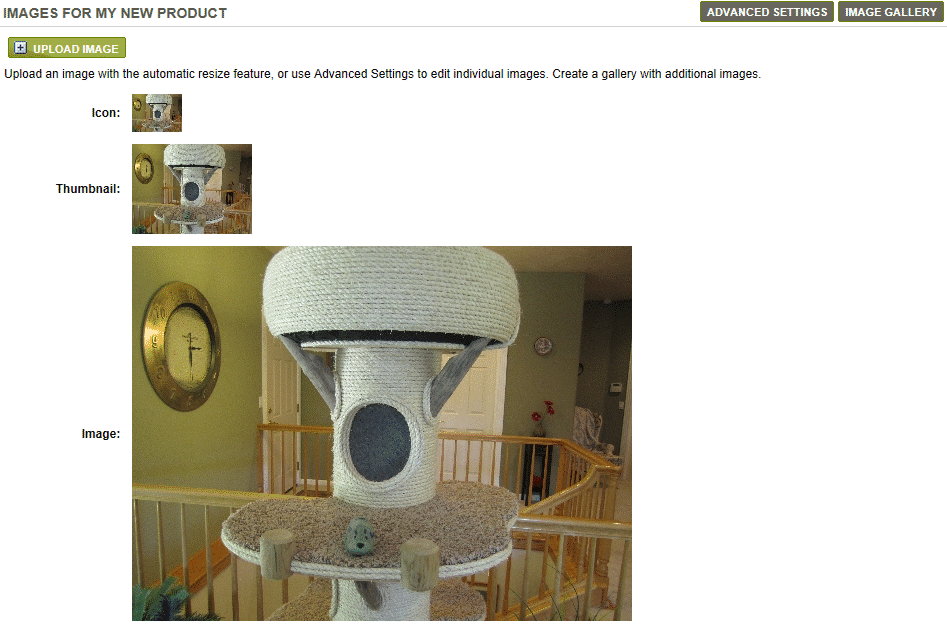
Click UPLOAD to automatically generate three new images for your product, as shown in this example.
-
Three new images are automatically created and placed in the \Assets\ProductImages\ folder. The sizes are set according to your Default Image Size configuration.
When working with the image upload and re-size feature, we recommend that you use a consistent size and orientation for original images. -
The standard, or large Image is used on the main product detail page. The medium size Thumbnail image is used to display product listings on the category pages. The small Icon image is used in the mini-basket and in other sidebar controls.
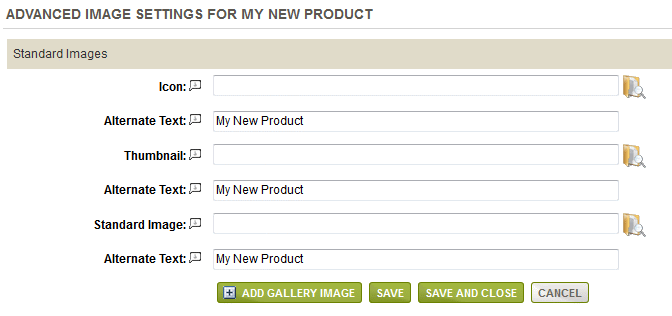
Adding Product Images manually
-
From Product Editing page, click on the Images tab.
-
From this screen, click the ADD EXISTING IMAGE button.
-
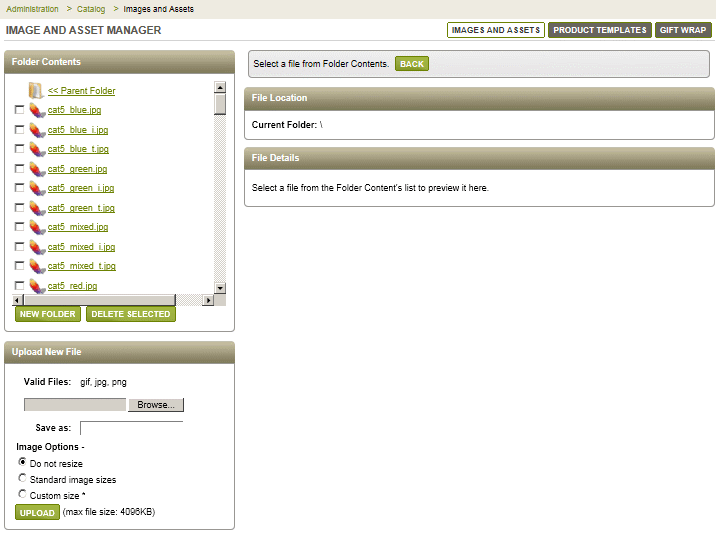
Click the Image selector icon, to launch the Asset Manager in a new window.
-
If you are manually creating your three image sizes with a 3rd-party software tool, then you would typically have these images ready for selection in the \Assets\ProductImages\ folder. Note that you can Upload, or Upload and Resize from this page as well.
-
Select an image from the Asset Manager. Repeat as needed for each of the three types of product images (Icon, Thumbnail, and Std Image).
-
Click the SAVE CHANGES button.
-
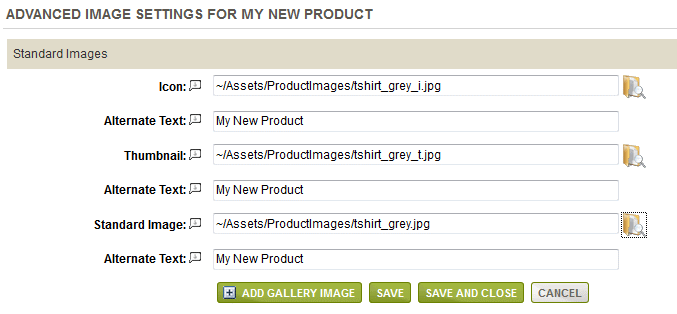
The URL path to the default product images folder is referenced as ~/Assets/ProductImages/{imagename}.
You can return to this page to edit the images at any time. -
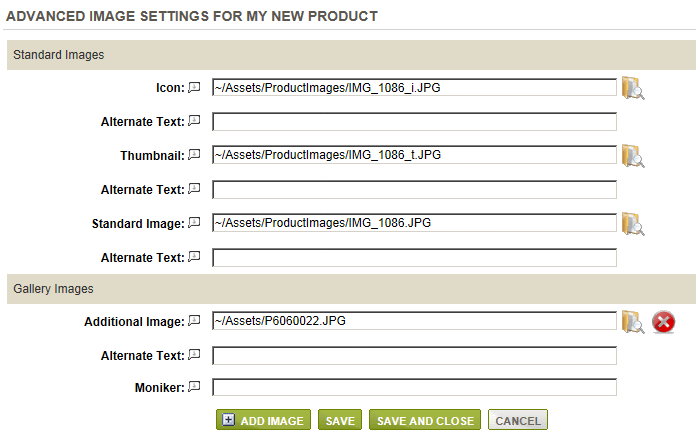
If you need to add more images, click the ADD GALLERY IMAGE button. You can add as many images as you like to form an Image Gallery.
Additional Image Gallery
-
From Product Editing page, click the Images tab.
-
From this screen, click the brown IMAGE GALLERY button.

-
From here, you can easily create an image Gallery for the user to view large close-up details of product images you provide.
Click the UPLOAD button to do an automatic upload and resize of an individual image from your computer.
-
If you have already resized your image gallery pictures and uploaded to the Asset Manager, then click the ADVANCED SETTINGS button instead.
-
Beneath any Standard images you have for your product, you'll see the ADD IMAGE button. Click this to manually select images for the Gallery.
-
Select an image from the Asset Manager. Repeat as needed by clicking the ADD IMAGE button for each new image.
-
Click the SAVE CHANGES button when finished. Click the Delete icon if you want to remove an image.
-
Preview the full size images in your Gallery by clicking the IMAGE GALLERY button.
-
The included sample product, Flat Panel Plasma TV, demonstrates a working example of the product image Gallery on the retail side.
When the user holds their mouse pointer over one of the pictures, it enlarges to full scale without leaving the page.

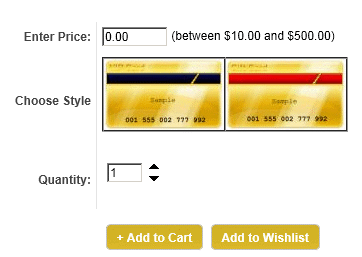
Product Option Swatches
This example is another one of the sample products included with AbleCommerce. The 'Choose Your Own Gift Card' demonstrates both the variable price feature and option swatches. For this section, we'll be showing you how these swatches (images) are assigned to the product's options. Another topic covers the Product Option and Variants feature in detail.
In the example below, the product has two Style options, each with thumbnail images called Swatches. The user can click on either swatch image to view the corresponding full size image. This is a very common feature in most online clothing stores, and very useful feature for many other types of ecommerce stores as well.
-
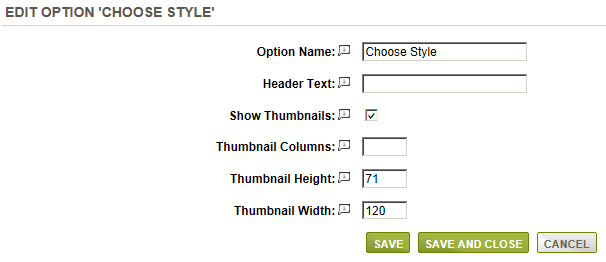
From Product Editing page, click on the Options tab.

-
These instructions requires that you have created at least one Option for your product. If you have, then you'll see a page similar to the one above.
-
In the first row, you can check the box to Show Thumbnails. This will enable the feature on the retail product pages.
-
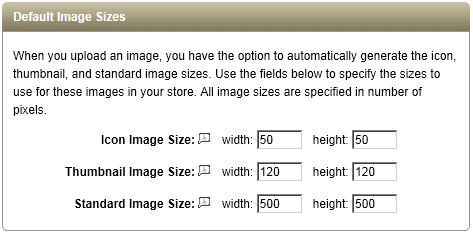
The Thumbnail Width and Height are values that can be set at a global level, or changed for each product.
As shown in the screenshot below, the default values can be set from the Configure > Store > Images page.

-
You may want to set a maximum number of columns for the swatch option list. This swatches are displayed in a grid format and this will set the total number of columns for the table.
-
In the next section, you can select a smaller Swatch Thumbnail image, and select the large Image that will be viewed when the swatch is clicked.

-
Click the SAVE button. You can click the Preview tab to view the product in a new browser.
-
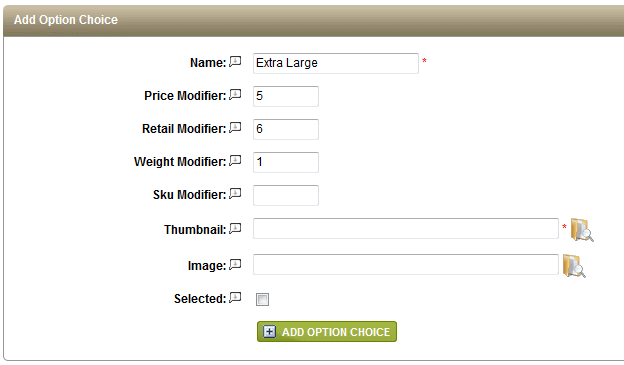
In the last section of the page, you can create another choice for this option.
-
With one form, you can enter a new option Choice with the Name, Swatch, Image, and any modifiers for the product.
-
Select the images in the same manner. Click the ADD CHOICE button when finished.
There isn't a technical limit to the number of option choices that can be displayed on the product page. You may need to make adjustments with swatch sizing and number of columns to display them within the area given. Page customization may be necessary if you have a large number of product option choices to display with swatches.
![]()
Go to Site Map