Catalog > Add Digital Good
Add Digital Good
Learn how to create digital goods and setup emails for download notifications and automate license keys.
Adding a New Digital Good
-
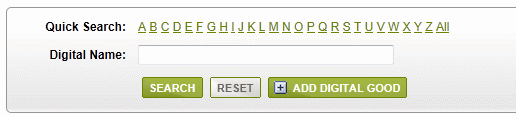
From the Manage Digital Goods page, or from the top-menu, go to Catalog > Digital Goods.
-
In the top search form, find and click the ADD DIGITAL GOOD button.
-
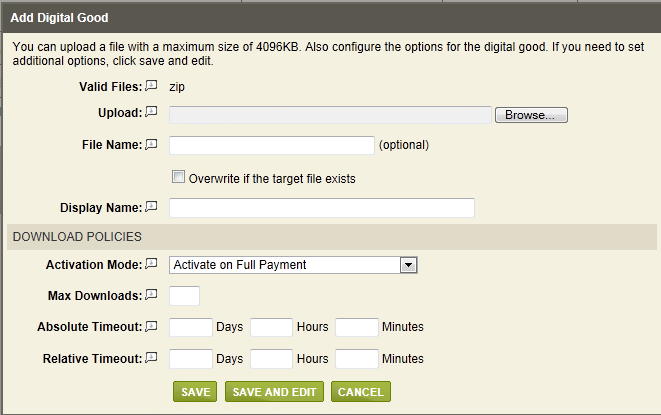
A pop-up will be displayed like the one shown below.
-
The first section is where you can upload a file and name add a display name for the Digital Good. These two items are required.
-
Valid Files - This displays the type of files that can be uploaded through the administration. This is a built-in security feature under System Settings.
-
Upload - Use the Browse button to select a file from your computer. The maximum size that can be uploaded through a form is 4096KB.
If you have a file larger than 4mb, you will need to use an alternate method to place the file in the \App_Data\Digital Goods\ folder of the installation. -
File Name - After uploading, the name of your selected file will populate the File Name field. If needed, you can rename the file on upload by entering a different name here.
-
Overwrite if the target file exists - an option that must be if you intend to upload and overwrite an existing file.
-
Display Name - Enter a name for your Digital Good. This will be shown to customers when they view their digital goods.
-
After you have selected a file to upload and a name for your digital good, click the SAVE and EDIT button for additional licensing and fulfillment options.
If you only wish to set the Download Policy options, you can do that from this page and click the SAVE button to be returned to the Manage Digital Goods page.
As shown in this example, the Digital Goods settings and configuration page -
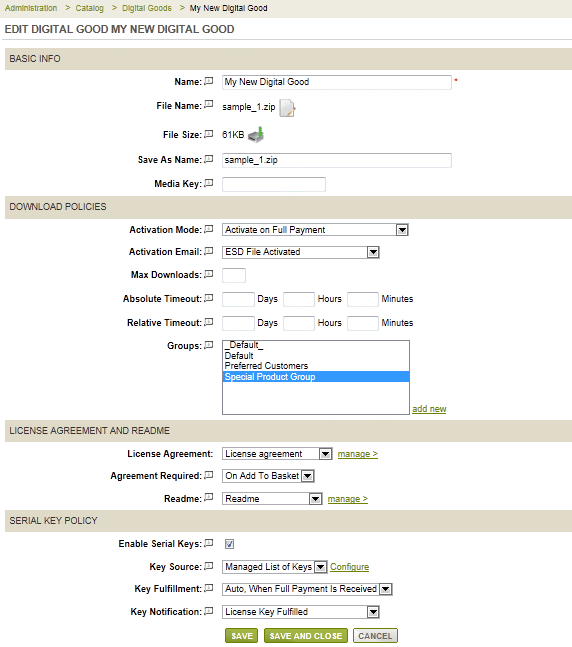
Basic Info
In the top section, you'll find the Basic Info section. This is where you can edit Digital Good names previously entered.
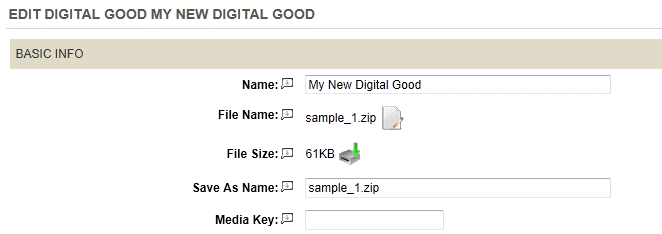
The Media Key can be used to provide your customers a password or passcode necessary to open the file being downloaded. This information is provided in the Key Fulfillment email template. For more information, see Email Templates
Download Policies
The Download Policies section is where you will configure the rules for activating the digital download.
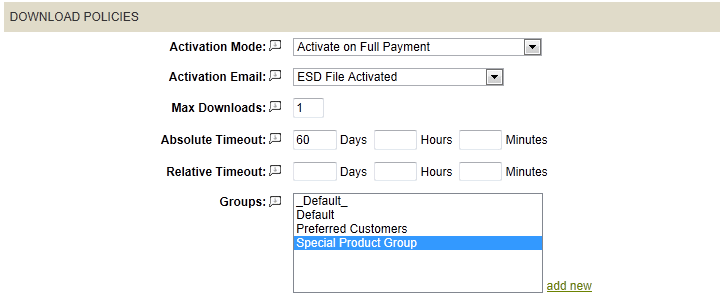
Activation Mode - When a product with a digital good is purchased, you must select the time when the file will be available for download, or activated.
-
Activate Manually - You will need to activate the download through each order if you choose this option.
-
Activate on Full Payment - This option will make the download available after the order is paid.
-
Activate Immediately on Order Placement - This option will make your download available through any paid or unpaid order. Be careful not to use this option unless you have secured your digital good download with a license key.
Activation Email - This is the email that is sent for each Digital Good in the order. It is sent when the Activation Mode setting from above is triggered. The default email from AbleCommerce sample data is named 'ESD File Activated'.
Max Downloads - The maximum number of downloads allowed per customer. Leave blank to allow unlimited downloads.
Absolute Timeout - The amount of time, after the order is placed, in which the customer shall have to download the file.
Relative Timeout - If you going to allow more than a single download, then you can set the amount of time between the first download and the expiration of the download.
Groups - [New in R7] When you assign a digital good to a group, any customer who is a member of that group, will be able to view and download the digital good file. This overrides the activation policies for the order, and no email will be sent.
HINT: Use subscriptions with groups and digital goods to give your customers easy and automatic access to files for download. Once the subscription expires, the user will be removed from the group, and access to the downloads is no longer available.
License Agreement and Readme
The License Agreement and Readme features are optional. You will need to create a License Agreement and/or Readme before you can assign it to a Digital Good. If you need to do this now, then click the manage > link(s) before continuing.

License Agreement - Select a license agreement from the list.
Agreement Required - This option determines when the customer must read and accept the license agreement before downloading.
-
Never - A license agreement is not required in order to download.
-
On Add to Basket - The selected agreement will be presented, and must be accepted, before the user can add the product to the shopping cart.
-
On Download - The selected agreement will be presented, and must be accepted, before the user can download after purchase.
-
On Both - The selected agreement will be presented twice. The user will be required to read and accept the agreement before adding to basket or downloading.
Readme - This option will display a link to the selected Readme file. When clicked a pop-up will display showing the readme text for informational purposes.
Serial Key Policy
Using Serial Keys with your digital goods is an optional feature. You can manage your own license key lists which are available through manual or automated fulfillment.
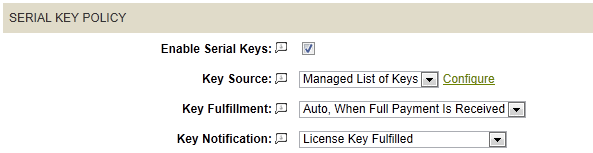
Enable Serial Keys - If you want to record, store, or generate a license key for the digital good.
Key Source - This setting determines whether the license key will be manually entered or come from an available source of keys.
You will need to provide a list of keys, if this option is selected. If you do not have any key lists created, you'll need to click SAVE to view the Configure link.
Key Fulfillment - Determines when a license key is distributed by email and/or displayed to the customer with their download.
-
Manual - No license keys are used. The merchant may need to enter a license key to the order manually.
-
Auto, When Order is Placed - When using a Managed List of Keys, you can use the automatic fulfillment feature. This setting will use the next available key from your list to display it to the customer when the order is placed. You should make sure to use a payment capture, at time of order, if you are going to use this setting.
-
Auto, When Full Payment is Received - This option is also available with a Managed List of Keys. When selected, the next available key is displayed when the order is fully paid.
Key Notification - If you want to send an email when a license key is automatically used or manually entered, then select a default email from the AbleCommerce sample data named 'License Key Fulfilled' or create your own.