Warehouses
Table of Contents Show
Managing Warehouses
A warehouse is used for all products. You must have at least one warehouse to ship anything in AbleCommerce. Even digital goods must belong to a (virtual) warehouse. Your default warehouse will always be known as your Primary Warehouse. You can select a different primary warehouse at any time.
From the menu, go to Configure
> Shipping > Warehouses to view a page similar to
the one below.
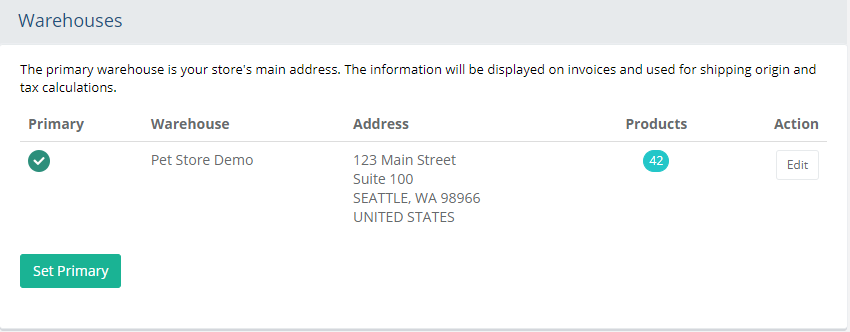
The Warehouses listing page is shown.
In the first column, the Primary warehouse is indicated by the circled checkmark.
The primary warehouse information is shown on your invoices. It can also be used if you have setup tax rules and the taxable area is within your default warehouse address. This typically applies to international merchants who use VAT and must display prices with tax. In this case, a taxable product will be shown with tax in the case of the warehouse address being within the taxable region or zone.
The Warehouse column lists the name of each warehouse. This information will be shown to the customer.
The Address column shows the physical location of location where products will be shipped from.
The Products column has a counter showing the number of products that are assigned to the corresponding warehouse.
The Action column allows you to Edit the name and address of the warehouse, or Delete any warehouses that are not set as the primary.
When you create multiple warehouses, you are creating new shipping origins. A warehouse
is typically a unique physical location, and used to create orders
with multiple shipments. By using Ship
Groups with warehouses you can assign different shipping services
or methods to a warehouse for special shipping conditions, such
as products that are oversized, overweight, or perishable.
All the products in your catalog are assigned to a warehouse. It is a requirement; so it is best to set up warehouses before adding your products. If you will only be using one shipping origin, then it isn't necessary to create more than one warehouse. You can, however, easily move products from one warehouse to another.
Add or Edit a Warehouse
AbleCommerce is installed with one default warehouse. All products must belong to a warehouse.
From the menu, go to Configure > Shipping > Warehouses.
From the Warehouses page, click the Add Warehouse button located in the upper-right corner of the page.
From the Add Warehouse page, you will see a form to enter basic address information.
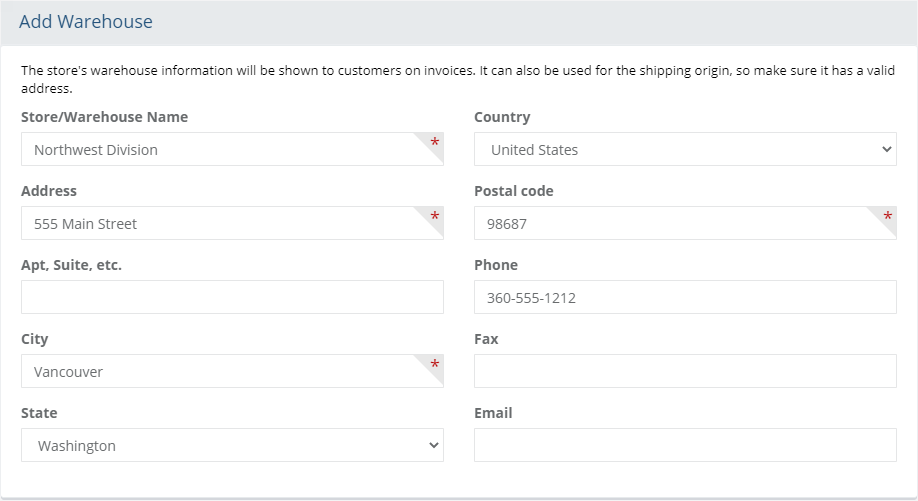
Enter the Store/Warehouse Name for the warehouse. This will be displayed within the order administration.
Enter the street, city, country, state, and zip code. Make sure to use the correct zip code, especially if using a live shipping service.
If desired, enter the phone, fax, and email. This will be displayed on the packing list and invoices.
Click the SAVE button to make updates, or use the SAVE and CLOSE button when finished.
You will return to the Warehouses page where your new warehouse will be shown.
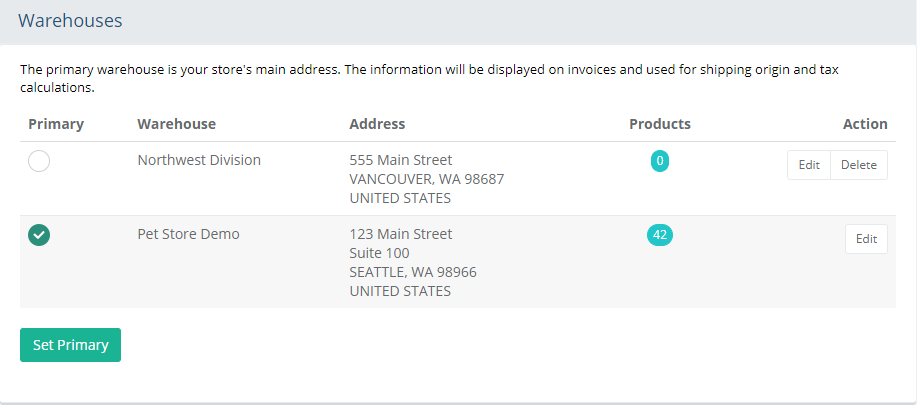
Note that the product count is shown for each warehouse. After you create a new warehouse, you should assign products to it.The Primary Warehouse is indicated by the green circled checkmark in the first column. To change the Primary Warehouse, select it and click the Set Primary button in the lower-left corner.
You can change the address or name of a warehouse by clicking the Edit button from the Action column.
You can remove a warehouse by clicking the Delete button from the Action column. You cannot delete the default warehouse.
Assigning Products to a Warehouse
After creating a new warehouse, you can assign products to it. There are a few methods available:
Search and Assign - to assign several products to a warehouse, click on the linked number counter in the Products column for the tax code you want to assign.
Moving Products from a Deleted Warehouse - if a warehouse that you wish to remove has products assigned, you can delete it while reassigning its products.
Batch Edit - to change or update several products with a different warehouse, go to the Catalog > Batch Edit > Products page and follow the instructions there.
Edit a Single Product - go to the product editing page, which is available from the Catalog > Products page. Select a product to edit. From the default tab named 'Product', find the section named "Shipping and Tax" and select a warehouse from the Warehouse field option.
Search and Assign Products to a Warehouse
From the menu, go to the Configure > Shipping > Warehouses page to view a list of warehouses previously created.
To assign a warehouse to products, click on the linked number counter in the 'Products' column for the applicable warehouse.
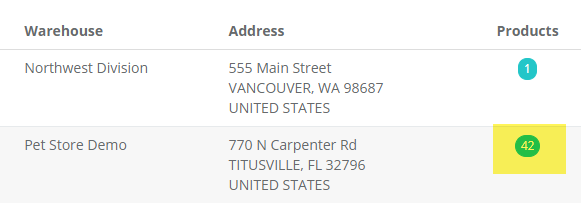
This will bring you to the Search Products form, which is similar to the one shown below.
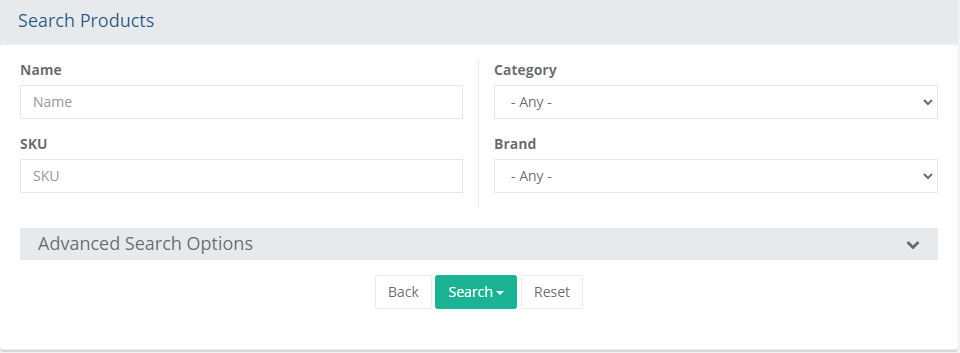
The top section provides common search fields and options that can be used to find one or more products. If you want additional search options, then click on the Advanced Search Options header to expand a section with additional search criteria. Reference the sample screenshot below:
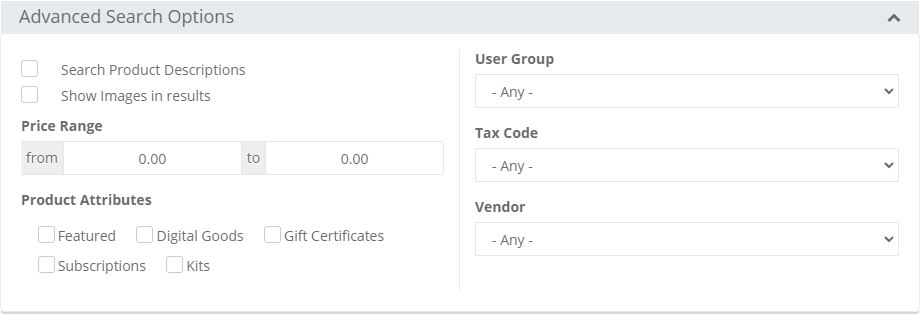
Using the search form(s) provided, find the products that will be assigned to the warehouse selected from the prior page.
After entering the search criteria, press the Search button which will drop-down to provide 3 additional filters:
- All Products: results include all products regardless of their assignment to warehouse.
- Assigned Products: results include only the products that are assigned to the selected warehouse.
- Unassigned Products: results include only products that are not assigned to the selected warehouse.
By default, the search results show any products that are currently assigned to the selected warehouse. Reference sample below:
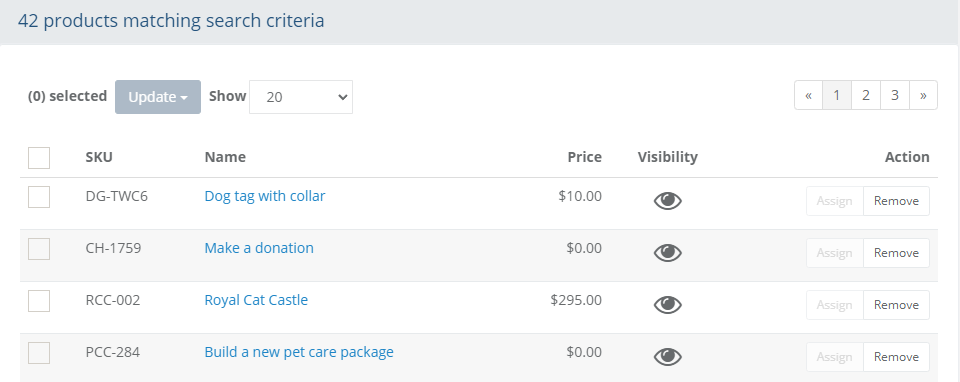
You can either use the buttons from the Action column to individually Assign or Remove product associations, or..
Check the box next to one or more products, or check the box at the top of the first column to quickly select all products in the search results.
This will activate the Update button, which will drop-down to provide 2 options: either Assign or Remove the selected products.
The update will take place immediately after selection.

When finished assigning products, click the BACK button to return to the Warehouses page.
Moving Products to a different Warehouse
From the Warehouses page, click Delete button in the Action column for the warehouse you want to remove. This cannot be the default warehouse.
This will display a page listing of all the products that belong to this warehouse.
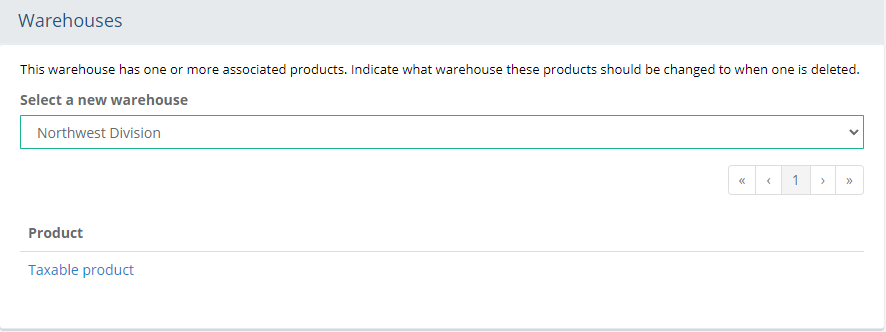
Each product has a link to the Edit Product page.Using the option list, Select a new warehouse to move all the products to.
In the lower-right corner of the page, click the red Delete button to continue, or Cancel button to return to the previous page. Once the Delete action has occurred, the products are moved to the warehouse selected.
Adding or Changing a Product's Warehouse
From the Catalog menu, go to the Edit Product page for any product.
When you add or edit a product, you can select the Warehouse from the SHIPPING and TAX section.

The list of existing warehouses are available for the Warehouse selection.
Multiple Shipments at Checkout
The example below shows the selection of shipping methods for two shipments.
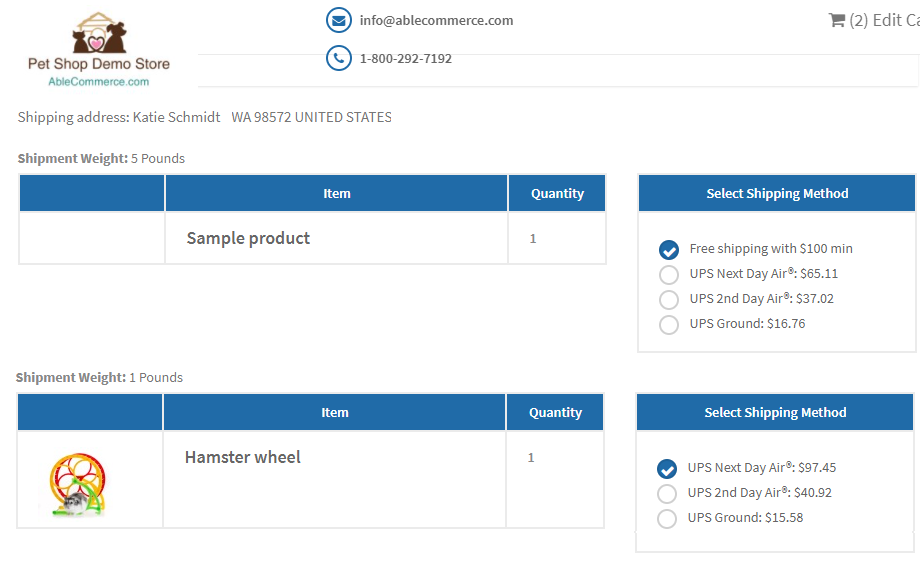
Multiple shipments can be created for two reasons:
The order contains items from more than one warehouse. One shipment created per warehouse.
The customer has selected multiple addresses for different items in the order. One shipment per address.