Ship Groups
Table of Contents Show
Managing Ship Groups
When you sell and ship items with unique shipping requirements, using Ship Groups will allow you to organize your shipping methods and provide unique combinations of shipping options for all of your products.
For products using multiple ship groups, only the common shipping methods will be available, so make sure to provide overlapping shipping methods where possible. In addition, when you have shipping methods that are not assigned to any ship group, they will appear for all products regardless of the product's ship group assignment.
Using the Ship Groups page
To find the Ship Groups feature, use the menu to navigate to Configure > Shipping > Ship Groups. From this page you can create new ship groups, assign products and shipping methods, both of which are required for this feature. Ship Groups are optional and used when you need to provide unique shipping scenarios for products that have special shipping needs.
A new installation will not include ship groups by default, so an example showing some common shipping scenarios is shown below:
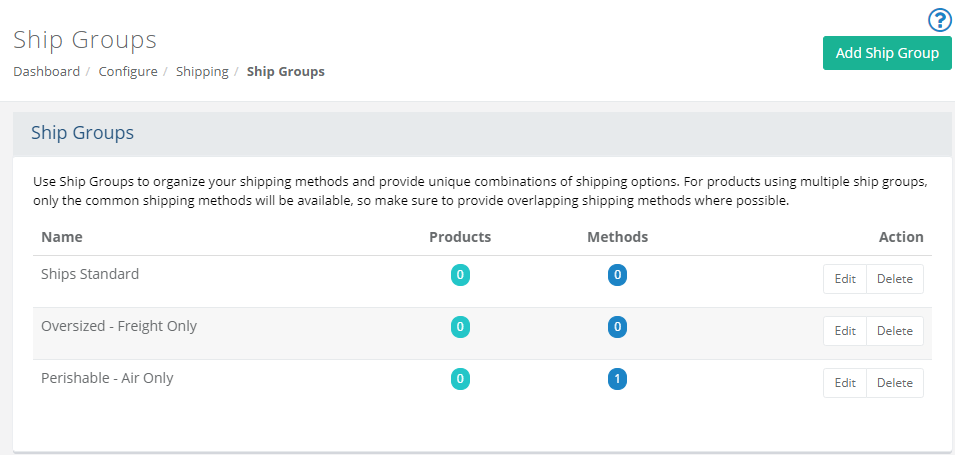
The Ship Groups listing page is shown above.
In the first column, the Name of each Ship Group appears. These names are for internal use only.
The Products column has a counter showing the number of products that are assigned to the corresponding ship group.
The Methods column has a counter shown the number of shipping methods that are assigned to the corresponding ship group.
The Action column allows you to Edit the name of the ship group, or Delete any ship groups.
Add or Edit a Ship Group
A ship group must have at least one shipping method and be assigned to products.
From the menu, go to Configure > Shipping > Ship Groups.
From the Ship Groups page, click the Add Ship Group button located in the upper-right corner of the page.
From the Add Ship Group page, you will see a form to enter a name for the shipping group. This name will only appear for the admin users.
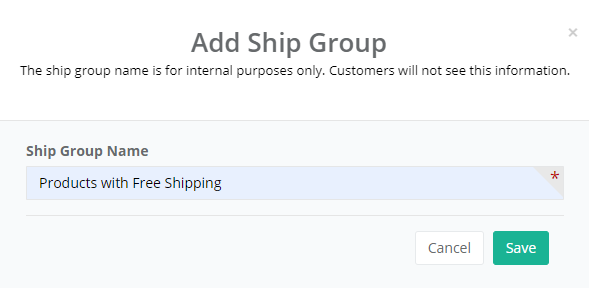
Click the SAVE button when finished. You will be returned to the Ship Groups listing page.
To edit the name of the Ship Group, click the Edit button from the Action column.
Assign Shipping Methods to a Shipping Group
Before completing this step, you should have your Shipping Methods created and ready to assign. See Shipping Methods for more information.
To assign shipping method(s), click on the linked number counter in the 'Methods' column for the applicable Ship Group.
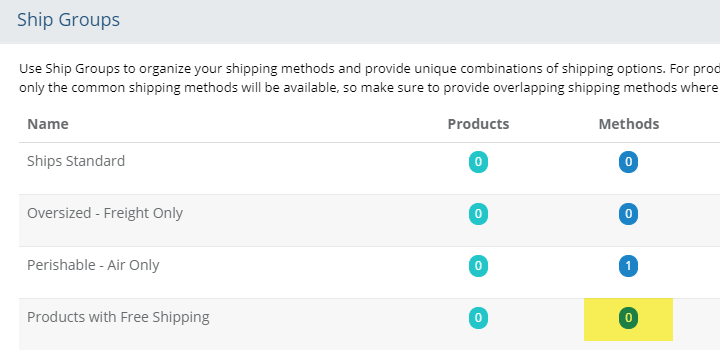
This will bring you to a list showing all available Shipping Methods. If you need to create more, use the Add Shipping Method button in the upper-right corner of the page.
Use the checkbox in the first column to select all methods that will be assigned to the chosen Ship Group.
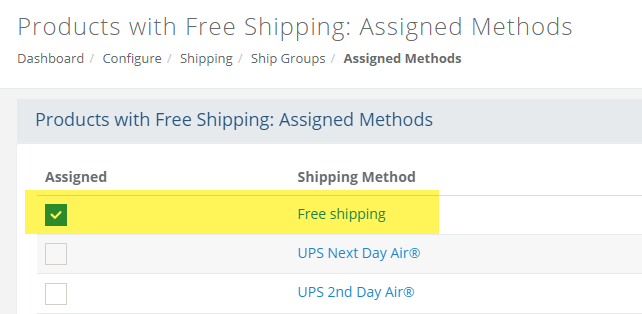
Click the Save or Save and Close button to return to the Ship Groups page.
Note: This example shows how to create a Ship Group for Free Shipping on certain products. It's also common for some businesses to sell products that can only be shipped to certain regions, by certain methods, or by individual carriers. When setting up your Shipping Methods, keep Ship Groups in mind so you can organize your products into groups that have only the methods that a product can ship by.
Search and Assign Products to a Ship Group
From the menu, go to the Configure > Shipping > Ship Groups page to view a list of ship groups previously created.
To assign a ship group to products, click on the linked number counter in the 'Products' column for the applicable ship group.

This will bring you to the Search Products form, which is similar to the one shown below.
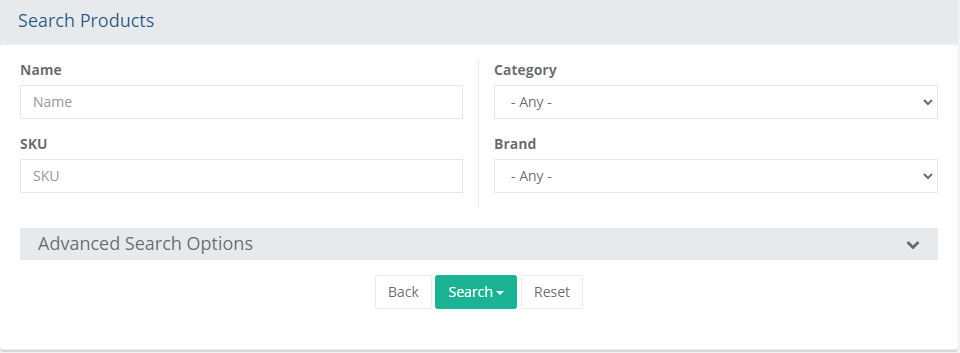
The top section provides common search fields and options that can be used to find one or more products. If you want additional search options, then click on the Advanced Search Options header to expand a section with additional search criteria. Reference the sample screenshot below:
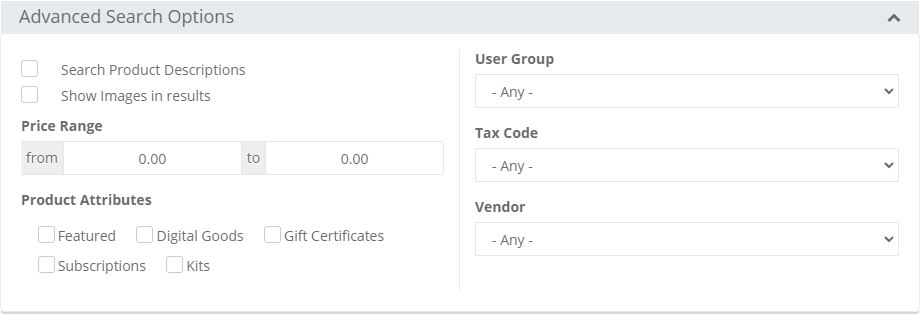
Using the search form(s) provided, find the products that will be assigned to the ship group selected from the prior page.
After entering the search criteria, press the Search button which will drop-down to provide 3 additional filters:
- All Products: results include all products regardless of their assignment to the ship group.
- Assigned Products: results include only the products that are assigned to the selected ship group.
- Unassigned Products: results include only products that are not assigned to the selected ship group.
By default, the search results show any products that are currently assigned to the selected ship group. Reference sample below:
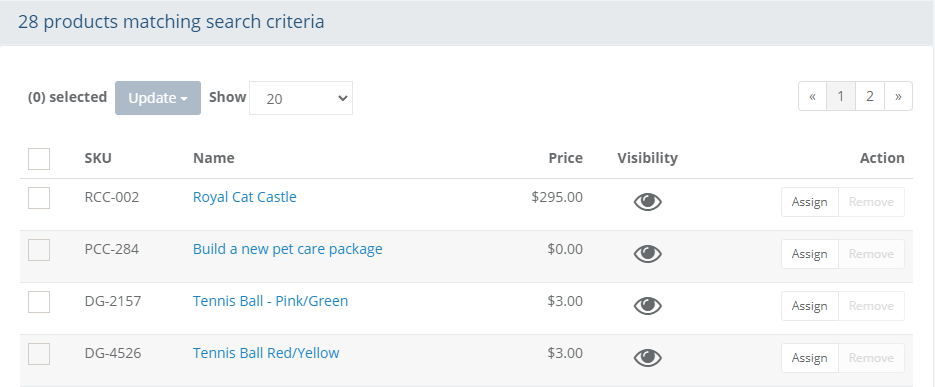
You can either use the buttons from the Action column to individually Assign or Remove product associations, or..
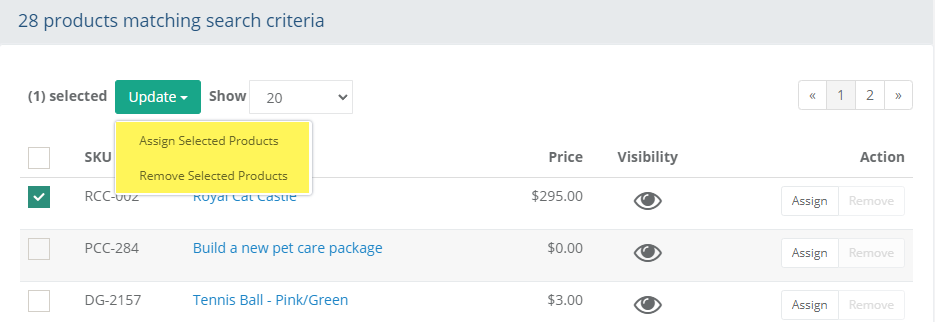
Check the box next to one or more products, or check the box at the top of the first column to quickly select all products in the search results.
This will activate the Update button, which will drop-down to provide 2 options: either Assign or Remove the selected products.
The update will take place immediately after selection.
When finished assigning products, click the BACK button to return to the Ship Groups page.
Adding or Changing a Product's Ship Group
From the Catalog menu, go to the Edit Product page for any product.
When you add or edit a product, you can select the Ship Group(s) from the SHIPPING and TAX section.

For a product that can use all available shipping methods, then select 'All Ship Groups'.
If the product has limited shipping methods, then use the 'Selected Ship Groups' and select any that apply to the product's shipping conditions.
When finished, click the SAVE button.