Watch the Installation Video -
Or read the step-by-step instructions below. These will include additional details with regards to specific versions of AbleCommerce, .Net, and the website settings.
These instructions are intended for new installations of AbleCommerce 7.x. This document assumes -
that you have already met the minimum system requirements
downloaded the software from your order, and
created a database, or installed SQL Express.
If you have not completed all of these steps, please go back here.
|
Watch the Installation Video - Or read the step-by-step instructions below. These will include additional details with regards to specific versions of AbleCommerce, .Net, and the website settings. |
AbleCommerce supports three versions of the .NET Framework. Depending on the version of AbleCommerce, you may need to adjust the installation files before beginning.
If you are installing the latest version of AbleCommerce 7.0.7 (build 14600+), and your website is running ".NET Framework Version 4.0, no action is necessary.
Continue to Step1 below and run the web-based installer.
If you are installing AbleCommerce 7.0.3 through 7.0.7 (build 14481), and your website is running ".NET Framework Version 4.0", complete these additional steps before continuing.
If you are installing AbleCommerce 7.0.7 (build 14600), and your website is running ".NET Framework Version 3.5", complete these additional steps before continuing.
If you are installing AbleCommerce 7.0.3 or higher, and your website is running .NET Framework Version 2.0", complete these additional steps before continuing.
For more information, please reference the AbleCommerce Compatibility Guide.
AbleCommerce can be installed to a website running in either "Integrated" or "Classic" Managed Pipeline Mode. To use the "Classic" mode, or read more about this setting, expand this link for additional information.
Note: NO changes are necessary if your website uses Integrated mode, or if you are installing the latest version of AbleCommerce.
Copy all program files to the desired location in your website.
Note: If you are installing AbleCommerce to a virtual location, make sure to configure a web directory if necessary.
Open a browser and access the installation page to begin.
e.g. http://<your_website_name>/install/default.aspx
Read and Accept the License Agreement to continue.
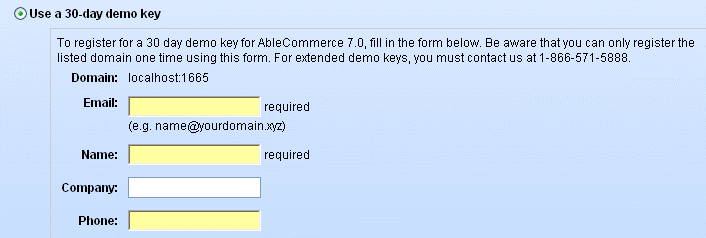
On the first page of the install wizard, you will see a section named License Key. There are three choices here.
Use a 30-day demo Key - no license key is required, simply enter your email, name, company, and phone to register for a 30 day full installation. You can enter your license key later without re-installing.

Provide my license key - enter the public key you were sent as fulfillment of your order.

Upload my license file - this option would only be used if you have the "commercebuilder.lic" file from a previous install. (This is not common)

Choose the License Key option
Enter the required information.
IMPORTANT LICENSE KEY NOTES:
When you request a key, make absolutely sure it matches the website name or IP that you are installing to. After you enter a license key on this page, it will automatically use the website and/or IP the key was tied to. If you install the wrong key, you will receive an HTTP 404 Not Found error on the next page. If this happens, simply request a new key through your order.
In order to validate your AbleCommerce license key, you must be able to access https://www.ablecommerce.com from the server that you are installing to. If this is not possible, let us know in your key request.
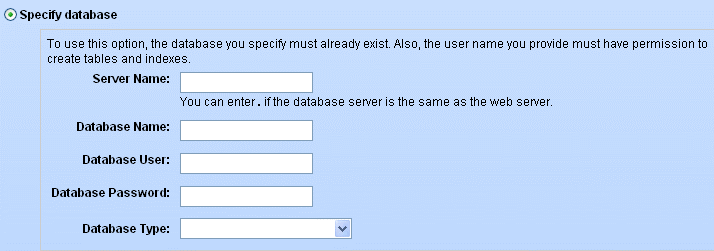
On the bottom of the first page of the install wizard, you will see a section named Database Connection. There are three choices here.
Specify database - this option is used if you have created a new (empty) MS-SQL database.
Make sure the database owner has full permissions to read/write.
Enter the server name or IP, database name, database user, password, and select the database type*.

* Beginning in version 7.0.3, the database type is automatically recognized so you will not see the Database Type selection.
Specify connection string - this option is for advanced users who wish to supply a connection string to their database.

Use the supplied SQL Server 2005 database - this option does not require that you create a database*.

*You must have already installed SQL Server 2005/2008 Express in order to use this option.
Choose the Database option
Enter the required information as needed.
The next step ensures you have acknowledged and reviewed the secure implementation guide.
Be sure to download the link given to the PDF which describes the steps that must be completed to make sure you are using AbleCommerce in a PCI compliant manner.

Check the box if you acknowledge that you have reviewed the secure implementation guide.
Click the CONTINUE INSTALL > button to continue.
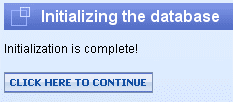
If you have entered the correct information, you will see a database confirmation page.

Click to continue with the last step of the installation wizard.
You should now see the page Install AbleCommerce 7.0.x (Step 2 of 2). This is where you will enter the information necessary to create your store.

Enter the name of you Store. You can change this later.
Enter the email address of the primary store administrator. You can create additional store administrators later.
Enter a password. Write this down! If you forget your admin password, it will not be easy to recover.
Enter the primary address for your store. You can create additional warehouses later if needed.
Select the Country that you will be doing business with. We recommend that you select All Countries and remove any later.
The Basic Data option is highly recommended so that you will have a functional store.
The Additional Data is recommended and includes sample products that demonstrate many of the features of AbleCommerce. After installing, you can use the Quick Start Guide which uses the sample data in demonstration. The sample data can be easily removed later.
When finished, click the button to Install AbleCommerce. If successful, you will see a confirmation page.

Click the button to Continue to Admin.
Login using your username and password to access the AbleCommerce Dashboard.

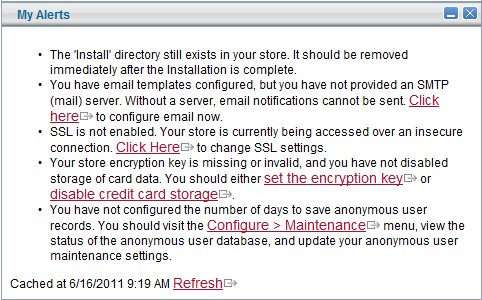
To get started, Check the Alerts Menu and complete any tasks as indicated.

Your first task should be to remove the 'Install' directory. For security reasons, this folder should be removed immediately after installation.
After installation, make sure to check for free Service Release upgrades, or Hot Patches as posted in the Announcements section on the home page of this website.
 Merchant Guide
  - Online documentation for using the AbleCommerce program and configuration of features.
Quick Start Guide  - After installation, use this guide to setup and configure your store.
Copyright © 1994 - 2025 AbleCommerce.com, All rights Reserved
eCommerce shopping cart software platform