Merge CMS Staging Data
The AbleCommerce Merge CMS Staging Data is a special utility that can be used on major upgrades from AbleCommerce 7 or Gold to the latest version, AbleCommerce 9. The utility is designed to work with data between two AbleCommerce 9 upgraded installations.
The purpose of this utility is to allow developers time to upgrade to the new version, and have a high-traffic and/or custom AbleCommerce store requires the first upgrade and the following site development to take place on a separate website. AbleCommerce 9 has a Content Management System which is not part of the old versions, so the development time to adjust the store pages such as header, footer, etc. can take a few hours on a simple site, to several weeks, or even months, depending on the project size.
When the proposed store's development and styling is finished, some clients create a second staging site. This allows all admins involved in the project to give everything a good test before going live. This is optional, but recommended on sites with heavy customizations.
Schedule the "go live" time and expect to have as little as 15 to 30 minutes downtime while the upgrade and merge takes place.
Here is an overview of the process:
Install #1 (AbleCommerce 9 development/staging site) -
Upgrade Gold/AC7 database to version 9.
Install "Merge CMS Stating Date" plugin, but do not configure. Using transaction logging, it tracks changes specific to the CMS.
Finish development and prepare the staging site for final testing.
Install #2 (AbleCommerce live 9 site) -
Turn off the live Gold/AC7 store for the final upgrade to version 9.
Backup and Upgrade the Gold/AC7 database to version 9. This should have all the latest data.
You do not need to install the plugin again, instead login to Install #1 (staging/dev) and configure the plugin.
The database changes from Install #1 (dev 9 store) will be merged to Install #2 (live 9 store).
Step 1: Install the Merge CMS Staging Data Plugin for AbleCommerce 9 immediately after upgrading
Install the plugin and activate it immediately after upgrading to version 9 on the first installation - the development site. It is important to install the plugin before making changes as the transaction logs will be stored only if the plugin is installed.
Login to your newly upgraded (from AC7/Gold) AbleCommerce 9 installation.
For the exact steps to upgrade, please see this page in our help site.Using the menu, go to the Plugins page.
Use the Filter Plugins option and select the type "General".
Note: Merge CMS Staging Data will only be shown if you are using AbleCommerce 9.0.9 (or later), or if you've installed the plugin separately.

Click the green Install button in the far right column.
When the confirmation popup appears, click the green Yes, install it button.
Do not configure the plugin at this time.
Step 2: Develop the newly upgraded AbleCommerce 9 store
Complete the upgrade process which involves the following steps:
Make a copy of the sample theme and give it your own custom name.
Add your main store logo, mobile logo, and printable logo.
Set Defaults for the outer Page template and Inner template. Create custom templates, if you like.
Make a copy of the store header widget board, and customize it.
Make a copy of the store footer board, and customize it.
Adjust colors as needed. Use the custom.css file under your custom theme.
Review your home page, category pages, product pages, and the checkout system.
Review the new email templates and merge any custom changes over.
When all development is complete, configure the plugin.
NOTE: During development, if you decide to Rebuild all the Catalog URL's to a new format, the changes will be logged and merged to the proposed live site. In cases where the catalog is large, more that 5,000+, then the merge process could fail. In cases of large catalog stores, do not Rebuild the Catalog URL's during development and instead wait until the final upgrade is completed.
Step 3: Final upgrade to AbleCommerce 9
Estimated down-time between 15 to 30 minutes depending on size of database being upgraded.
Stop the live Gold website.
Backup all* the Gold application files and move them out of the website, or create a new folder for the website root, whichever you prefer.
*Leave existing folder \Assets\*.* in place, but all other AbleCommerce folders and files need to be backed up and moved to a different location.Unpack a stock version of Ablecommerce application files, and copy ( \website\*.* ) into the root of the live website.
*Do not overwrite existing files and folders of the Gold installation. Make sure they are removed per last step.Take a backup of the live database and upgrade it for a second time on the live website.
Make a note of the database connection information as you will need it in the next step.
For the exact steps to upgrade, please see this page in our help site.
Step 4: Login to the AbleCommerce 9 development install and configure the plugin
The plugin is already installed, so now it is time to configure and use it to complete the final upgrade step. .
Login to your first upgraded (from AC7/Gold) AbleCommerce 9 development/staging installation.
Using the menu, go to the Plugins page.
Use the Filter Plugins option and select the type "General".
Note: Merge CMS Staging Data will only be shown if you are using AbleCommerce 9.0.9 (or later), or if you've installed the plugin separately.
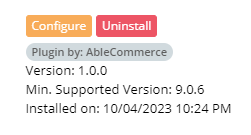
Click the orange Configure button in the far right column. The Plugin should have been installed immediately after the site was upgraded for the first time. If the plugin was not installed, then there will be no recorded data to merge.
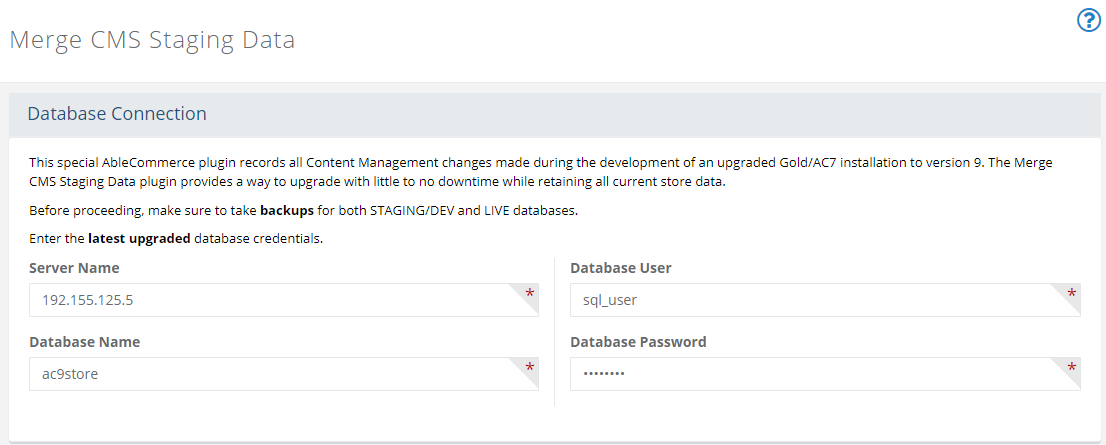
In the fields provided, enter the Server Name, Database Name, Database User, and Password. This information matches the live 9 database in step 3.
Click the Continue button.
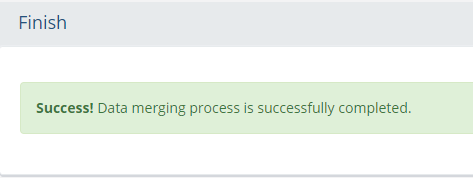
A processing bar appears. Wait for it to complete.
When finished, a success message appears.
Step 5. Recycle app pool and turn on the AbleCommerce 9 live store
Check the newly upgraded live 9 store.
Refresh (F5) your browser to view the latest CMS changes that are now merged from the development site to your store.
The development site should match the newly upgraded live site.
Give everything a quick test, including placing an order to test any shipping, tax, or payment gateways.
Congratulations!
Step 6. Final Post Upgrade Steps
Set a new encryption key, or restore the original one from your Gold installation.
Google reCAPTCHA is the default now, so you'll need to obtain a new key to use this feature, or change the setting to use the old version.
Rebuild Catalog URL's is an optional step. There are new formats available to generate URL's that are more SEO friendly.
Google Analytics 4 is available. If you had been using Google Universal Analytics, you can easily migrate to the new version.
You may want to notify your customers that, due to a required security update, the encryption of all passwords has been upgraded, and all existing accounts will be required to reset their password on the first login only.