Affiliates
Table of Contents Show
General Affiliate Settings
You can enable your customers to sign themselves up as Affiliates in your store. Configure commission rates and more.
Using the menu, go to People > Affiliates to view the Affiliates main page.
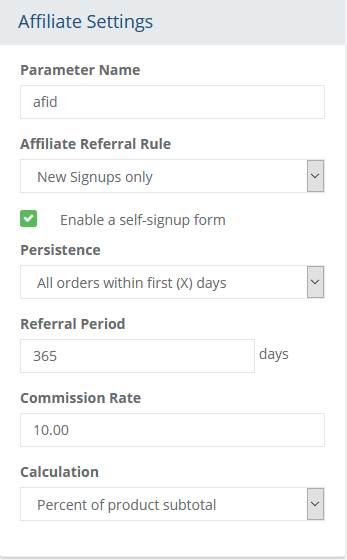
Find the "Affiliate Settings" section as shown in the example below. If desired, you can modify the default value (afid) for the Affiliate Link parameter.

Make sure to have any existing Affiliates change their links if you change the Parameter Name.
There is an Affiliate self-signup feature that can be turned on here by checking the box to Enable a self-signup form. For additional information about this feature, please skip to the section below.
Make sure to click the Save Settings button after making changes.
Affiliate Self Sign-up
Within the Affiliate Settings section is an option to enable self-signup form. If you want to allow a business associate to sign-up automatically for your Affiliate program, simply check the box to activate some additional settings.
There are two settings involved for all Affiliates.
Parameter Name - the parameter that must be used by all affiliates in order for the system to recognize a valid URL fore referrals. The affiliate ID must be appended to the parameter. As new affiliates are created, the URL using the parameter and affiliate ID is shown from the edit page of each affiliate record.
If the parameter name is changed, then any existing affiliates must be notified.
Affiliate Referral Rule - determines how different affiliates are interacting with new and existing users.
New Signups Only - Only new customers will be associated with an affiliate. Existing users will not be converted to an affiliate's account.
New Signups and Existing Users (no override) - Both new sign-ups and existing registered users may be associated to the affiliate, as long as the user isn't already associated with another affiliate record.
New Signups and Existing Users override affiliate - Both new sign-ups and existing registered users may be associated to the affiliate even if the existing user already has an affiliate association.
The settings below determine the commissions and referral period that a new Affiliate user will have after signing up. They can be changed at anytime once the new Affiliate has been created. These settings apply when the option to Enable a self-signup form is checked.
Persistence - indicates the length of time that a new user is eligible for a commissioned referral. Existing users are not applicable.
Persistent - this setting has no time limitation. A user's purchases will always be counted towards the referring affiliate.
First X Days - you can use this setting to limit the referral period to a set number of days. When this option is selected, you must enter a value in the Referral Period field.
First Order - this setting will allow the Affiliate to get paid on the first valid order only.
First Order within X Days - this setting limits the Affiliate to getting paid on the first order only, and that order must be placed within the number of days specified in the Referral Period field.
Referral Period - this field is only used to specify a number of days for an order to be placed that is valid for an Affiliate referral.
Commission Rate - this setting determines how much commission will be calculated on the order.
Flat Rate - enter a dollar amount that will be paid for each commissioned order
% of product subtotal - enter a percentage that will be paid on the sub-total of each commissioned order (less any taxes or shipping amounts)
% of order total - enter a percentage that will be paid on the total of each commissioned order.
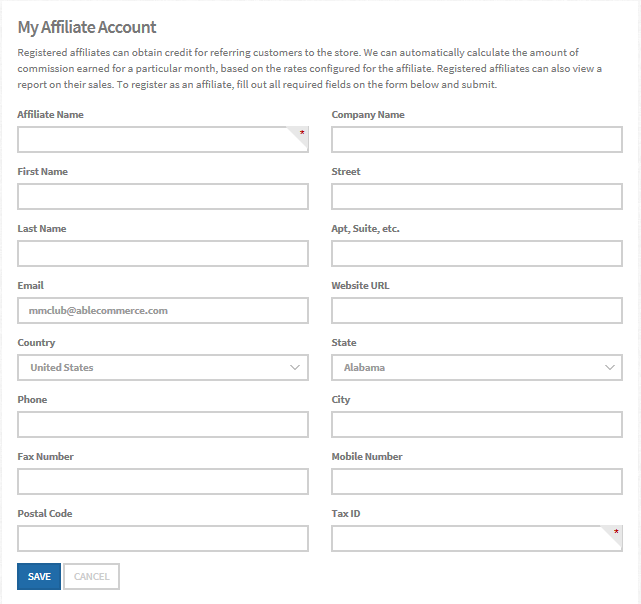
After clicking the SAVE button, the Account area on the retail side of your store will automatically have an Affiliate sign-up form available.
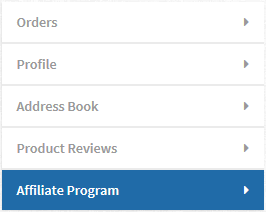
To find the new sign-up form, the new affiliate must have a registered login to the members account area. From there, a tab will be shown for "Affiliate Program".
The registered user can complete the affiliate form. At a minimum, the form requires an Affiliate Name and Tax ID for reporting purposes.
Once this is saved, a confirmation email will be sent to the merchant and also to the person who registered. You can modify the contents of the email template by going to Configure > Email > Templates and selecting the "Affiliate Registration" template.
Affiliate Commission Reports
The new Affiliate records appear on the People > Affiliates page within the Merchant Administration.
To add or edit affiliate records from the back-end administration, please see Adding a New Affiliate below.
The Affiliate needs to provide their customers a unique link with their Affiliate ID. This ID is shown in several locations, including the new registration email, the Affiliate page in the member's My Account area, and also within the Merchant Administration.
After an order is placed using an Affiliate ID, it will be shown to the Affiliate through their online reporting page from within the member's My Account area.
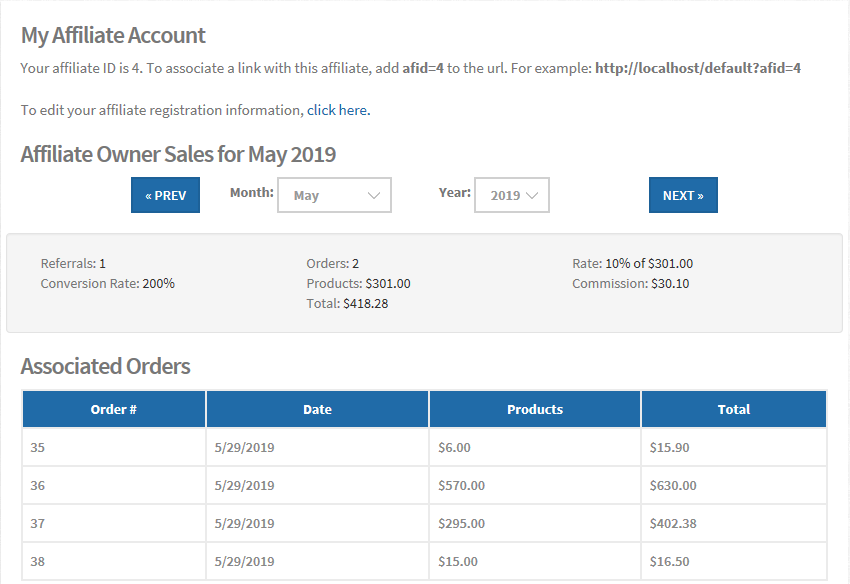
Information about the Order total and calculated commissions are shown. These reports are calculated monthly and can be viewed at any time. Details about each order are not shown, only the date the order was placed and the total amount of the order including shipping and tax.
Only orders that are fully paid will be included in the commissioned amounts shown.
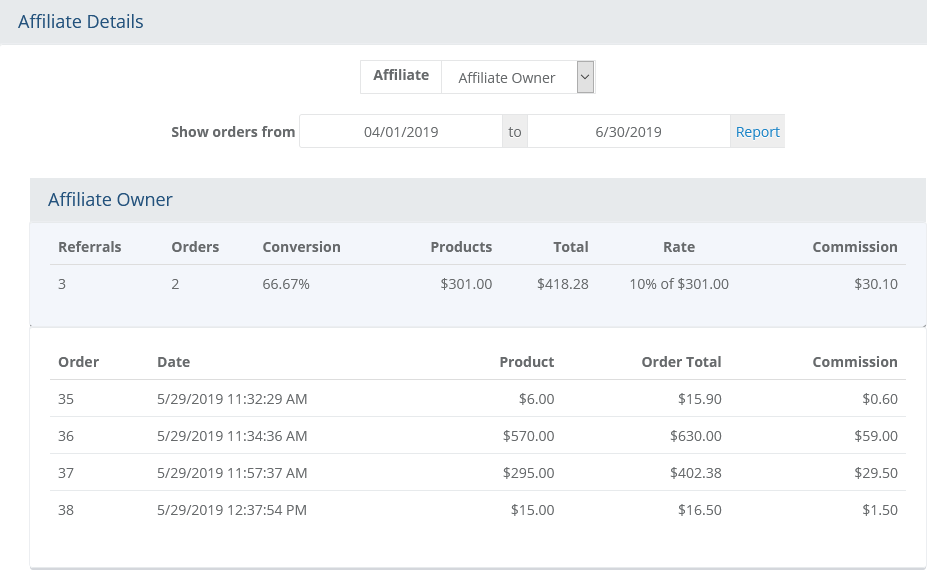
The same information can also be viewed by the merchant so commissions can be paid out. From the People > Affiliates page, click the linked number in the Orders column to view all orders placed using that Affiliates referring ID.
Third Party Tracking
If you plan to manage several Affiliates, then an integration with a third-party affiliate software should be considered. For this purpose, AbleCommerce provides a generic tracking form so you can enter the necessary Tracking URL into the field provided.
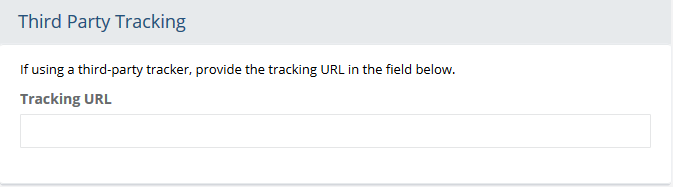
The URL's can be modified with variables, so that the actual values
are used when the tracking URL is rendered.
Use the following (case sensitive) variables in the URL to collect additional information as needed.
[OrderTotal]
Displays the order total.
[OrderSubTotal]
Displays the order total, less shipping, handling, gift wrap, and taxes.
[OrderNumber]
Displays the order number.
Here is an example of usage: https://www.yourdomain.com/affiliate_integration/af.aspx?Order[OrderNumber]&Sale[OrderSubTotal]
Adding a New Affiliate
Using the menu, go to the People > Affiliates page.
From the upper-right corner, click the Add Affiliate button to view a popup as shown in the example below.
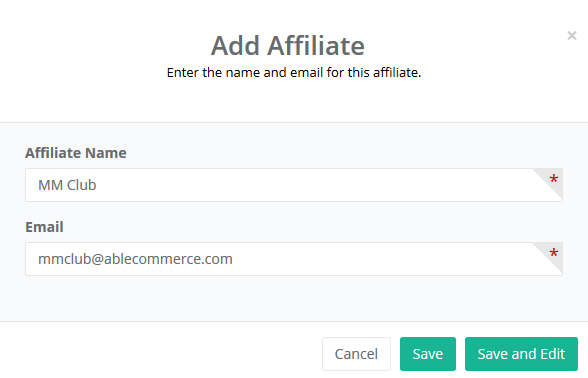
Click the Save and Edit button to configure the new record.
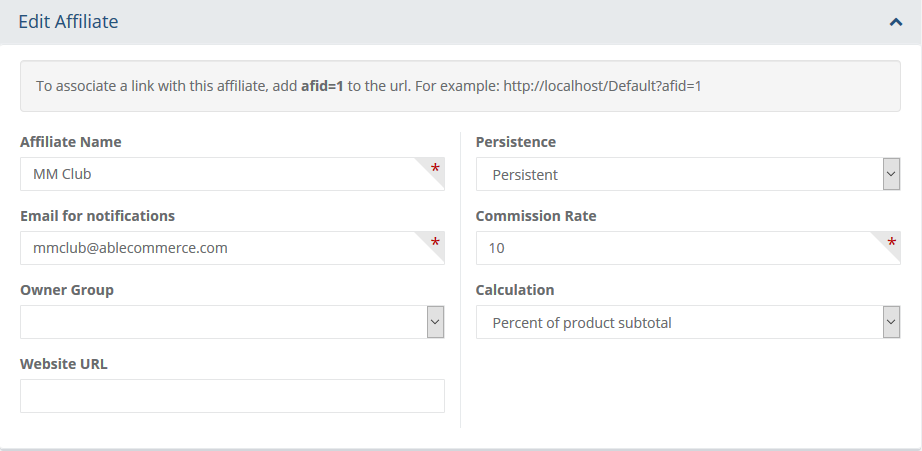
The Affiliate Name appears on reports and any orders placed through the Affiliate link.
Enter the Email for notifications address. This is the email that will be used to send a new affiliate email notification.
The Commission Rate is used for calculations. Enter a value and then select the Commission Type.
- Flat Rate (pays a fixed amount for each order)
- % of product subtotal (commission paid on order excludes tax and shipping)
- % of order total (commission paid on order includes tax and shipping)Enter Website URL for the Affiliate. This is optional and for internal reference only.
The Owner Group selection can be used to give access to the Affiliate's reports. Any member of the selected group will be able to view this Affiliate's report. This is optional and requires additional setup from the User Groups menu.
The Persistence setting determines the length of time that the Affiliate will receive commissions on orders.
- Persistent (no expiration, commissions are paid until the Affiliate record is removed)
- First Order (no expiration, commission is paid on a user's first order only, so subsequent orders by the same user are not commissioned)
- First X Days (commission is paid on all referred orders within the number of days specified for Referral Period)
- First Order within X Days (commission is paid on a user's first order within the number of days specified for Referral Period)In the bottom section, "Address Information", enter the primary contact for the Affiliate. You can use the fields to enter the company address and contact information as well. This is optional and for internal reference only.
Click the SAVE button when finished.
At the top of the page, you will see your Affiliate's Link.

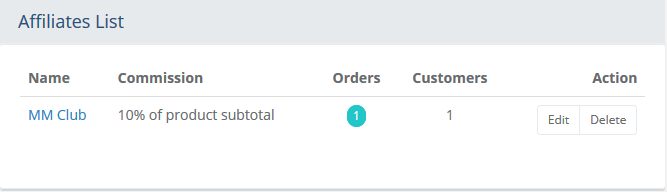
This information needs to be given to the Affiliate for whom the record is associated. Using this unique URL, the Affiliate should add links on his/her website. When a user arrives at your store via the Affiliate link, and makes a purchase, the order and commissions are tracked accordingly.New Affiliate records are listed on the Affiliates page. Details of the commission type and rate are shown.
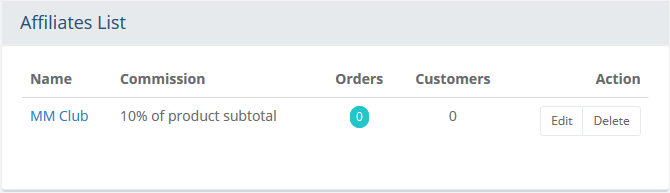
After new orders are placed using the Affiliate Link, you can also see the total number of Orders accruing.
Only Affiliates who's Persistence setting tracks repeat customers will be shown in the Customers column.Use the EDIT icon to make changes to the Affiliate record. We do not recommend making changes to the Commission or Persistence settings after orders are placed.
Use the DELETE icon to remove the Affiliate record.
Click the linked number of Orders to view the Affiliate report details.
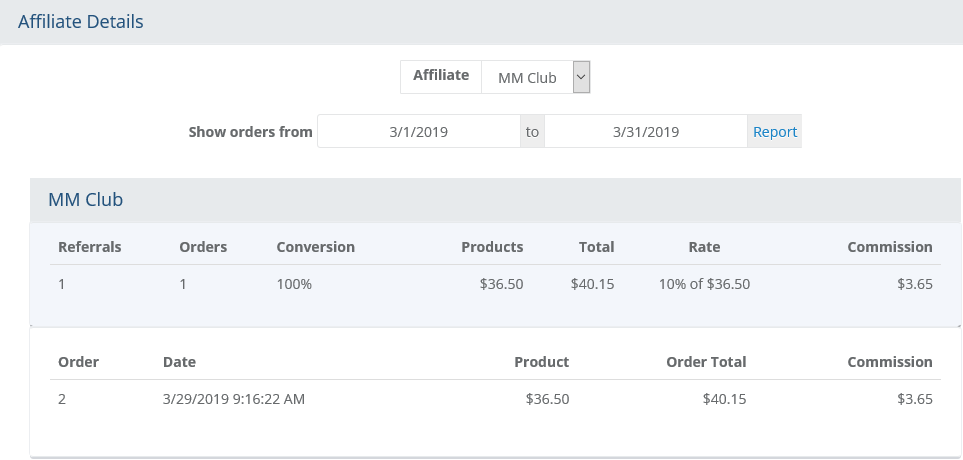
Use the available selections to change the reporting period or which Affiliate record(s) you would like to view.
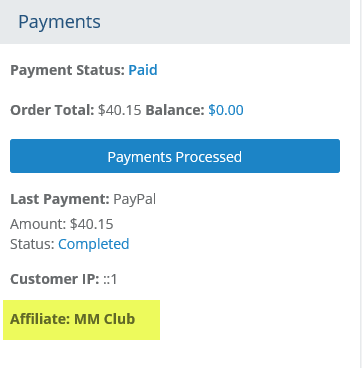
Within the details of an order, you can see the Affiliate referenced within the Payments section.
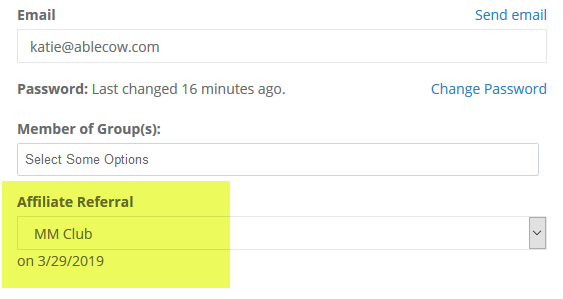
From the customer's profile, you can see the associated Affiliate in the Referred By* row. The date of referral is shown.
* In the case of Persistence settings "First Order within X Days" and "First Order", the order's Referred By setting will be indicated as 'No Affiliate' because the user's subsequent orders will not be tracked for the Affiliate.