Gift Wrap
Table of Contents Show
Managing Gift Wrap
The Gift Wrap feature gives the merchant the ability to create different wrapping groups with each one containing as many types of gift wrap styles as needed. The Gift Wrap groups can be seasonal or event themed. Each gift wrap style can include pricing, taxes, and images to represent them. The wrap groups are assigned to products and the customer will be presented with the different wrapping styles upon checkout.
Using the menu, go to Catalog > Gift Wrap to view a page similar to the one shown below.

The Gift Wrap management page displays the name of each Gift
Wrap Group and the number of Gift
Wrap Styles for each one.
In the Products column, a counter indicates the number of products that are associated to the Wrap Group. You need to associate products to the Wrap Group in order to see the Gift Wrap styles available at checkout.
To change the name of a Wrap Group, click on the Edit button from the Action column.
The Copy button creates a duplicate set of the selected Group and all of it's Gift Wrap styles. Click the Delete button to delete a Wrap Group, it's Gift Wrap styles, and any product associations.
Add Wrap Group
Learn how to create gift wrap groups and wrapping styles.
Using the menu, go to the Catalog > Gift Wrap page.
Click the Add Wrap Group button, from the upper-right corner of the page, to view a pop-up as shown in the example below.

Enter a Gift Wrap Group Name in the field provided. This information will be for internal use only.
Click the Save button to create a new Wrap Group.
Your new Wrap Group will displayed in the Gift Wrap Groups list. Now you will need to add at least one Wrap Style.

Add Gift Wrap Style
From the Catalog > Gift Wrap page, click the counter in the Wrap Styles column for the selected Wrap Group. A page similar to the one shown below will appear.

Click the Add Wrap Style button, from the upper-right corner of the page, to view a pop-up as shown in the example below.

Enter the Name of your Gift Wrap Style. This information will be shown to the customer during checkout.
Enter a Price for the gift wrap option.
When finished, click the Save button. The new Wrap Style appears in the list for the selected Gift Wrap Group.

Edit Gift Wrap Style
A Gift Wrap Style can include images to show your customers during checkout.
After adding a Gift Wrap Style, you can click the Edit button from the Action column to view a page similar to the image below.

The Gift Wrap Style Name and Price were previously entered while creating the new Gift Wrap style.
If the Gift Wrap is taxable, then make sure to select the applicable Tax Code.
On the right side of the page, drag and drop a small Thumbnail image and a Full Size image into each of the boxes shown.
You can also select an image from the server using the folder icon, or remove the image using the trash can icon.

When finished, click the Save and Close button to return to the Gift Wrap Groups page.
Continue adding Gift Wrap Styles to the Wrap Group(s) available.
You can return to the Gift Wrap Styles page by clicking the number counter in the Wrap Styles column for the selected Wrap Group.

Use the up and down arrows in the Sort column to change the position of the Gift Wrap options on checkout.
Remove Gift Wrap Style
If you want to remove the Gift Wrap style or the entire Gift Wrap group, click the Delete button from the Action column.

A confirmation pop-up will appear.
Confirm to delete the Wrap Group, all of its associated Wrap Styles and any product associations. This action cannot be undone.
Add Gift Notes
Using the menu, go to the Catalog > Gift Wrap page.
From the upper-right corner of the page, click the Add Wrap Group button to view a pop-up as shown in the example below.

Enter a name for your Gift Wrap Group in the field provided.
Since this group will not contain any gift wrap choices, we'll name it Gift Note.Click the Save button to create a new Wrap Group.
Assigning Products to a Gift Wrap Group
After creating a new gift wrap group, you can assign products to it. There are a few methods available:
Search and Assign - to assign several products to a wrap group, click on the linked number counter in the Products column for the wrap group you want to assign.
Batch Edit - to change or update several products with different gift wrap groups, go to the Catalog > Batch Edit > Products page and follow the instructions there.
Edit a Single Product - go to the product editing page, which is available from the Catalog > Products page. Select a product to edit. From the default tab named 'Product', find the section named "Shipping and Tax" and select a Gift Wrap group from the Gift Wrap field option.
Search and Assign Products to a Gift Wrap Group
From the menu, go to the Catalog > Gift Wrap page to view a list of gift wrap groups previously created.
To assign a gift wrap group to products, click on the linked number counter in the 'Products' column for the applicable wrap group.

This will bring you to the Search Products form, which is similar to the one shown below.
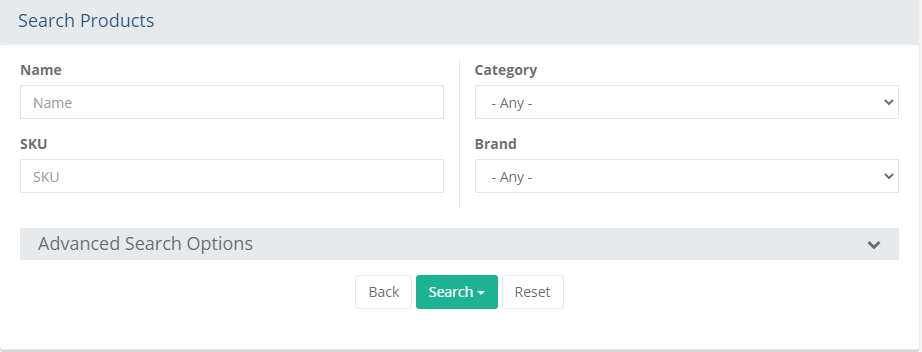
The top section provides common search fields and options that can be used to find a one or more products. If you want additional search options, then click on the Advanced Search Options header to expand a section with additional search criteria. Reference the sample screenshot below:

Using the search form(s) provided, find the products that will be assigned to the gift wrap code selected from the prior page.
After entering the search criteria, press the Search button which will drop-down to provide 3 additional filters:
- All Products: results include all products regardless of their assignment to gift wrap group.
- Assigned Products: results include only the products that are assigned to the selected gift wrap group.
- Unassigned Products: results include only products that are not assigned to the selected gift wrap group.
By default, the search results show any products that are currently assigned to the selected wrap group. Reference sample below:

You can either use the buttons from the Action column to individually Assign or Remove product associations, or..
Check the box next to one or more products, or check the box at the top of the first column to quickly select all products in the search results.
This will activate the Update button, which will drop-down to provide 2 options: either Assign or Remove the selected products.
The update will take place immediately after selection.

When finished assigning products, click the BACK button to return to the Gift Wrap group page.
Adding or Changing a Product's Gift Wrap Group
From the Catalog menu, go to the Edit Product page for any product.
When you add or edit a shippable product, you can select a Gift Wrap group from the Shipping and Tax section.

Click the Save button after making your selection.
Gift Wrap options at Checkout
Since each product may have it's own selection of gift wrap choices, we'll need to ask the customer if they want to add gift options. This takes place during checkout.
If the user is trying to purchase a product that has gift options, they will be taken to a page that has their gift wrap options presented.
Here is an example of the Gift Options that are presented to the customer.

Gift Wrap automatically becomes a checkout option for the customer. The Gift Message displays along with the gift wrapping selection(s) without any additional configuration.
A Gift Message option is displayed in the customer's shopping
basket and on invoices.
