New LinkPoint Web Service API
Applies to: AbleCommerce 7.0.1 and higher
Date: 11/18/2011
Version: CommerceBuilder.LinkPoint.dll. version 7.1.14620
Enhancements
-
A new LinkPoint Web Service API is available to work with 64-bit operating systems and Windows 2008 server. In this version, we have eliminated the 32 bit com dependency.
-
Supports: Authorize, Authorize/Capture, Capture, and Refund
-
If you are currently using the older LinkPoint integration with electronic checks or recurring billing, do not replace your gateway with this newer one, as these features are unsupported.
-
Full trust is no longer necessary. The requirement is Medium trust + Web Permission. By default, medium trust does not allow outbound web requests. Web permission either needs to be turned on specifically for the website or more simply turned on for all websites.
-
Port 1129 is no longer required. This is a web service integration and communicates over SSL on port 443.
Important Information
The new LinkPoint Web Service API itself is standard, not all that different from any other payment gateway. But, they require some unusual security. Your web hosting environment must have a security certificate installed locally to the server. Then the web server’s user account must be configured to have permission to the certificate that was installed.
This poses unique challenges in a shared hosting environment. Most ISP’s will balk at the idea of anything being installed locally on their hardware. In the event of a roll over to a standby system, that system must also be configured with the client certificate to process payments Same problem if you decide to change hosting providers.
These instructions assume you have direct access to the web server console.
Download:
https://www.ablecommerce.com/patches/CommerceBuilder.LinkPoint.zip
Instructions:
-
Extract the new Linkpoint DLL file to a temporary location.
-
Backup your original CommerceBuilder.LinkPoint.dll in the \bin\ folder, by copying it to another folder.
-
Copy the new CommerceBuilder.LinkPoint.dll to the \bin\ folder, replacing the original version.
-
Restart IIS, or recycle the application pool to refresh the website files.
Obtaining Credentials from LinkPoint
To use LinkPoint Web Services, you will need to obtain current user credentials.
-
Login to the FD (Linkpoint) Merchant Virtual Terminal interface,
-
Go to the Support > Download center.
-
Click the button to download the store certificate files.
-
You will be prompted to select files for the web service or the older com version. Make sure to choose Webservice at this point.
-
Within the *.tar.gz file, you will find about 8 different files. The files needed for this purpose are:
WS####._.1.auth.txt ---> Inside this TXT file is the username and password that you need to provide on the Linkpoint configuration in AbleCommerce, along with your store number.
WS###._.1.pem ---> This PEM file needs to be placed into the \App_Data\ folder of the Ablecommerce installation.
WS####._.1.p12 ---> This certificate file needs to be installed to the certificate store using the instructions supplied below.
WS####._.1.p12.pw.txt ---> This file contains the password to your P12 certificate and will be needed when installing it.
First Data (LinkPoint) Gateway Configuration
Access the new gateway configuration page by logging into the AbleCommerce Merchant Menu. Go to Configure > Payments > Gateways using the menu system.
-
Select the LinkPoint gateway to configure.
-
Review the screen to make sure the Assembly version matches the one below.
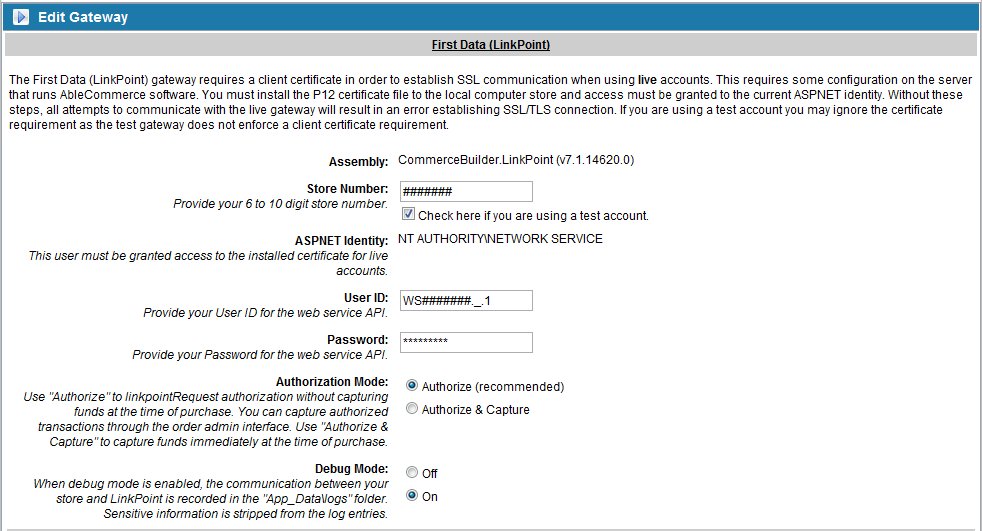
-
Provide your Store Number, User ID, and Password. These are provided in the WS####._.1.auth.txt file provided to you by LinkPoint.
-
Update the settings when finished.
-
If you are using a test account, you can assign this gateway to your payment methods and test transactions. If you are using a live account, then you must complete the next step, Preparing the Certificate.
Preparing the Certificate
This step is required for live accounts, but not for testing.
-
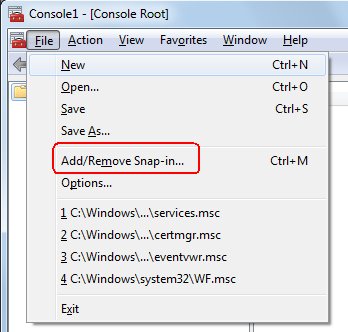
Launch MMC (start > File > Add/Remove Snap In)
-
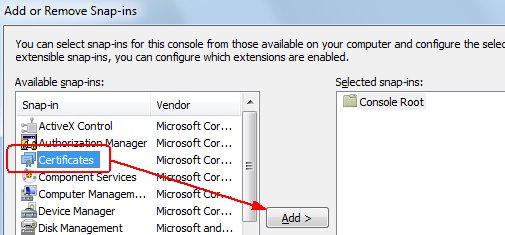
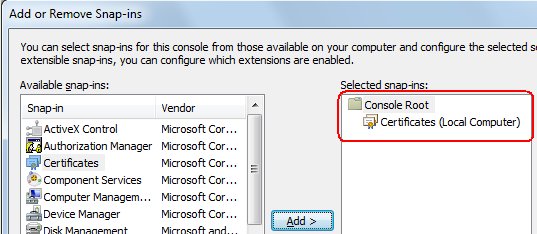
Choose Certificates and click Add >.
-
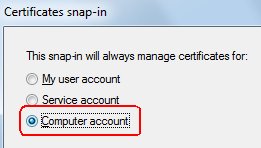
Choose Computer account and click Continue.
-
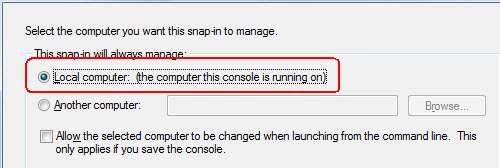
Choose Local computer and click Finish.
-
Click OK to close the window.
-
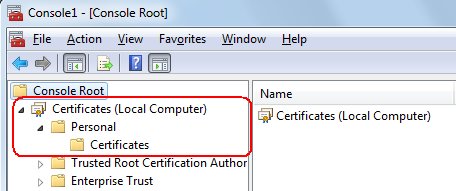
Expand the tree to Certificates (Local Computer) / Personal / Certificates
-
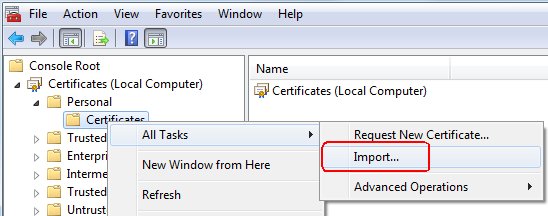
Right click on the Certificates folder, below Personal, and choose All Tasks > Import...
-
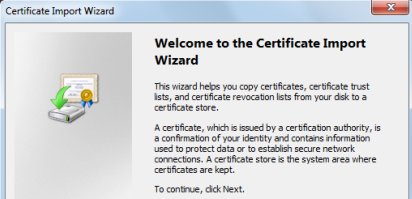
Certificate Import Wizard launches. Click Next.
-
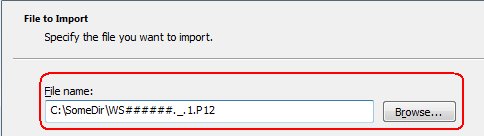
In the File name box, browse out to find the Linkpoint P12 certificate and click Next.
-
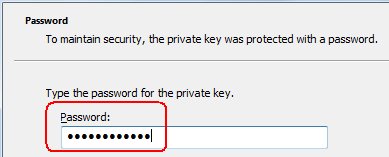
You will be prompted for the password for the private key. Enter your password and click next.
-
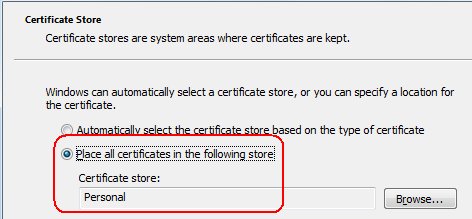
The screen will prompt you for where to place the certificate. Personal should already be showing in the select area. If it does not, click Browse and then select Personal. Then click Next.
-
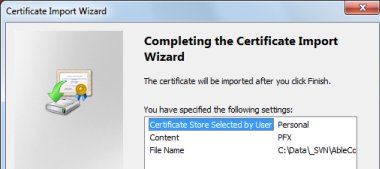
The final screen is a confirmation of the import. Review the settings to ensure they matched what you selected and then click Finish.
-
You will receive a confirmation the import was successful. Click OK to finish.
Setting Permissions to the Certificate
After importing the Personal Certificate, you will need to give permission to read this file by the website's application pool identity. Typically, the Asp.Net application pool identity is the "Network Service" account. However, in a hosted environment, this would likely be different. Before completing this next step, make sure you know the correct user account for your website.
Instructions are different for Windows Server 2003 and 2008. Select the section below to complete.
WINDOWS SERVER 2003
For a Windows 2003 Server, you must obtain the tool winhttpcertcfg.exe to set appropriate permissions on the imported certificate.
It can be downloaded from Microsoft here: http://www.microsoft.com/download/en/details.aspx?displaylang=en&id=19801
By default, the application will install to a path similar to C:\Program Files\Windows Resource Kits\Tools
To Grant Permissions:
-
Open a command line window and change directory to the correct path, eg: C:> cd C:\Program Files\Windows Resource Kits\Tools
-
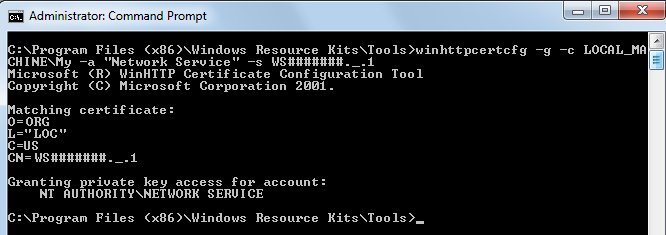
Run winhttpcertcfg tool to grant permissions to the aspnet application pool identity:
e.g. C:\Program Files\Windows Resource Kits\Tools> winhttpcertcfg -g -c LOCAL_MACHINE\My -s WS#####._.1 -a MACHINE\USERNAME
WINDOWS SERVER 2008
For a Windows 2008 Server, the certificate permissions can be adjusted without a command line tool.
-
With MMC still open, right click on the newly imported key.
-
Choose Manage Private Keys from the popup menu.
-
This will open a standard windows permissions dialog.
-
Use this dialog to add the Asp.net application pool user identity, so that it will have READ access to the private key.