Manage > Payments
|
|
Payment ManagerThe payment manager page is a different way to process your orders. From this page, you can see all the transactions coming in to the store with the order number as reference. It is very much the same as the Order Manager except you are seeing payments instead. This page gives the merchant some options to process payments in bulk by filtering the payments by status. A common use of this page would be to show all credit card transactions that are in an 'Authorized' state. Then select all orders with one click, and perform a capture of all transactions with one more click. The process is very simple. The payment manager can also be used to find very specific information about a transaction, like searching on the identification number provided by the gateway. You can use this page to reconcile with your merchant account statements, show all transactions relating to an order, and so much more.
|
Managing your Transactions
From the merchant administration, you can manage your credit card payments by going to Manage > Payments page.
If you prefer to process payments from each order, see Order Payments.

The Payment Manager page will show all transactions with the most recent first. In the upper section, you can set the search criteria to filter your results.
The payment search form has several search options:
-
Date Range - Click in the fields to open the calendar picker. Choose a specific start and/or end date to show transactions for the period selected.
-
Date Quick Pick - These are a selection of date or range options that can be used to filter payments quickly. Some options include Today, Last 7 Days, Last Month, and many more.
-
Payment Status - Filter the transactions by their payment status. The default selection is Authorized, because these are the payments waiting to be captured.
-
Transaction ID - Enter an transaction ID to find a specific record.
-
Order Number - You can enter an order number, or range of orders to display all associated transactions.
Click the SEARCH button to find payments with the criteria entered.

In the example above, the individual transactions are shown for the search criteria. Looking left to right, the columns are described as follows:
-
Select - Check one or more transactions to perform a batch change.
-
Order # - Shows the order number. It is linked so you can go directly to the order from here.
-
Customer - The last name, first name of the customer who placed the order.
-
Date - The date the payment took place.
-
Order Balance - This column shows the remaining balance for the order. You can use it as reference to the payment amount.
-
Payment Amount - The payment amount for the transaction. It is possible to have multiple payments for a single order.
-
Payment Status - This is the state of the transaction. Every possible payment status is available. Used to group results so batch operations can be performed.
-
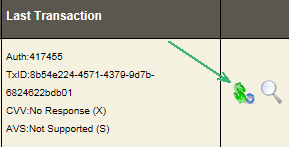
Last Transaction - This column shows the details of the last transaction. You can view the transaction numbers with the CVV and AVS responses.
-
Actions - Click on the Payment icon to process an individual transaction. Click on the Preview icon to view the order details.
Batch Processing
Use the search form to find transactions that are of the same type. In this example, we'll use a Payment Status of Authorized to find all transactions that need to be captured.

In the first column, select the individual transactions, or you can check the first box to select all for the page. If you would like to show more transactions per page, then adjust the filter at the top of the search results.
Once some items are checked, the Batch Processing section is updated with the total amount of payments to process, and a button to CAPTURE ALL.
When orders are paid, then automated email, inventory adjustments, and activation of digital goods, subscriptions, and gift certificates could be triggered depending on your settings.
Not all payment processing can take place through a batch function. For instance, a refund would need to be processed through the individual order. You can, however, process individual transactions from this page.
Processing Individual Transactions
In the last column, click on the Payment action icon if it is available. If it isn't available, then you'll need to go to the order directly to process the payment.

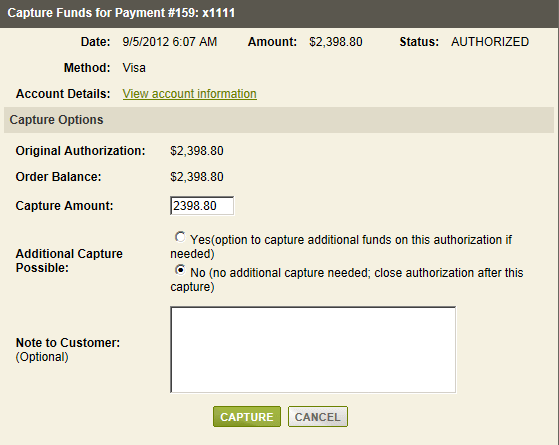
A pop-up window will be displayed.

-
If you want to change the amount to capture, then enter a different Capture Amount.
-
Some payment gateways support the Additional Capture feature. By selecting this option, you can capture a portion of the total authorized amount. This will keep the authorization open so further transactions can be placed.
-
If you want to add an Note to Customer, enter it in the field provided. This will appear on their online order invoice if the merchant has enabled the setting.
-
When finished, click the CAPTURE button. After a moment, you will be returned to the Manage Payments page
