Website > Layouts > Default Layouts
In this Topic Show
Default Layouts
Layouts are used to control the overall design of your page. Most Layout can be used with any AbleCommerce display page, however, there are a few Layouts that are designed specifically for certain pages of the store.
The default Layout determines which page design will be used when none are specified.
Setting the Default Layouts
-
From the Manage Layouts page, or from the top-menu, go to Website > Layouts.
-
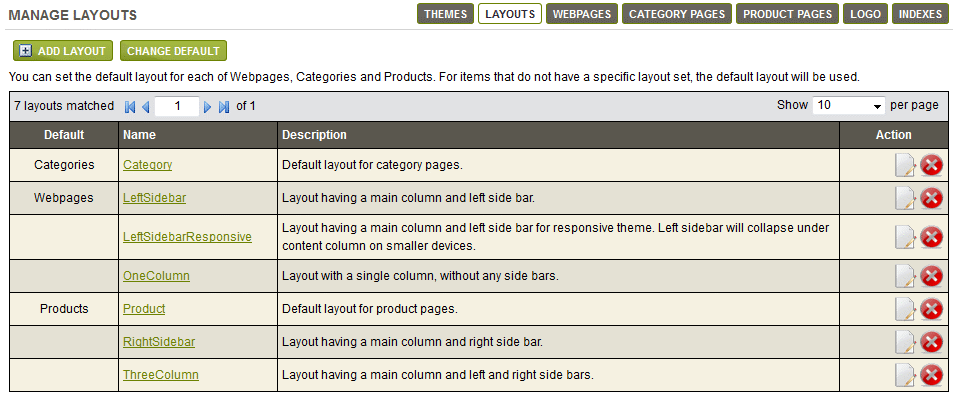
In a default installation, there will be layouts defined. These are shown below.
-
The first two columns display the Layout that is assigned to each default page.
-
There are 3 types of Default pages that are used in your store. These are Categories, Products, and Webpages which correspond to the catalog objects of the same type. Each of them are assigned to a default Layout.

-
To change any one of the default Layouts, simply click the CHANGE DEFAULT button.
-
A pop-up form will appear. Select a different layout for Web pages, Category pages, and/or Product pages in the store.

-
Click SAVE when finished.
Add a New Layout
-
From the Manage Layouts page, or from the top-menu, go to Website > Layouts.

-
Click the ADD LAYOUT button.

-
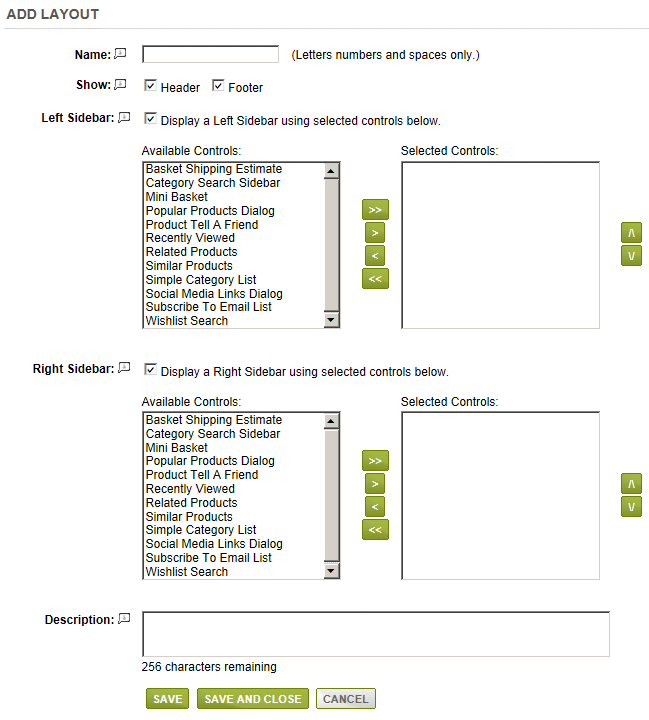
In the first field, enter a Name for your new layout. It must be letters, numbers, or spaces only.
-
The next two checkboxes allow you to display a Header and Footer. Make sure the box is checked if you wish to display the Header or Footer for this layout.
-
If you wish to create a page that displays a Left Sidebar, then check the box and select from the available controls.
The left side shows the Available Controls, and the right side shows the controls that are Selected. Once you have selected some controls, they will output in the order that you have them sorted. Use the green arrows to move and sort the controls. -
You can include a Right Sidebar by checking the box shown. The same controls will be available for you to create a custom right sidebar for the layout.
-
If desired, you can briefly describe this layout. This is for merchant purposes only.
-
When finished, click the SAVE or SAVE AND CLOSE button.
Go to Site Map