Product Reports
Table of Contents Show
Sales by Product
The Sales by Product report displays product sales totals for the selected period of time.
Using the menu, go to the Reports > Products > Sales by Product page.
Select a time frame FROM and TO using the Calendar picker and click the Report button.
View the results as shown in this example below.
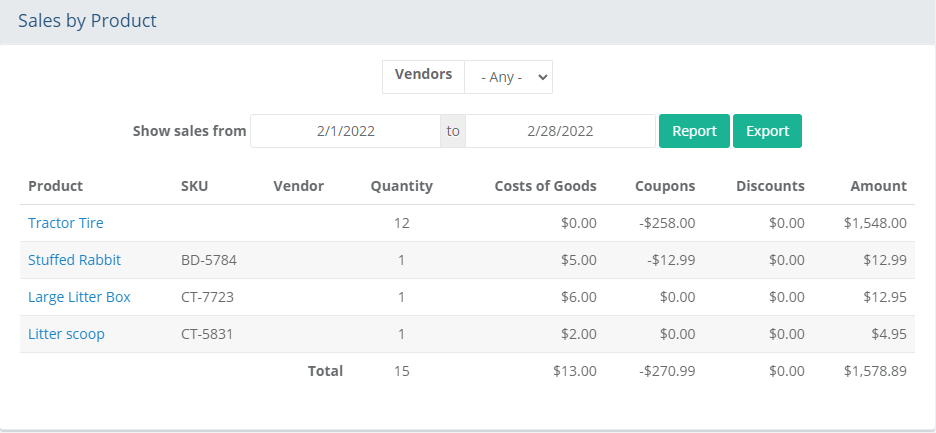
- This itemized report shows each product name, total quantity sold, and the gross sales amount.
- A Vendor selection is available from the drop-down to further narrow the results.An Export button is available to create a CSV file with this data for use in other spreadsheet applications.
Product Popularity
The Product Popularity report displays a list of products viewed.
Using the menu, go to the Reports > Products > Popular Product page.
Select a tab to view the top products by sales or views.
View the results as shown in this example below.
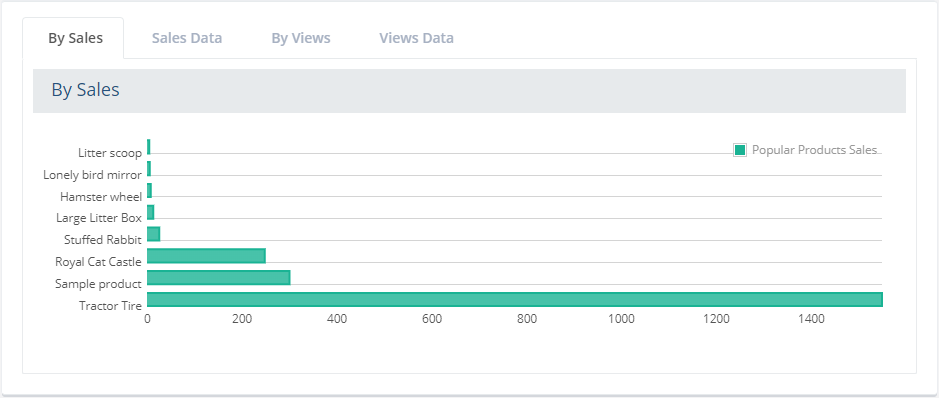
- Additional tabs are available to
view the sales data, products by page views, and the number of
views data.
- The most viewed products are listed first. This feature
requires that you have Page
Tracking enabled.
- The length of time you select for Page Tracking configuration
determines the report period.
- An Export button is available
to create a CSV file with this data for use in other spreadsheet
applications
Category Popularity
The Category Popularity report displays a list of categories viewed.
Using the menu, go to the Reports > Products > Popular Categories page.
Select a time frame FROM and TO using the Calendar picker and click the Report button.
View the results as shown in this example below.
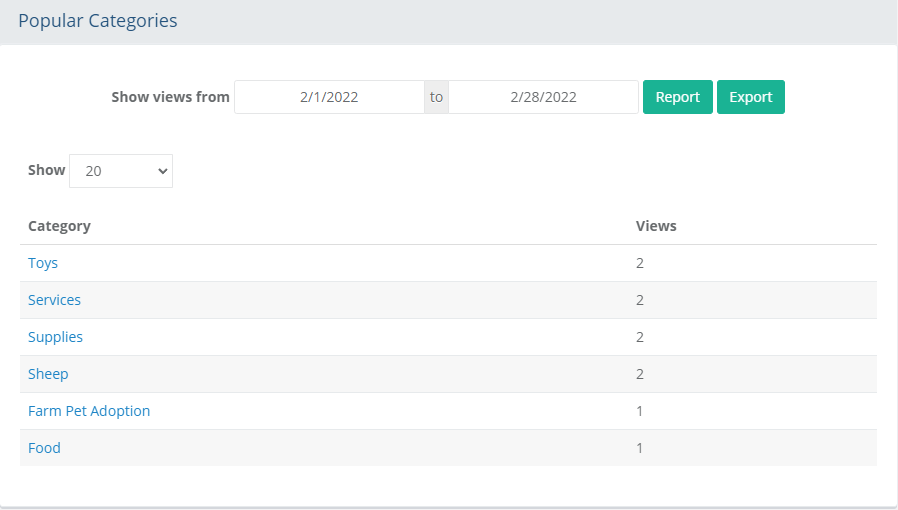
- The most viewed categories are
listed first. This feature requires that you have Page
Tracking enabled.
- The length of time you select for Page Tracking configuration
determines the report period.
- An Export button is available
to create a CSV file with this data for use in other spreadsheet
applications
Low Inventory
The Low Inventory Report displays products at, or below, the 'Low Stock' inventory setting for each.
Using the menu, go to the Reports > Products > Low Inventory page, or access the same page through Manage > Low Inventory.
A search form will be shown first on the page. By default, the Inventory Level setting selected will be Low Stock showing only the products that need to be reviewed for inventory.
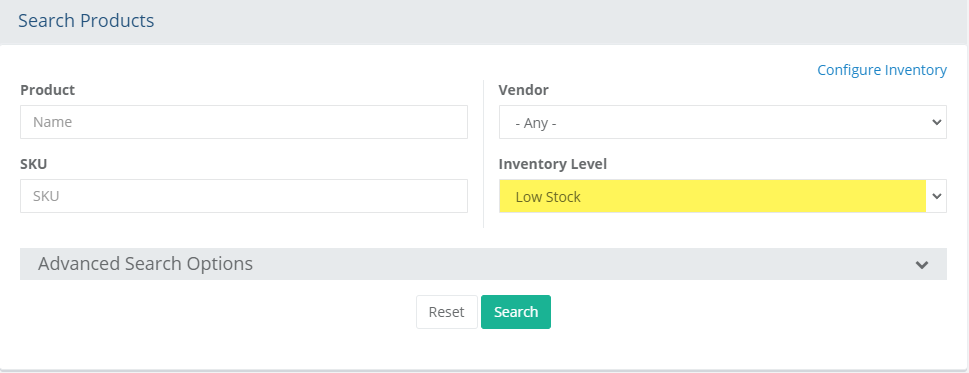
You can search by Product name, SKU or select a Vendor to narrow the results.
Click the Search button after entering or making the selections.
View the results as shown in the example below.
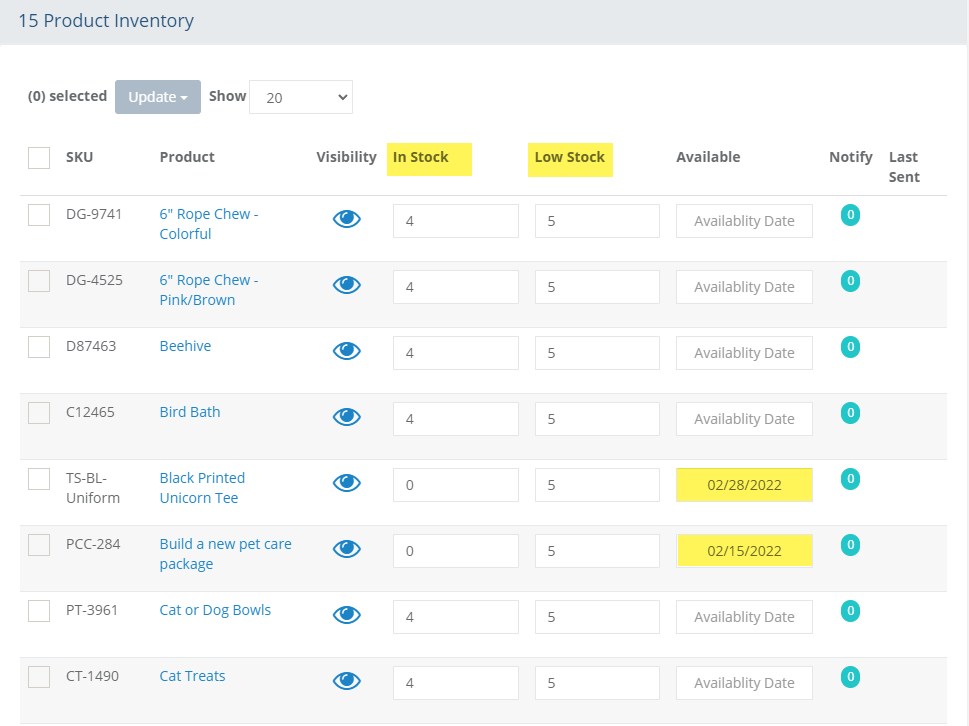
Columns for In Stock and Low Stock are shown. You can adjust the In Stock levels as needed.
If you use the Availability Date feature, you can pick the date when stock is expected to be available.
Click the Save button to add new inventory.
Additional documentation on other inventory features is available from the Manage > Inventory page.