Braintree
Table of Contents Show
Braintree Processing Features
As the owner of the AbleCommerce e-commerce platform, you can seamlessly enable credit card, debit card, and PayPal payments by integrating with Braintree. Use the online application form to get instant approval for your new or existing PayPal account.

AbleCommerce supports all the standard features of the Braintree payment gateway.
Authorize
Authorize Capture (Sale)
Partial Capture
Capture
Void
Refund
Partial Refund
Braintree is a subsidiary of PayPal. Amounts will be USD, or as configured within your merchant account.
Additional integration support for:
ApplePay
Google Pay
PayPal Express Checkout
PayPal Instant Payment Notification
Post-order Processing
All AbleCommerce payment gateway integrations offer full support for post-order processing. This means that after an order is placed, you can authorize, capture, refund, and void transactions from the AbleCommerce order administration area.
Some post-order processing features, such as refunds, may require that you enable credit card storage from the Configure > Security > System Settings page.
Installing the Braintree Gateway
Login to your AbleCommerce installation.
Using the menu, go to the Plugins page.
Use the Filter Plugins option and select the type "Payment".
NOTE: BrainTree plugin will be available in the list as shown in the screenshot below.
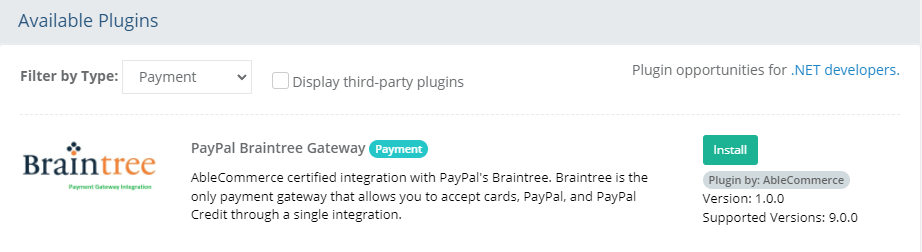
Click the green Install button in the far right column.
When the confirmation popup appears, click the green Yes, install it button.
Upon completion, click the orange Configure button.
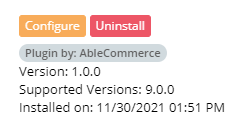
NOTE: Version shown may be different depending on the release of AbleCommerce you are using.
Connect to Braintree Payment Gateway
PayPal's Braintree payment gateway offers a new easy connect method where you can sign-up using your existing PayPal account, or create a new Braintree account.
From Configure > Payment > Gateways page, all of the installed payment gateways will be shown.
NOTE: Visit the Plugins page to install a new payment gateway. There is no limit to the number of gateways that can be install and/or in use.To configure a new gateway, click the blue plus (+) button to continue. If the gateway is already configured, click the Edit button to make changes.
You will now be on the Add PayPal Braintree configuration page as shown below:
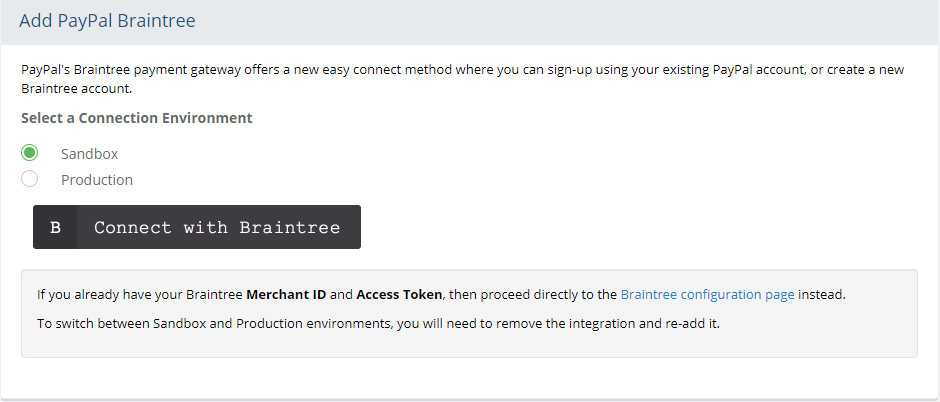
First, you must select your connection environment. If you are testing, then select Sandbox. For live accounts, be sure to select the Production option.
Note: In order to switch between Sandbox and Production, you will need to delete/remove the integration and re-add it.After selecting the type of connection, you will click the black "B Connect with Braintree" button to begin.
Next, you will be redirected to a special Braintree / AbleCommerce website. From this page, there are a couple of registration options:
If you do not have an existing PayPal or Braintree account, then use the tabbed (default) option to 'Sign Up with Braintree'. Enter your email address and a new password into the fields provided. The click the green 'Agree and Create Account' button at the bottom of the page. Be sure to read the terms and conditions before creating your account.
If you already have an existing PayPal account, then select the tabbed option 'Already have an account?'. You will now see a form like the one below:
You can either login with an existing Braintree account, or choose the blue button to Log in with an existing PayPal account.
During the next step, you will be asked a series of questions about your business and order process. A credit check will be performed and, if approved, you can begin using Braintree payments right away.
The last step requires that you agree to allow your AbleCommerce store to access the Braintree account. You must agree in order to process payments through AbleCommerce.
Click the green button 'Agree and Return to...". Then you will be redirected back to your AbleCommerce store.
Configure Braintree Payment Gateway
You should now be looking at the AbleCommerce configuration page for the PayPal Braintree Gateway.
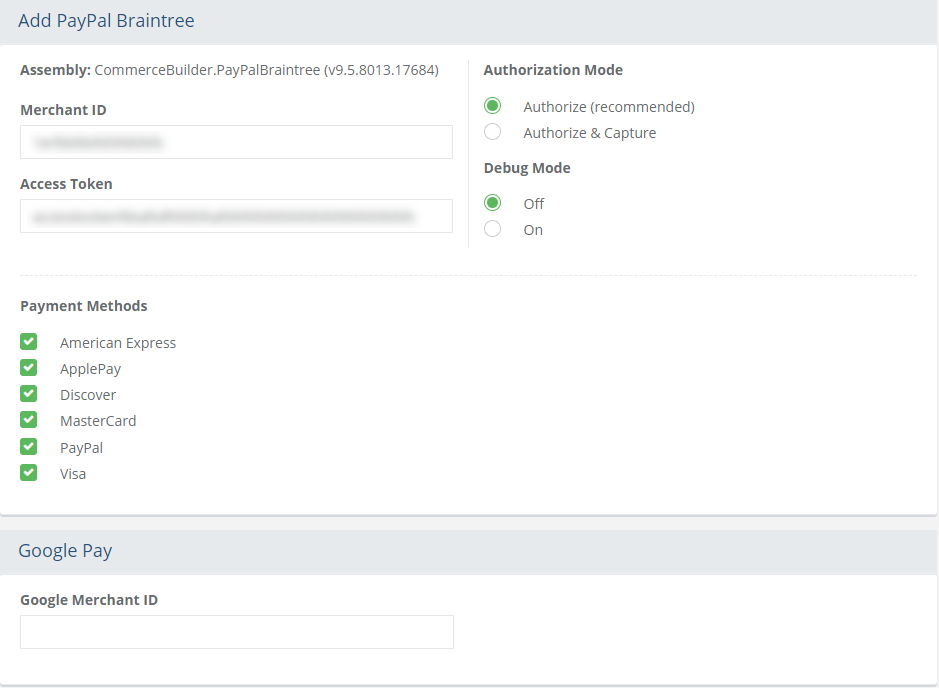
If you used the automated connection method, then you should already have your Merchant ID populated in the field provided. If you are using the manual connect method, you can enter your Merchant ID in this field.
If you used the automated connection method, then you should already have your Access Token populated in the field provided. If you are using the manual connect method, you can enter your Access Token in this field.
The Gateway Mode is determined before sign-up. In order to switch between Sandbox and Production, you will need to delete/remove the integration and re-add it. You can do this by going to the Configure > Payments > Gateways page. Find the PayPal Braintree Gateway instance and click the Delete button in the far right column.
Choose the type of Authorization Mode.
Authorize: to request authorization without capturing funds at the time of purchase. You can capture authorized transactions through the order admin interface.
Authorize & Capture: to capture funds immediately at the time of purchase. You should not use this feature unless you are able to ship goods the same day of the sale.
Debug Mode: When debug mode is enabled, all messages sent to and received from Braintree are logged. This should only be enabled at the direction of qualified support personnel.
Default Log File Location: ..\App_Data\Logs\[gatewayname].logIn the bottom section of the page, find the section called Payment Methods. The Braintree integration supports standard credit cards and payment through PayPal. If you need to add payment methods (eg. Visa, MasterCard, etc.), then you will need to go to the Configure > Payments > Methods page.
NOTE: If you already have an existing PayPal integration, then you can easily change to Braintree by ensuring that the PayPal payment method is assigned to the Braintree payment gateway. Changing the standard PayPal payment method to Braintree should eliminate the past reliability issues with IPN notifications.At the bottom of the page, click the Save and Close button to finish.
Manual Connection with Braintree
The manual connect option is for testing only. Before using this option, you should already have connection information for Braintree.
Merchant ID = Your Braintree Account ID
Access Token = Your Braintree Access Key
This option can be used to manually connect AbleCommerce to the PayPal Braintree payment system.
Using Braintree with different Payment Methods
Braintree Credit Card Payments
Once Braintree is configured, your customers will be able to easily pay by credit card or with their PayPal account.
AbleCommerce uses a custom integration with Braintree so that the payment form will be consistent between all payment gateways. If the customer selects the Credit/Debit card option from the available payment methods, then a form will appear where card type can be selected. Standard payment data is entered and a button to Pay With Card is provided to complete the transaction.
Braintree PayPal Payments
Including PayPal with your Braintree integration will allow your customers to have a much more streamlined payment option. Huge improvements have been made with PayPal in conjunction with the Braintree integration. No longer will the merchant have to rely in the instant payment notification service which was sometimes unreliable. Additionally, the customer will make payment directly from the payment page and an order will not be generated until that payment is complete.

The customer can select PayPal from the payment method list and a new blue PayPal button will be available. This new PayPal method keeps the customer on your website. Instead of leaving your store, a pop-up window appears where the customer can login to their PayPal account and provide a payment. This ensures that you will not end up with unprocessed orders. If the PayPal payment is canceled, the customer will remain on the payment page in your AbleCommerce store.
Braintree ApplePay Payments
Before implementing ApplePay, make sure there is a payment method available.
Go to the Configure > Payments > Methods page.
Create a New Payment Method.
Give it a name "ApplePay" and use the instrument type: ApplePay.
If the Braintree payment gateway is already setup, then select it from the Payment Gateway option list.
Click the Save button to finish.
Braintree Google Payments
Before implementing Google Pay, make sure there is a payment method available.
Go to the Configure > Payments > Methods page.
Create a New Payment Method.
Give it a name "Google Pay" and use the instrument type: GooglePay.
If the Braintree payment gateway is already setup, then select it from the Payment Gateway option list.
Click the Save button to finish.
Braintree PayPal Express
If you want to use this payment method, then make sure the Braintree payment gateway is configured first.
Go to the retail basket page at /checkout/basket
Turn on edit mode
Open the left panel to view the list of widgets
Under Checkout widgets, find the one named "Braintree Paypal Express Checkout Button.
Drag and drop it to a location on the page.
Save.
Implementing Processing Options through Braintree
Once everything is configured and ready to go within AbleCommerce, you will need to login to your Braintree merchant account and configure the processing options.
Before beginning, confirm that your AbleCommerce store is using SSL (Secure All Pages)
Use the settings option from the upper-right corner of the page:
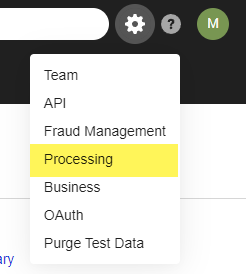
Select the Processing option.
Enable ApplePay and/or Google Pay as a processing option:

For Apple Pay, you will need to click on the "Options" link.
From the next page, click the link "Add a Domain" to enable Apple Pay.
Add your store's website name to ApplePay for verification:

For Step 2, you will need to download the linked file "apple-developer-merchantid-domain-association" and place it on the server hosting the AbleCommerce installation. The file must be in the path noted:
https://{your licensed store domain}/.well-known/apple-developer-merchantid-domain-associationOnce the file is directly accessible, then you can click the Agree & Add Domain button.
Note: The file provided by Braintree has no file extension. If you receive a 404 Not Found error, or Braintree fails to validate, the have your hosting service administration refer to the following document which describes how to configure IIS to access this file:
Testing with Braintree
Setup a Braintree sandbox account through https://www.braintreepayments.com/sandbox/
Setup a sandbox account using the Braintree configuration page in AbleCommerce.
Complete the integration by making sure payment methods are assigned to Braintree.
At the bottom of the configuration page, click the SAVE button.
Using the credit card numbers listed below, you can test transactions.
Be sure to remove and add a new integration using a live account before processing real credit card transactions.
Braintree Test Credit Card numbers
Visa 4111111111111111
MasterCard 5500000000000004
American Express 378282246310005
Discover 6011111111111117
NOTE: There may be additional features within your Braintree account that have not been tested with AbleCommerce. If you enable unsupported features, you are doing so at your own risk.