Image and File Manager
Table of Contents Show
Managing Assets
The AbleCommerce Image and File Manager gives you the ability to work with your files and folders without directly accessing the web server through FTP. The Image Manager is simply a tool to help you organize, upload, or remove files and images.
Using the admin menu, go to Catalog > Images to view a page similar to the one below.
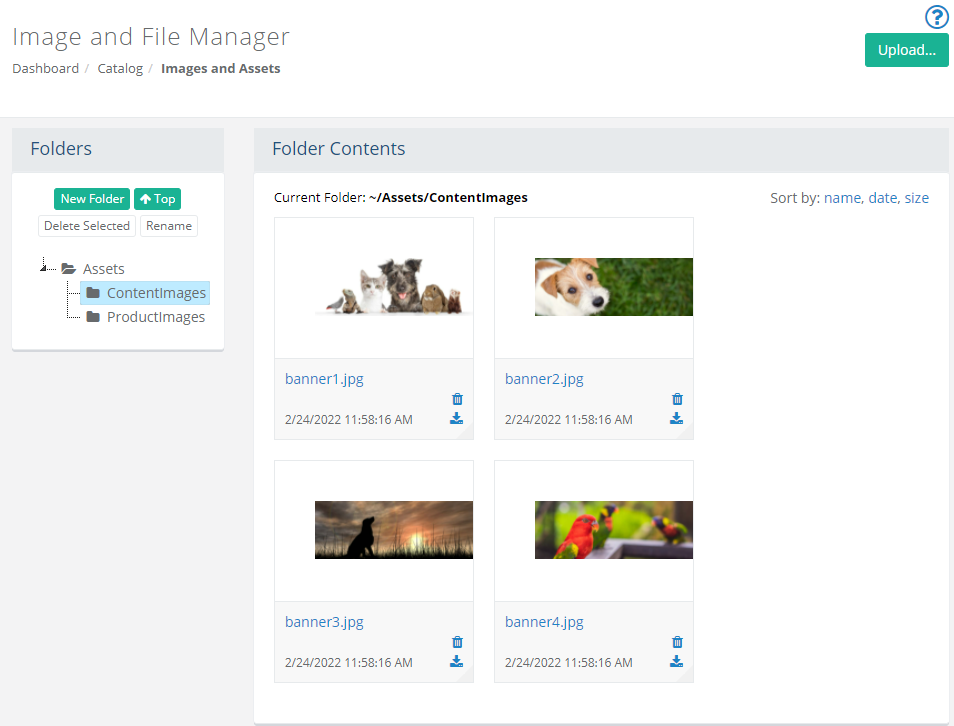
The left section named "Folders" is where you can organize the content for you store within the \Assets\ folder.
The right section named "Folder Contents" displays the files that are within each folder where images can be previewed as a thumbnail.
Current Folder displays the location of the items/images being viewed.
Sort the items within a folder using the linked Name, Date, or Size
If an item is an image, then a thumbnail picture will appear above it's name and details.
The details of the item are shown with the name and date it was added.
A download icon is available so you can copy it to your local system.
The delete icon is available to remove the item or image permanently from the server.
Managing Folders
You can view the sub-folders beneath the \Assets\ directory in the Folders section as shown in the example below.
Note: Removing the included \ProductImages\ or \ContentImages\ folders will break all images that are used in the sample store.
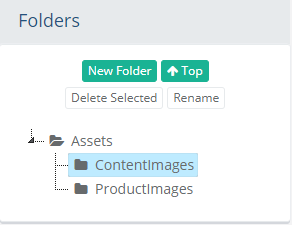
To add a new sub-folder, click on the \Assets\ folder (or any other folder) and then click the New Folder button to view a pop-up.

Enter a new Folder Name.
Note: Folder names must not include spaces or special characters. Valid folder names may include hyphens or under-bars. (e.g. "New_Folder" and "New-Folder" are acceptable. "New Folder" is not.)Click the Save button.
If you want to remove a folder, select any empty folder and then click the Delete Selected button.
A confirmation will appear. Click Yes, delete it to continue.
If you want to rename a folder, select any folder and then click the Rename button to view a pop-up.
Note: If there are any images or files being referenced within the folder, then you will need to update the path accordingly.Click the Save button.
Uploading Images
Security system settings determine the types of new files and/or images that can be uploaded. The image settings determines the default sizes that are used for resizing.
From the menu, go to Catalog > Images page.
Make sure you are in the desired sub-folder within the \Assets\ directory.
Hover over the Upload... button from the upper-right corner of the page, then drop-down to select Image. A page similar to the one below will be shown.
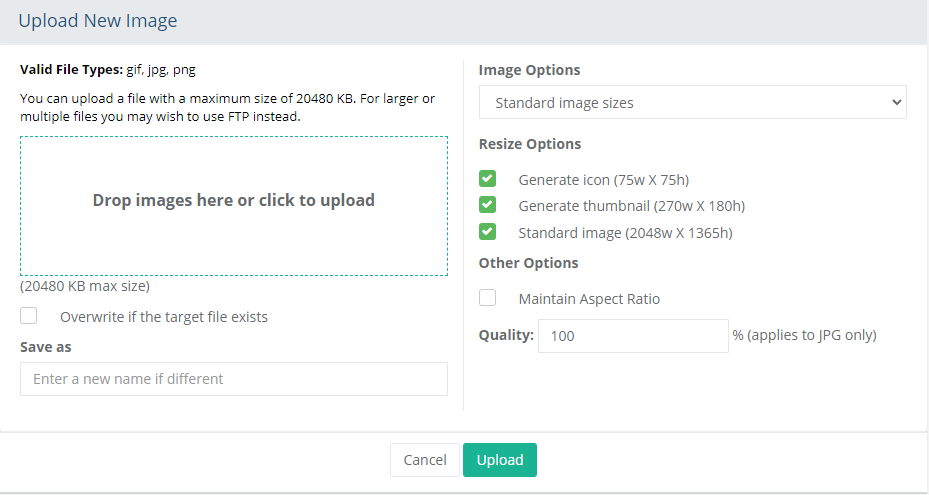
Valid File Types: You can allow only specific file types to be uploaded by setting the values from the System Settings page.
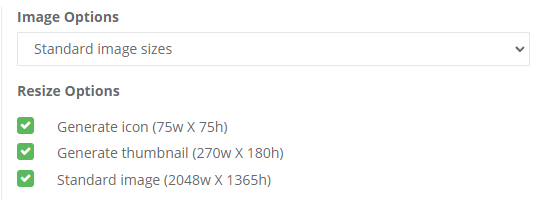
Before uploading an image, take note of the Image Options selection. This determines how the image will be handled on upload.
- Standard image sizes: When an image is uploaded, three sizes will be created. Select which Resize Options to use. This option will create up to three different image sizes. This option is typically selected when you are uploading images for products, but can be used for other catalog items such as categories and webpages.
- Do not resize: The image will be uploaded as-is without any resize options and multiple images will not be created.

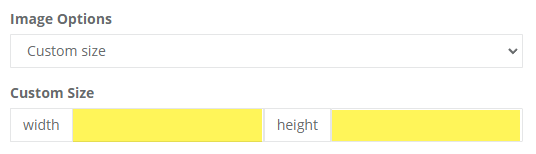
- Custom size: The image can be uploaded and resized to a specific width and height which must be entered in the fields shown.
Drag and drop a Full Size image into the box shown, or click in the box to select an image from the server.
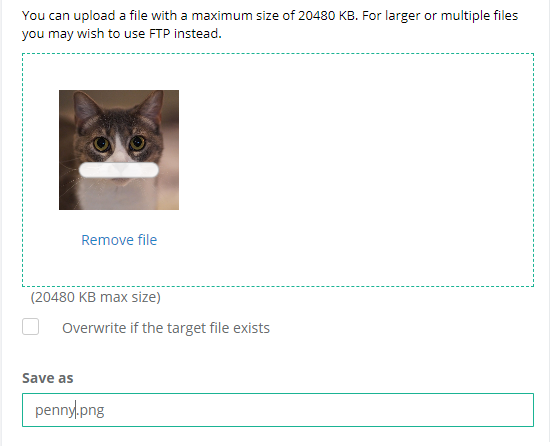
Note: The actual size of the image is not shown here. It has been reduced so it can be displayed in the box.The file name of the image change be changed during upload by entering a different Save As name into the field shown.
If the image being uploaded will replace an existing one, check the box to Overwrite if the target file exists.
The Other Options section has a box which can be checked to Maintain Aspect Ratio. This ensures the image will not be distorted during a resize.
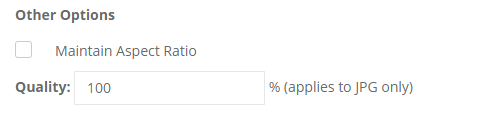
There is a Quality field which can be used to adjust the physical size of the image when working with a .JPG. A lower quality will reduce the size of the file.
When finished, click the Upload button.
The image(s) will be shown immediately after upload in the folder it was uploaded to.
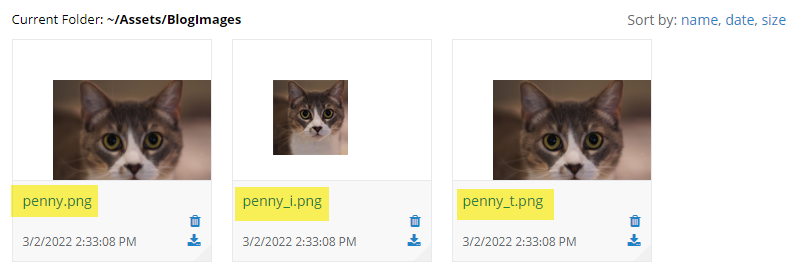
In the case of using the Resize Option to create standard image sizes, there are three different images created from the original upload.
- Standard: This is the full sized image created using the name of the image. The default size is 2048w x 1365h
- Thumbnail: This is the next size image created using the name_t and the default size is 270w x 180
- Icon: This is the smallest image created using the name_i and the default size is 75w x 75hThe default image sizes can be changed by following the instructions on the Image Settings page.
Uploading Files
Security system settings determine the types of new files and/or images that can be uploaded.
From the menu, go to Catalog > Images page.
Make sure you are in the desired sub-folder within the \Assets\ directory.
Hover over the Upload... button from the upper-right corner of the page, then drop-down to select File. A page similar to the one below will be shown.
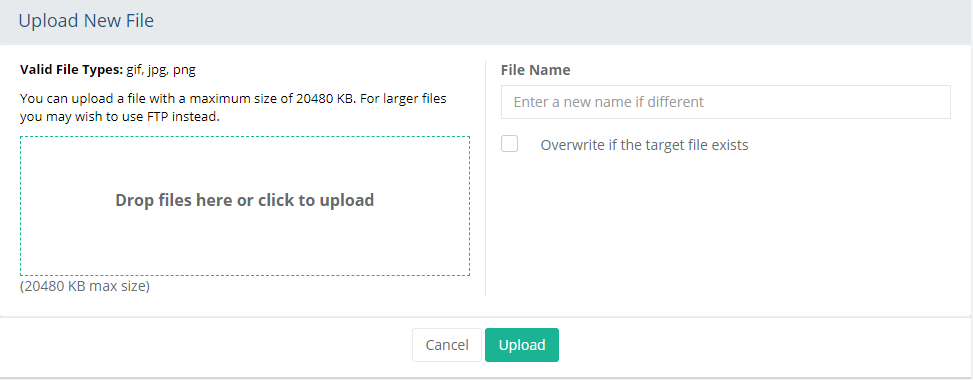
Valid File Types: You can allow only specific file types to be uploaded by setting the values from the System Settings page.

Drag and drop a File into the box shown, or click in the box to select a file from the server.
The File Name can be changed during upload by entering a different name into the field shown.
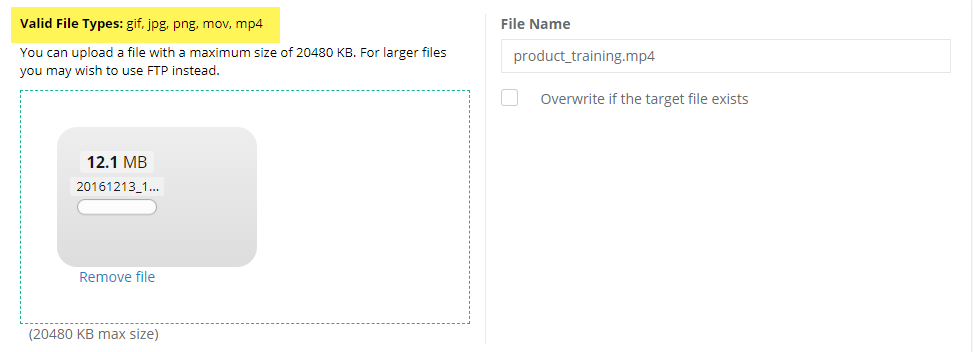
If the file being uploaded will replace an existing one, check the box to Overwrite if the target file exists.
When finished, click the Upload button.
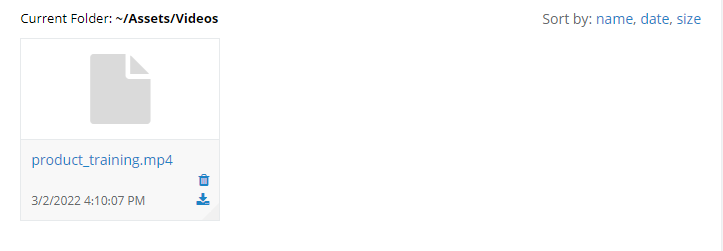
The file will be shown immediately after upload in the folder it was uploaded to.