Categories > Manage Gift Wrap
Manage Gift Wrap
From the Gift Wrap page, or from the top-menu, go to Catalog > Gift Wrap. An example Gift Wrap page is shown below.
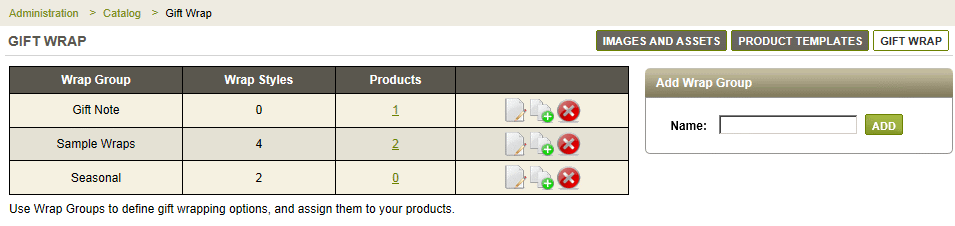
The Gift Wrap management page displays the name of each Wrap Group, and the number of Gift Wrap styles for each one.
In the Products column, a counter indicates the number of products that are associated to the Wrap Group. You need to associate products to the Wrap Group in order to see the Gift Wrap styles available at checkout.
To change the name of a Wrap Group, or if you want to edit/add Gift Wrap styles, click on the EDIT icon.
![]()
The COPY icon creates a duplicate set of the selected Group and all of it's Gift Wrap styles. Click the DELETE icon to delete a Wrap Group, it's Gift Wrap styles, and any product associations.
Assigning Products to Gift Wrap
-
To assign products to the Gift Wrap group, click on the linked number counter in the Products column.
-
This will bring you to a search form that looks similar to the one shown below.
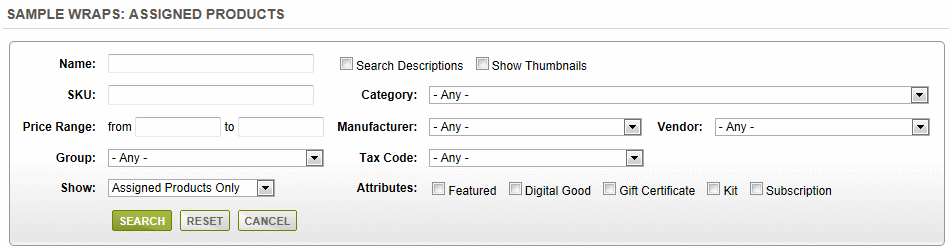
By default, you will see any Assigned Products that are currently associated to the Wrap Group.
Using the detailed search form provided, you will be able to easily find more products that can be assigned to this gift Wrap Group. -
Type in some search criteria, or select a filter, then click the SEARCH button.

In the results section below, you can check the top box in the first column to select all product results, or select individual items as needed. -
To associate product(s) to the Wrap Group, simply click the green PLUS icon in the Link column.
-
Or you may select one or more products using the checkbox, and then use the batch options to Assign or Remove Selected products to/from the Wrap Group.
-
You can remove the association by clicking the red delete icon.
-
When finished assigning products, click the CANCEL button to return to the Manage Gift Wrap page.
Assigning Gift Wrap to a Product
-
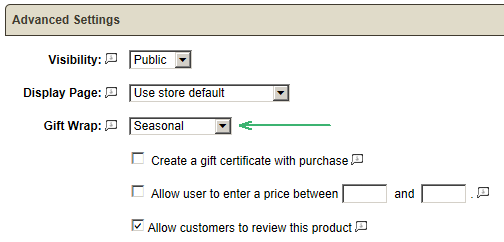
From Product Editing page, find the section named ADVANCED SETTINGS
-
Select the Gift Wrap group from the available list.
-
Click the SAVE button after making your selection.
Gift Wrap options at Checkout
Since each product may have it's own selection of gift wrap choices, we'll need to ask the customer if they want to add gift options. This takes place during checkout.
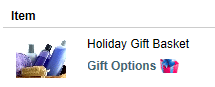
If the user clicks the Gift Options link, they will be taken to a page that has their gift wrap options presented.
Here is an example of the Gift Options that are presented to the customer.
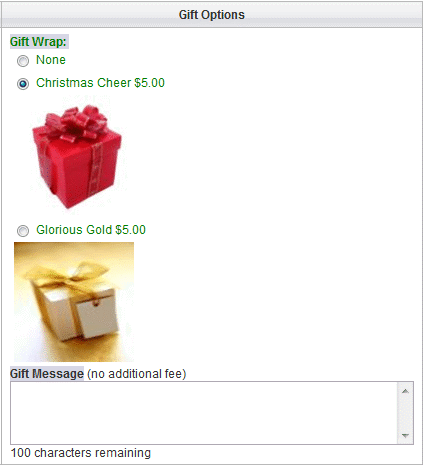
Gift Wrap automatically becomes a checkout option for the customer. The Gift Message displays along with the gift wrapping selection(s) without any additional configuration.
![]()
Go to Site Map