Vendors
Table of Contents Show
Manage Vendors
A Vendor is associated to items in the store. The email address is used to a send notification when an order is placed with items shipped or to be fulfilled by the vendor.
From the menu, go to People > Vendors to view a page similar to the one below.

The Vendors listing page is shown.
The Email column indicates where any notifications will be sent.
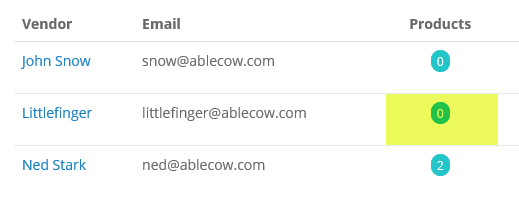
The Products column has a counter showing the number of items that are assigned to the vendor.
The Action column allows you to Edit the vendor name and email, or Delete the vendor's record - removing it from any product associations.
Add or Edit a Vendor
From the upper-right corner, click the Add Vendor button to view a popup.
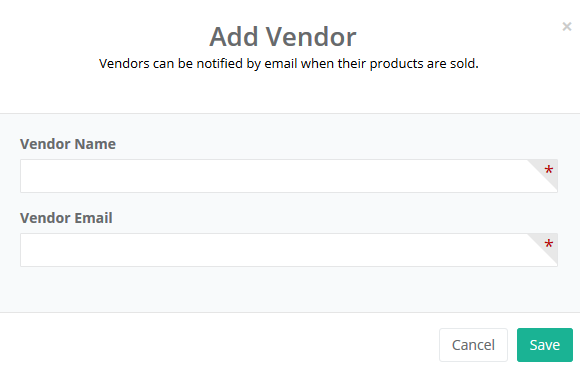
Enter the Vendor Name of the person or organization that will be fulfilling the order. This information does not appear within the retail storefront.
Enter the Vendor Email, which needs to be a valid email address that will receive order notifications. Only products that are fulfilled by the vendor will be shown within the email.
Click the Save button.
The new record appears in the Vendor list.
To change the vendor's name or email, click the Edit button from the Action column. A pop-up form will appear where you can change the name or email as needed.
Click the SAVE button when finished.
Assigning Products to a Vendor
After creating a new vendor, you will need to assign products to it. There are three methods available:
Search and Assign - to assign several products to a vendor, click on the linked number counter in the Products column for the vendor you want to assign to.
Batch Edit - to change or update several products with different vendors, go to the Catalog > Batch Edit > Products page and follow the instructions there.
Edit a Single Item - go to the product editing page, which is available from the Catalog > Products listing page. Select a product to edit. Select a vendor from the top section named 'Basic Product Information'.
Search and Assign Products to a Vendor
From the menu, go to the People > Vendors page to view a list of vendors and their email.
To assign products to a vendor, click on the linked number counter in the 'Products' column for the applicable vendor
This will bring you to a search form that looks similar to the one shown below.
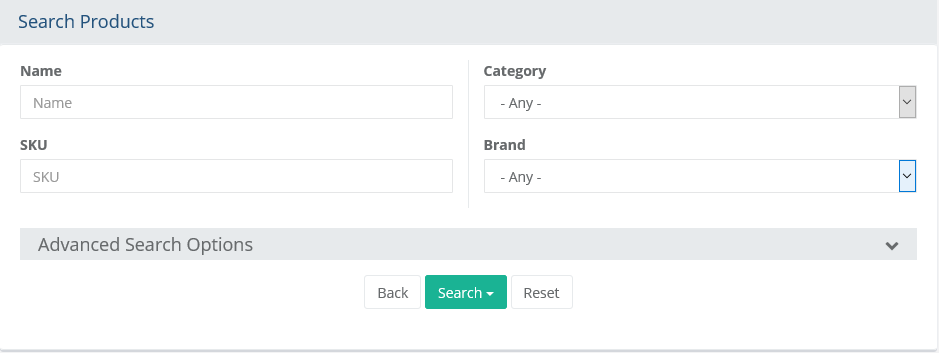
The top section provides common search fields and options that can be used to find a one or more products. If you want additional search options, then click on the Advanced Search Options header to expand a section with additional search criteria. Reference the sample screenshot below:
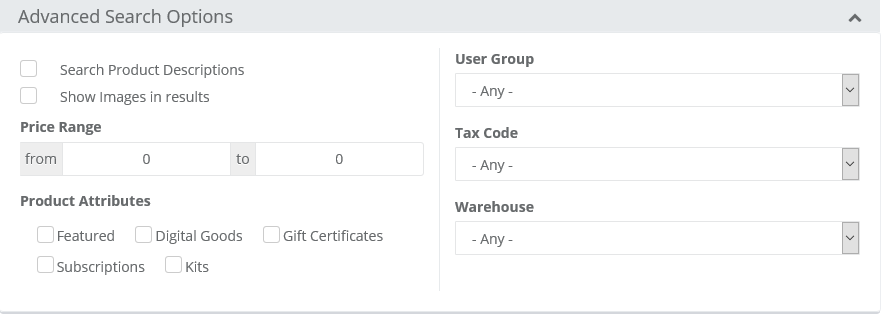
Using the search form(s) provided, find the products that will be assigned to the vendor selected from the prior page.
After entering the search criteria, press the Search button which will drop-down to provide 3 additional filters:
- All Products: results include all products regardless of their assignment to vendor.
- Assigned Products: results include only the products that are assigned to the selected vendor.
- Unassigned Products: results include only products that are not assigned to the selected vendor.
By default, the search results show any products that are currently assigned to the selected vendor. Reference sample below:
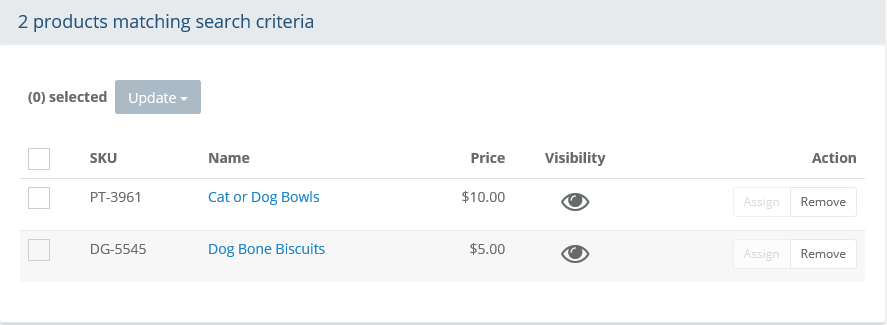
You can either use the buttons from the Action column to individually Assign or Remove product associations, or..
Check the box next to one or more products, or check the box at the top of the first column to quickly select all products in the search results.
This will activate the Update button, which will drop-down to provide 2 options: either Assign or Remove the selected products.
The update will take place immediately after selection.
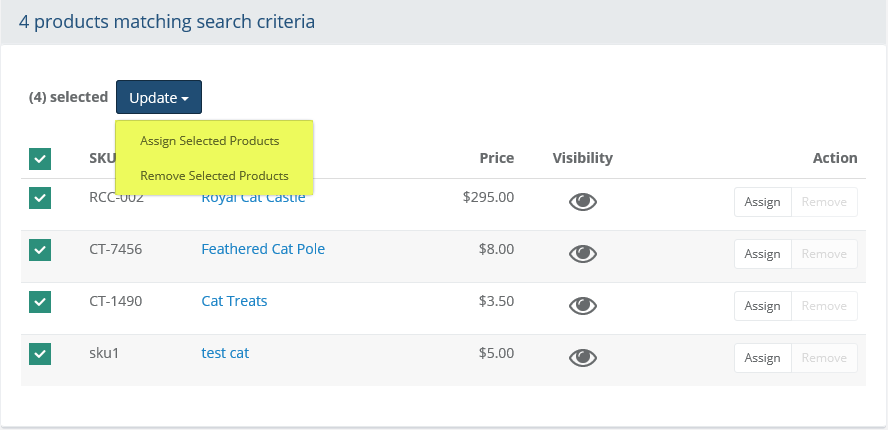
When finished assigning products, click the BACK button to return to the Vendors listing page.
Vendor Email Notification
The Vendor Notification is an email template included when installing AbleCommerce software.
You can find the Vendor Notification template by going to Configure > Email > Email Templates from the merchant menu.
To modify the template, find "Vendor Notification" from the list of email templates and click the Edit button to view a page similar to the one below.
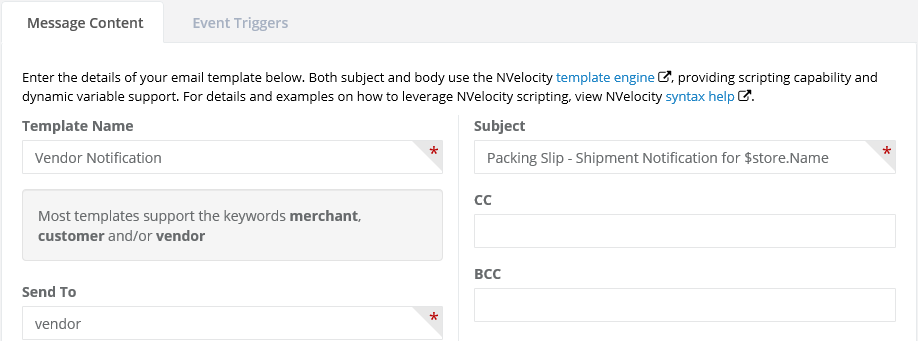
You can modify the sender (Send From) or recipient field (Send To). You can additional notifications to recipients through the CC or BCC fields.
Modify the subject and content as needed.
- The Vendor Email template supports two email aliases, customer and vendor. These keywords can be used in the template's recipient fields to send an email to the related customer or vendor for the products in the related order.
- The Vendor Email template supports NVelocity variables for $customer, $order and $payments. These are available to you when using dynamic information within your email content.When finished, click the Save button.
Email Event Triggers
The Vendor Email template can be triggered when an order contains items that are to be fulfilled by the vendor. To control when the email should be sent, you can modify its triggers. When an event is triggered, the email will be sent automatically by the system.
From the Configure > Email > Templates page, find the email template named "Vendor Notification" and click to edit.
Click on the Event Triggers tab to view a page similar to the following.
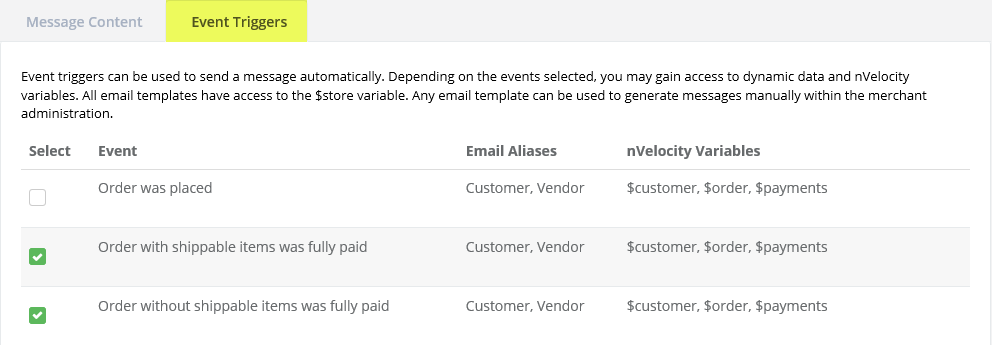
The Vendor Email template, by default, will be sent when either of the following events occur:
- Order with shippable items was fully paid
- Order without shippable items was fully paidIf desired, change the Event Trigger by checking the box next to the event(s) that should send the email.
Click SAVE when finished.
NOTICE: |
Even though email templates can have more than one event selected, rest assured, only one email will be sent to the recipient. |