User Groups
Table of Contents Show
User Groups
AbleCommerce allows you to create custom groups for your users. A group can be given special privileges or memberships, like the ability to receive tax exemption is one example. Many features within AbleCommerce can be assigned to groups, so that only those members will receive special discounts, coupons, etc.
A very common use of groups is to include special shipping or payment methods. For example, a pre-approved group of customers that are authorized to view the storefront, a product, or to use a Purchase Order can be easily accomplished.
For a default installation, there are no customer groups created by the system. These are groups that can be used by the merchant for many different purposes. For example:
To create a members-only store and/or viewing of individual products.
To apply products discounts that will only appear when user is logged in.
For a product's special price that will only appear when user is logged in.
Apply to any type of coupon for members of a group.
Use with any payment methods at checkout. (e.g. purchase orders)
Use with any shipping methods during checkout. (e.g. discounted or special shipping)
Tax Rules can be setup for members of a group. (e.g. tax exemptions for B2B stores)
Subscriptions used with groups allow you to offer memberships with automation at every level.
Digital Goods can be made available to groups for access to content. (e.g. purchase downloadable content)
For management of admin groups, see People > Admins > Admin Groups instead.
Customer groups are a way to organize different types of registered users. They can be used with the specific features mentioned above, or you can simply have your users put into groups for informative purposes.
To manage your customer groups, go to the People > Users > User Groups using the menu.

An example of the User Groups listing page is shown above.
You click the column name Group to sort the list from A - Z, or Z - A.
The Users column has a counter showing the number of registered users that are assigned to the group.
The Action column allows you to Edit the name of the user group, or Delete it.
Add or Edit a Group
From the upper-right corner, click the Add User Group button to view a popup.
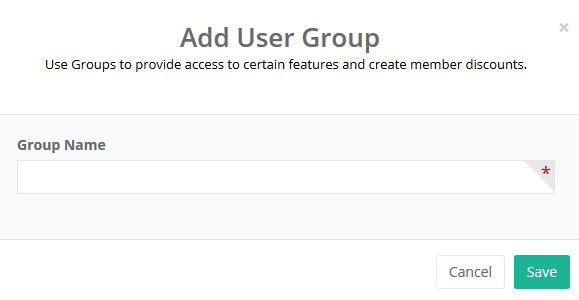
Enter the desired Group Name. This will only be used within the merchant administration.
Click the Save button.
The new record appears in the user group list.
To change the user group name, click the Edit button from the Action column. A pop-up form will appear where you can change the name as needed.
Click the SAVE button when finished.
Assigning Users to a Group
After creating a new group, you can assign users to it. There are three methods available:
Search and Assign - to assign several users to a group, click on the linked number counter in the Users column for the group you want to assign to.
Edit a Single User - go to the user's profile page, which is available from the People > Users > Manage Users page. Select a user to edit. Find the tabbed section named 'Account' and select one or more groups from the Member of Group(s) field options.
Automated group assignment by setting up a Subscription product. There will be an option to assign users to a group with the purchase of a paid subscription product. To do this, select a Subscriber User Group when setting up the subscription product.
Search and Assign Users to a Group
From the menu, go to the People > Users > User Groups page to view a list of groups available.
To assign users to a group, click on the linked number counter in the 'Users' column for the applicable group.
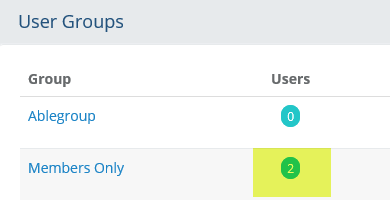
This will bring you to the Search Users form, which is similar to the one shown below.
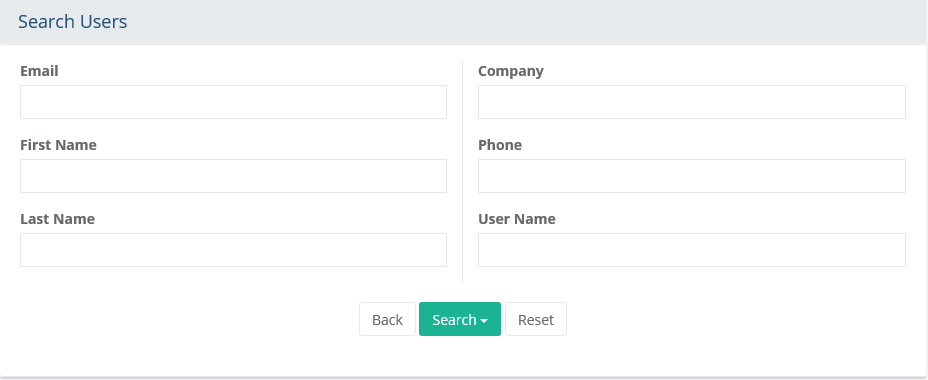
Using the search fields(s) provided, find the users that will be assigned to the group selected from the prior page.
After entering the search criteria, press the Search button which will drop-down to provide 3 additional filters:
- All Users: results include all users regardless of their group assignment.
- Users Assigned to this Group: results include only the users that are assigned to the selected group.
- Users Not Assigned to this Group: results include only users that are not assigned to the selected group.
By default, the search results show any users that are currently assigned to the selected group. Reference sample below.
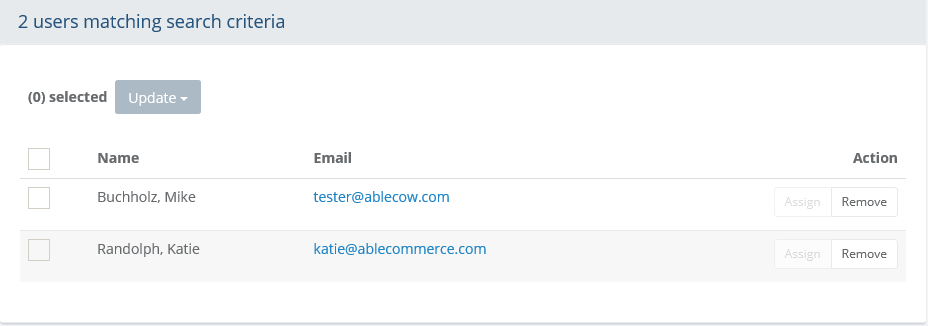
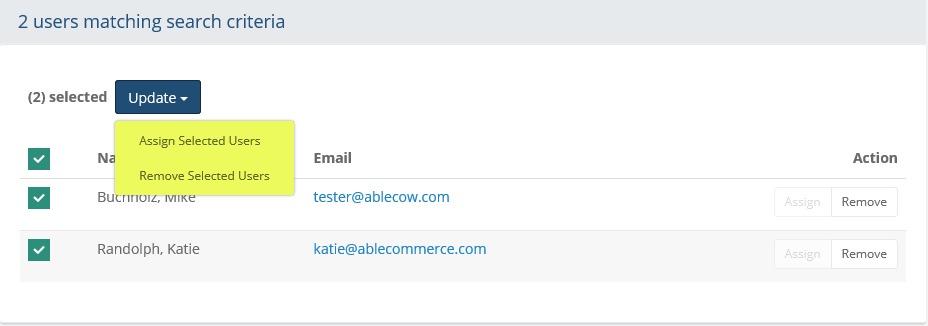
You can either use the buttons from the Action column to individually Assign or Remove group associations, or..
Check the box next to one or more users, or check the box at the top of the first column to quickly select all users in the search results.
This will activate the Update button, which will drop-down to provide 2 options: either Assign or Remove the selected users.
The update will take place immediately after selection.
When finished assigning users, click the BACK button to return to the User Groups listing page.