PayPal Complete Payments
Table of Contents Show
PayPal Complete Payments Solution Overview
Introducing a new PayPal integration with AbleCommerce. The latest PayPal Complete Payments solution provides flexibility and end-to-end capabilities to support payment processing.
![]()
Streamline the onboarding processing within AbleCommerce by logging in with your existing PayPal business account or create a new one.
A single integration that offers PayPal, Apple Pay, Google Pay, Venmo and a PCI compliant card payment form.
Leverage PayPal data and machine learning capabilities for better fraud and risk protection.
AbleCommerce + PayPal Complete Payment (PPCP) solution supports the following payment processing features.
Authorize
Authorize Capture (Sale)
Full or Partial Captures
Multiple Captures
Void
Refund
Partial Refund
Orders are created in PayPal. Amounts will be USD.
Additional integration support for:
PayPal Payments
Apple Pay
Google Pay
Venmo
PayPal Pay Later financing
Post-order Processing
All AbleCommerce payment gateway integrations offer full support for post-order processing. This means that after an order is placed, you can authorize, capture, refund, and void transactions from the AbleCommerce order administration area.
Installing the PayPal Complete Payments Gateway
Login to your AbleCommerce installation.
Using the menu, go to the Plugins page.
Use the Filter Plugins option and select the type "Payment".
NOTE: PayPal Complete Payments plugin will be available in the list as shown in the screenshot below.
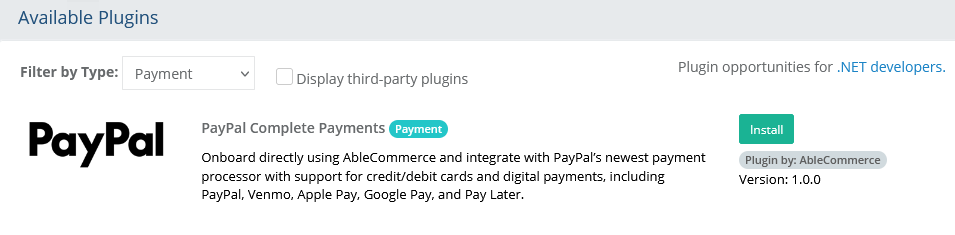
Click the green Install button in the far right column.
When the confirmation popup appears, click the green Yes, install it button.
Upon completion, click the orange Configure button.

NOTE: Version shown may be different depending on the release of AbleCommerce you are using.
Connect to PayPal Complete Payments / On-boarding Process
The PPCP payment gateway offers a new easy connect method where you can sign-up using your existing PayPal business account or create a new PayPal business account.
Click on the orange Configure button after installing the PPCP plugin, or,
From Configure > Payment > Gateways page, all of the installed payment gateways will be shown.
You will now be on the Add PayPal Complete Payments configuration page as shown below:
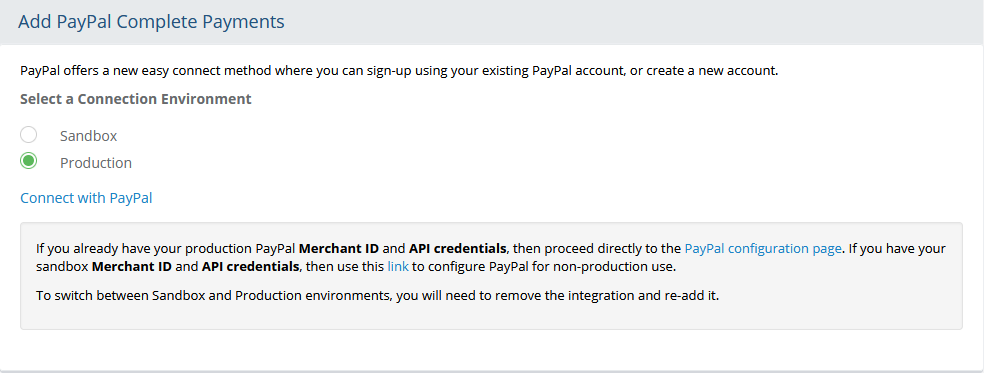
First, you must select your connection environment. If you are testing, then select Sandbox. For live accounts, be sure to select the Production option.
Note: In order to switch between Sandbox and Production, you will need to uninstall the plugin and re-install it.To connect through the on-boarding process, click the "Connect with PayPal" link to begin.
Note: If the gateway is already configured, and for some reason, you've lost your settings, follow the instructions to manually connect using your existing Merchant ID and API credentials.
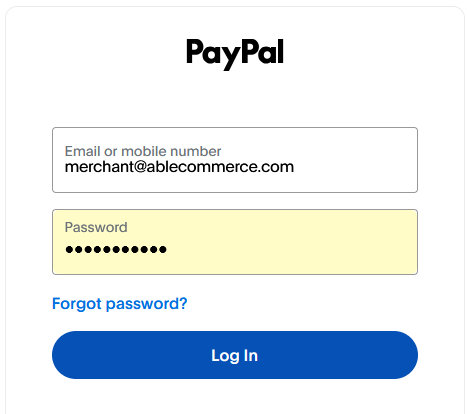
After connection, if you need to re-install, simply use the same Paypal login to reconnect. A new authorization will be obtained automatically through this process.Next, you will be redirected to PayPal's website as shown in the sample screenshot below:

Enter the email account that is associated to an existing PayPal merchant account. If you do not have an existing PayPal merchant account, enter an email that you want to use to create a new one. Click the NEXT button.Existing PayPal accounts - If you already have an existing PayPal account, go ahead and login now.
After a successful login, you may be presented with terms of use, and a series of questions to provide additional information about your business. Please continue to accept the terms and fill in the forms as needed. Click the NEXT button to continue.
After completing the on-boarding process with PayPal, you should receive a confirmation screen.
To return to the AbleCommerce configuration, please click the Return to... button at the bottom.
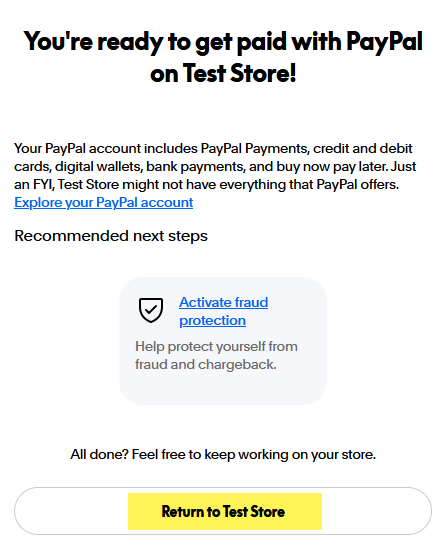
If the onboarding process completed successfully, you will see the connection results in Ablecommerce.
Refer to this sample screenshot below.

To continue with the configuration process in the next section, click the "Continue to Gateway Configuration" button.
Configure PayPal Connected Payments Gateway
Before completing the configuration page, you will need to decide which payment methods you would like to accept.
After reviewing the configuration page and the settings described below, click the Save and Close button. If you haven't yet configured the payment methods, please skip to the next section and return here after.
You should now be looking at the AbleCommerce configuration page for the PayPal Complete Payments.
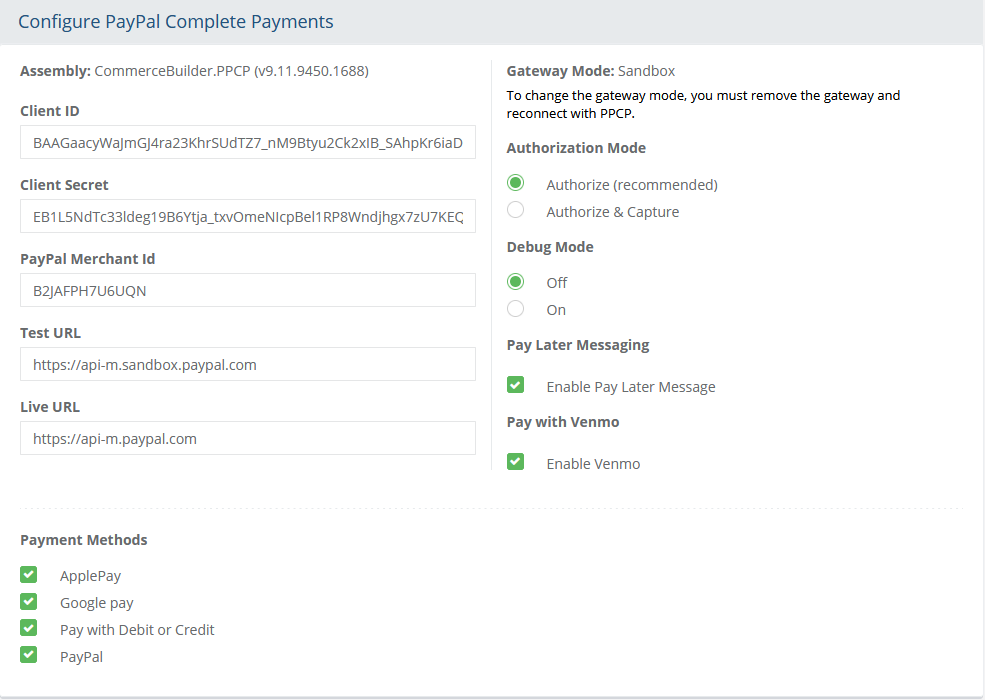
If you used the automated on-boarding process, then you should already have your Client ID populated in the field provided. If you are using the manual connect method, you can enter your Client ID in this field.
If you used the automated on-boarding process, then you should already have your Client Secret populated in the field provided. If you are using the manual connect method, you can enter your Client Secret in this field.
If you used the automated on-boarding process, then you should already have your PayPal Merchant ID populated in the field provided. If you are using the manual connect method, you can enter your PayPal Merchant Id in this field.
The Test URL and Live URL fields are available in case the connecting API information changes in the future. These URLs should never be changed unless directed by AbleCommerce technical support.
The Gateway Mode is determined before sign-up. In order to switch between Sandbox and Production, you will need to uninstall the plugin and reinstall. You can do this by going to the Plugins page. Find the PayPal Complete Payments plugin and uninstall. Then follow the instructions to install the plugin and complete the on-boarding process again.
Choose the type of Authorization Mode.
Authorize: to request authorization without capturing funds at the time of purchase. You can capture authorized transactions through the order admin interface.
Authorize & Capture: to capture funds immediately at the time of purchase. You should not use this feature unless you are able to ship goods the same day of the sale.
Debug Mode: When debug mode is enabled, all messages sent to and received from PayPal are logged. This should only be enabled at the direction of qualified support personnel.
Default Log File Location: ..\App_Data\Logs\PPCP.logIn the bottom section of the page, find the section called Payment Methods. The PPCP integration supports credit/debit card payments using the direct payment form provided by PayPal. This is a single PCI compliant payment form that supports many card types (Visa, MC, AMX, Discover, etc.).
By using the PayPal payment form, the liability of collecting credit card information shifts from the merchant to PayPal.
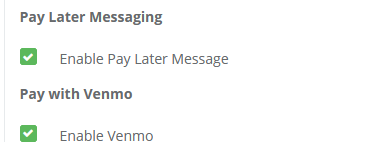
NOTE: If you already have an existing payment methods for Visa, Mastercard, American Express, etc. then you will want to delete these and create a new payment method that can be used for all payment card types.Pay Later Messaging enabled a simple text notification beneath the PayPal button. This informs users that PayPal offers financing for the purchase they are about to make. It includes a link to view the financing details. During the payment process, there will be an option on the screen for customers to finance.
Pay with Venmo is an option to display a separate Venmo button alongside the PayPal button.
At the bottom of the page, click the Save and Close button to finish.
Setting up Payment Methods for PayPal Complete Payments
After installing the PPCP plugin, you will need to configure the payment methods and make sure they are assigned to the new payment gateway.
From Configure > Payments > Methods page, all of the pre-installed payment methods will be shown.
You will want to delete all the pre-installed payment methods for credit cards. For example, Visa, Mastercard, American Express, etc. We will be replacing those with a single payment form. Use the Delete button in the Action column to remove the unneeded payment methods.
In the following sections, there are specific instructions to create the payment methods that can be used with PayPal Complete Payment Methods. At a minimum, you should configure a payment method for Credit/Debit cards and another for PayPal. Optionally, you can add Apple Pay and Google Pay.
Pay with Debit or Credit
From the Payment Methods configuration page, use the Add Payment Method button from the upper-right corner of the page to open a pop-up dialog.
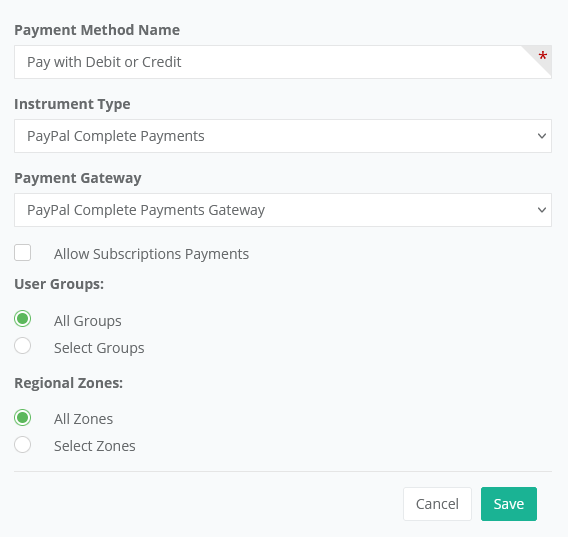
For the Payment Method Name, you can enter a custom value that describes the payment form. (e.g. Pay with Debit or Credit)
For the Instrument Type, select the "PayPal Complete Payments" option.
For the Payment Gateway, select "PayPal Complete Payments Gateway" which will assign this method to the gateway configuration.
The Allow Subscription payments is not valid for this payment instrument. Make sure this box is unchecked.
You may assign the payment method to one or more User Groups if there is a specific need to do so. Otherwise, leave this option as All Groups.
For Regional Zones, you can leave this as All Zones and the payment method will appear for all customers regardless of their billing location.
When finished, click Save.
A sample of the card form as it appears on the checkout payment page is shown below.
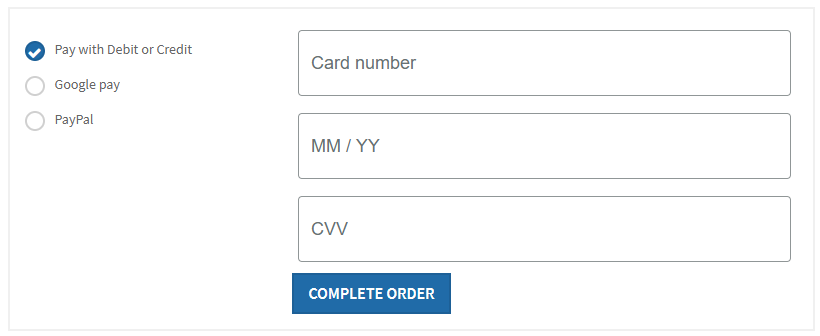
This payment form will also appear in the following locations:The customer's Pay My Order page from the order invoice. Appears when there is a balance due.
From the admin side, when viewing the order, you can manually enter a payment from the Payments tab.
While creating a new order from the admin, the payment form can be used to manually enter a payment.
PayPal and Venmo Payments
From the Payment Methods configuration page, use the Add Payment Method button from the upper-right corner of the page to open a pop-up dialog.

For the Payment Method Name, enter a custom value that describes the payment form. (e.g. PayPal or PayPal / Venmo)
For the Instrument Type, select the "PayPal" option.
For the Payment Gateway, select "PayPal Complete Payments Gateway" which will assign this method to the gateway configuration.
The Allow Subscription payments is not valid for this payment instrument. Make sure this box is unchecked.
You may assign the payment method to one or more User Groups if there is a specific need to do so. Otherwise, leave this option as All Groups.
For Regional Zones, you can leave this as All Zones and the payment method will appear for all customers regardless of their billing location.
When finished, click Save.
A sample of the payment button as it appears on the checkout payment page is shown below.
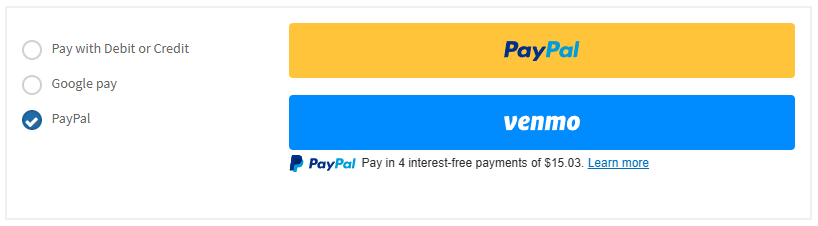
The Venmo payment option will appear along side PayPal if the PayPal Complete Payments configuration has it enabled. Reference step 11. in the section above.
Venmo is eligible to:
US-based merchants and US-based consumers only.
Payments must be in USD.
Buyers on mobile devices must use Safari on iOS or Chrome on Android.
Buyers on desktop PC can use any major web browser.
Buyers must have the Venmo iOS or Android app installed.
Apple Pay Payments
Apple Pay requires additional configuration steps within the PayPal merchant center.
From the Payment Methods configuration page, use the Add Payment Method button from the upper-right corner of the page to open a pop-up dialog.
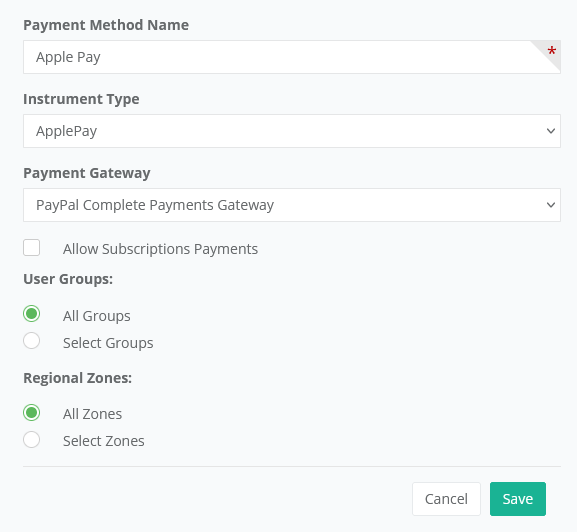
For the Payment Method Name, enter Apple Pay.
For the Instrument Type, select the "ApplePay" option.
For the Payment Gateway, select "PayPal Complete Payments Gateway" which will assign this method to the gateway configuration.
The Allow Subscription payments is not valid for this payment instrument. Make sure this box is unchecked.
You may assign the payment method to one or more User Groups if there is a specific need to do so. Otherwise, leave this option as All Groups.
For Regional Zones, you can leave this as All Zones and the payment method will appear for all customers regardless of their billing location.
When finished, click Save.
A sample of the payment button as it appears on the checkout payment page is shown below.
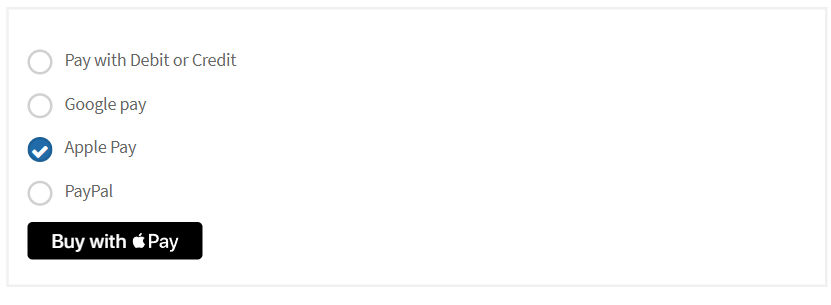
Apple Pay requires additional configuration steps and is eligible to users with an Apple device.
Google Pay Payments
Google Pay requires additional configuration steps within the PayPal merchant center.
From the Payment Methods configuration page, use the Add Payment Method button from the upper-right corner of the page to open a pop-up dialog.

For the Payment Method Name, enter Google Pay.
For the Instrument Type, select the "GooglePay" option.
For the Payment Gateway, select "PayPal Complete Payments Gateway" which will assign this method to the gateway configuration.
The Allow Subscription payments is not valid for this payment instrument. Make sure this box is unchecked.
You may assign the payment method to one or more User Groups if there is a specific need to do so. Otherwise, leave this option as All Groups.
For Regional Zones, you can leave this as All Zones and the payment method will appear for all customers regardless of their billing location.
When finished, click Save.
A sample of the payment button as it appears on the checkout payment page is shown below.

Google Pay requires additional configuration steps.
Pay Later Offers
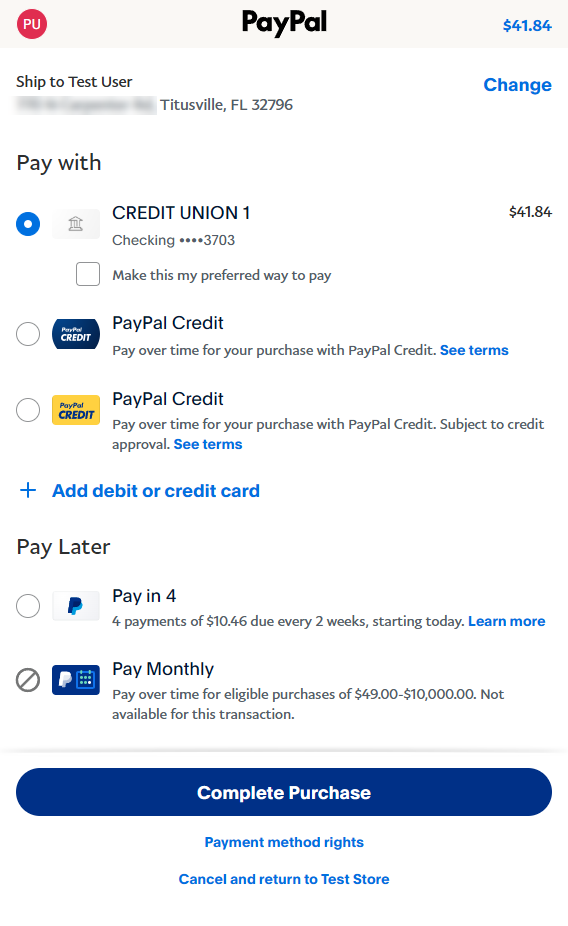
If your customer chooses the PayPal payment button, a popup dialog will appear after they login. This screen will have several payment options depending on the configuration of your PayPal account.
Here is an example of some PayPal Credit offers and Pay Later options.
To disable the Pay Later options
Login to PayPal with a PayPal business account.
From the upper-right corner, click on the circle icon to go to Account Settings area.
Using the menu on the left, go to Pay Later.
From the Pay Later settings section, there is a link to Turn off the PayPay Pay Later options.
Implementing Apple Pay through PayPal
You will need to login to your PayPal merchant account and configure the payment option for Apple Pay, as well as register your domain to prove ownership. This can be a tricky process. Please read the instructions below for troubleshooting tips.
Login to PayPal with a PayPal business account.
From the upper-right corner, click on the circle icon to go to Account Settings area.
Using the menu on the left, go to Payment methods.
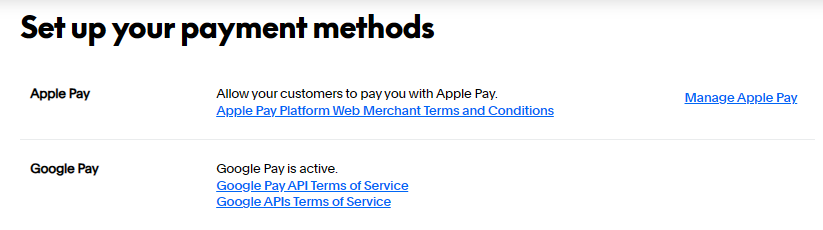
To setup Apple Pay, click the Manage Apple Pay link.
From the next page, click the link "Add Domain" button. A pop-up dialog will appear with specific instructions that require access to the server, either through FTP or Remote Desktop.
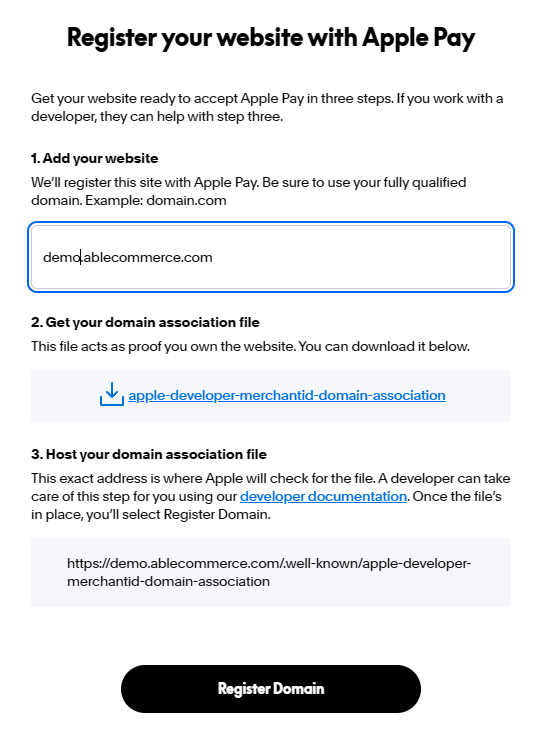
For Step 2, you will need to download the linked file "apple-developer-merchantid-domain-association" and place it on the server hosting the AbleCommerce installation. The file must be in the path noted:
https://{your licensed store domain}/.well-known/apple-developer-merchantid-domain-association
Once the file is in place, access it with a browser. If you receive a 404 error, then Apple Pay will not validate. You MUST see the raw file contents with no HTML.
If the file contents will not display, try adding a new mimeMap in the web.config file's <staticContent> section as shown below:
<staticContent>
<remove fileExtension=".woff" />
<remove fileExtension=".woff2" />
<mimeMap fileExtension=".woff" mimeType="application/font-woff" />
<mimeMap fileExtension=".woff2" mimeType="application/font-woff2" />
<mimeMap fileExtension=".webp" mimeType="image/webp" />
<mimeMap fileExtension="." mimeType="text/plain" />
</staticContent>
Once the file is directly accessible, then you can click the Register button.
NOTE: There may be additional features within your PayPal merchant account that have not been tested with AbleCommerce. If you enable unsupported features, you are doing so at your own risk.